This post is also available in: Français (French)
WARNING, this guide isn’t up to date, read it [here] in English!
Guide co-written with Aweryth, Updated on 20/02/2020
Localized by Larmakosa
![]()
Other guides:
Explorer | Miner | Pirate | Trader| Fighter | Liner | AX Combat
Hello everyone, and welcome to the AX Combat Guide!
In this guide, we will talk about combat against the Thargoids, this mysterious alien race.
You will find everything you need to know about the Thargoids and how to best prepare your ship.
![]()
Game mechanics
The Thargoids are an alien species that mixes mechanical and biological within all their constructions. The Thargoids’ ships are composed of many variants adapted to the Thargoid itself. The Thargoid is the ship, the ship is the Thargoid. Like the ants variants, the Thargoids are developing their own and multiple “tools” for the hive.
You will learn all the details about them in our articles :
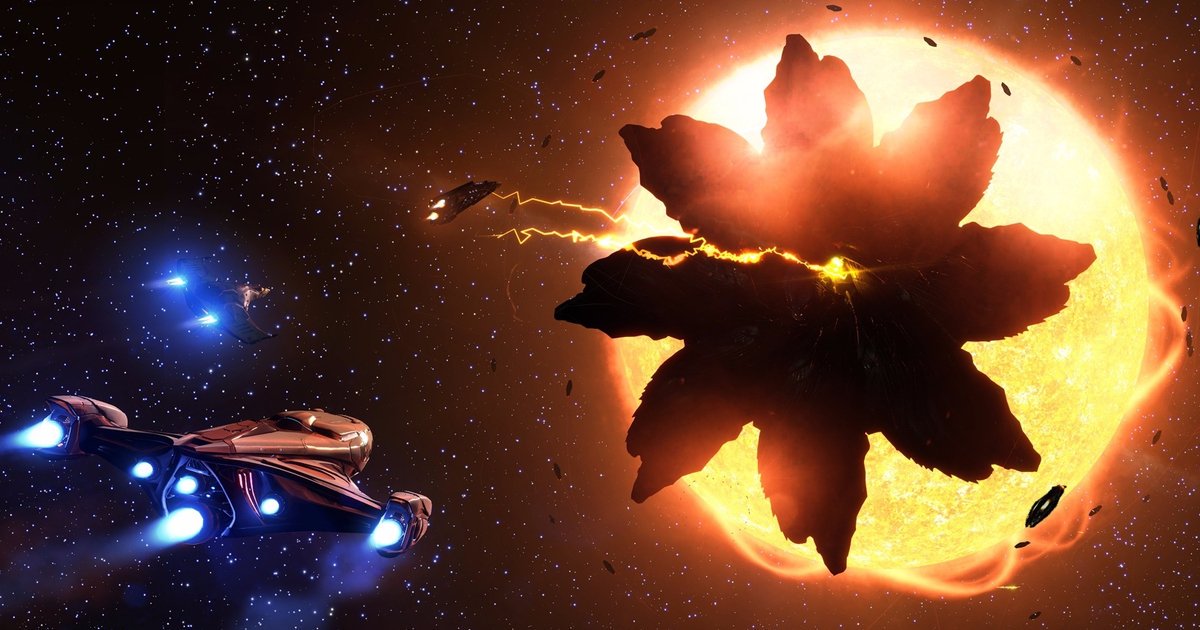
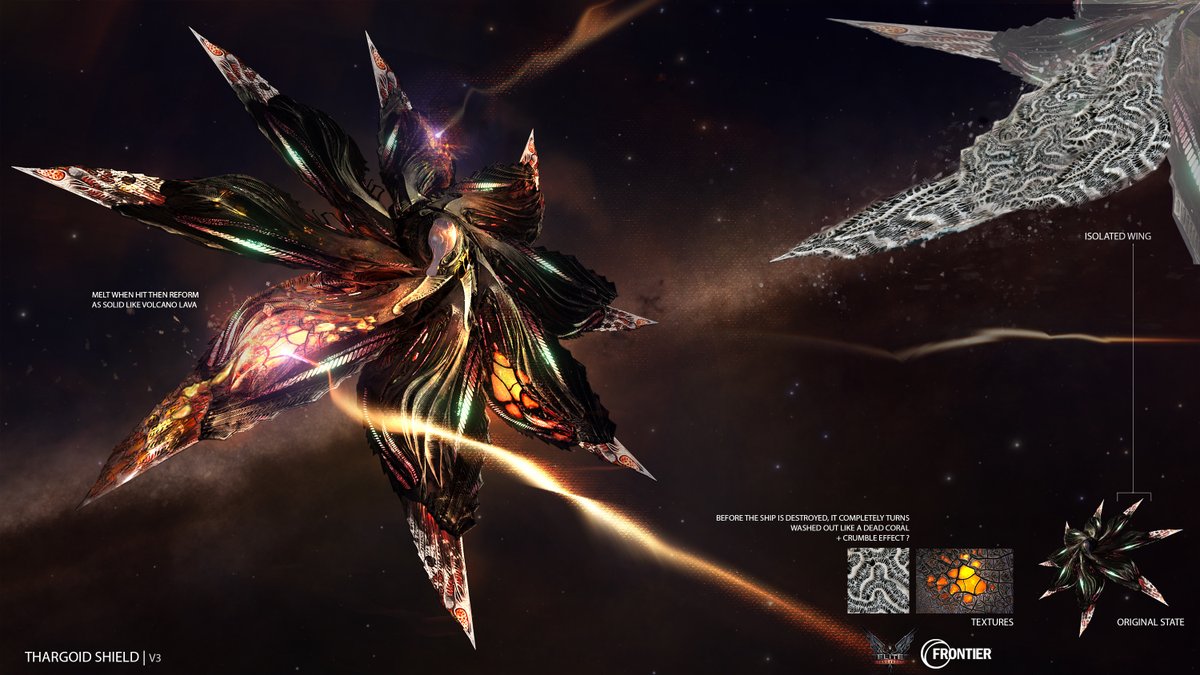
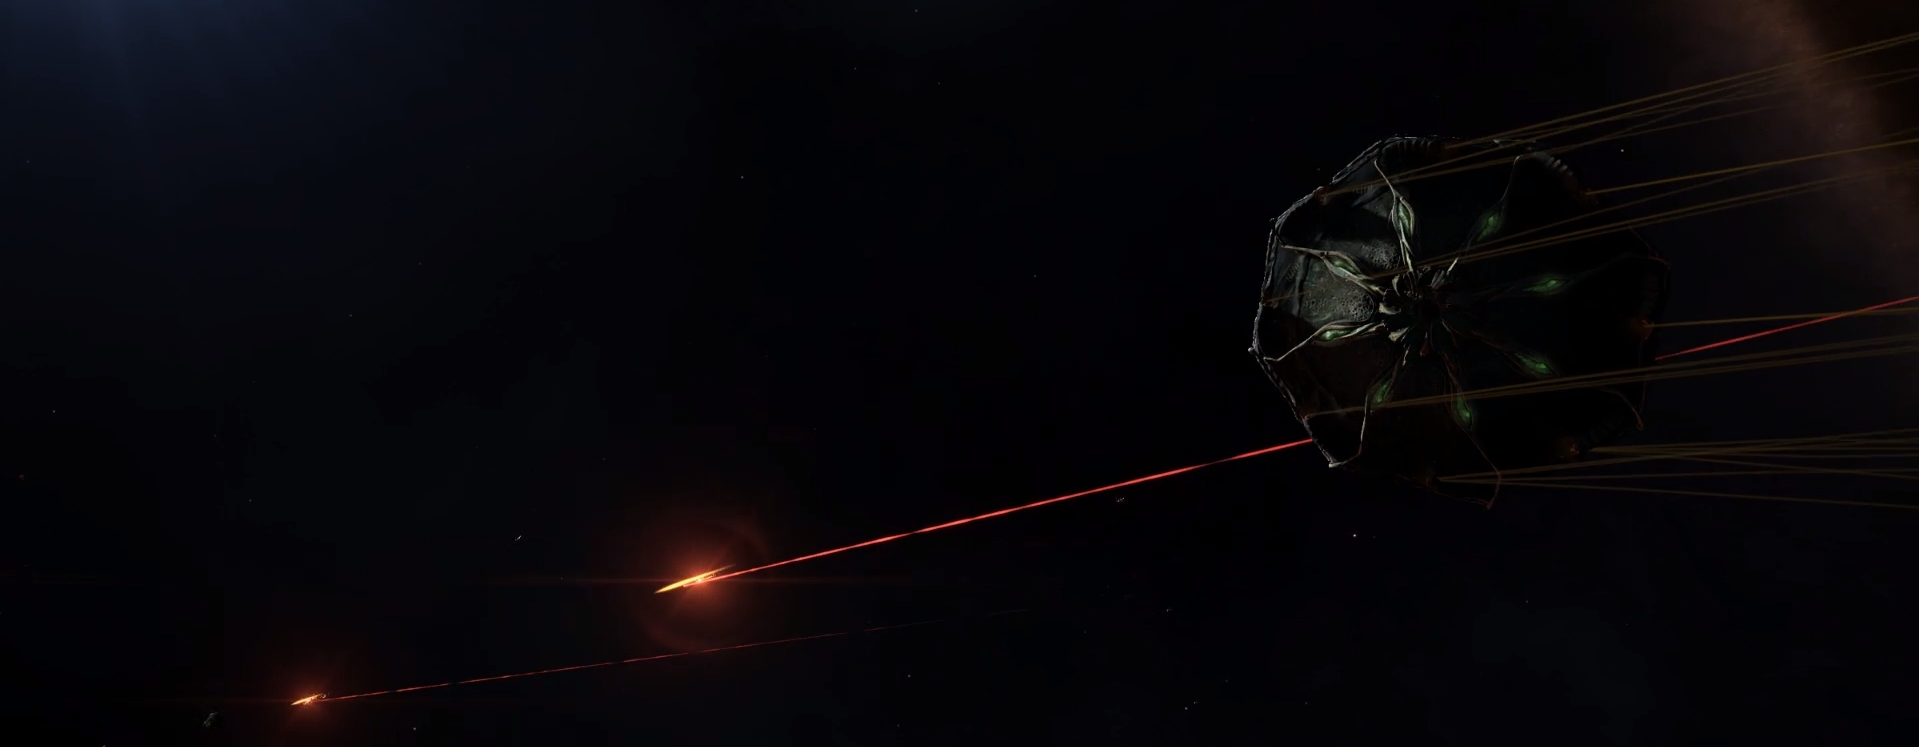
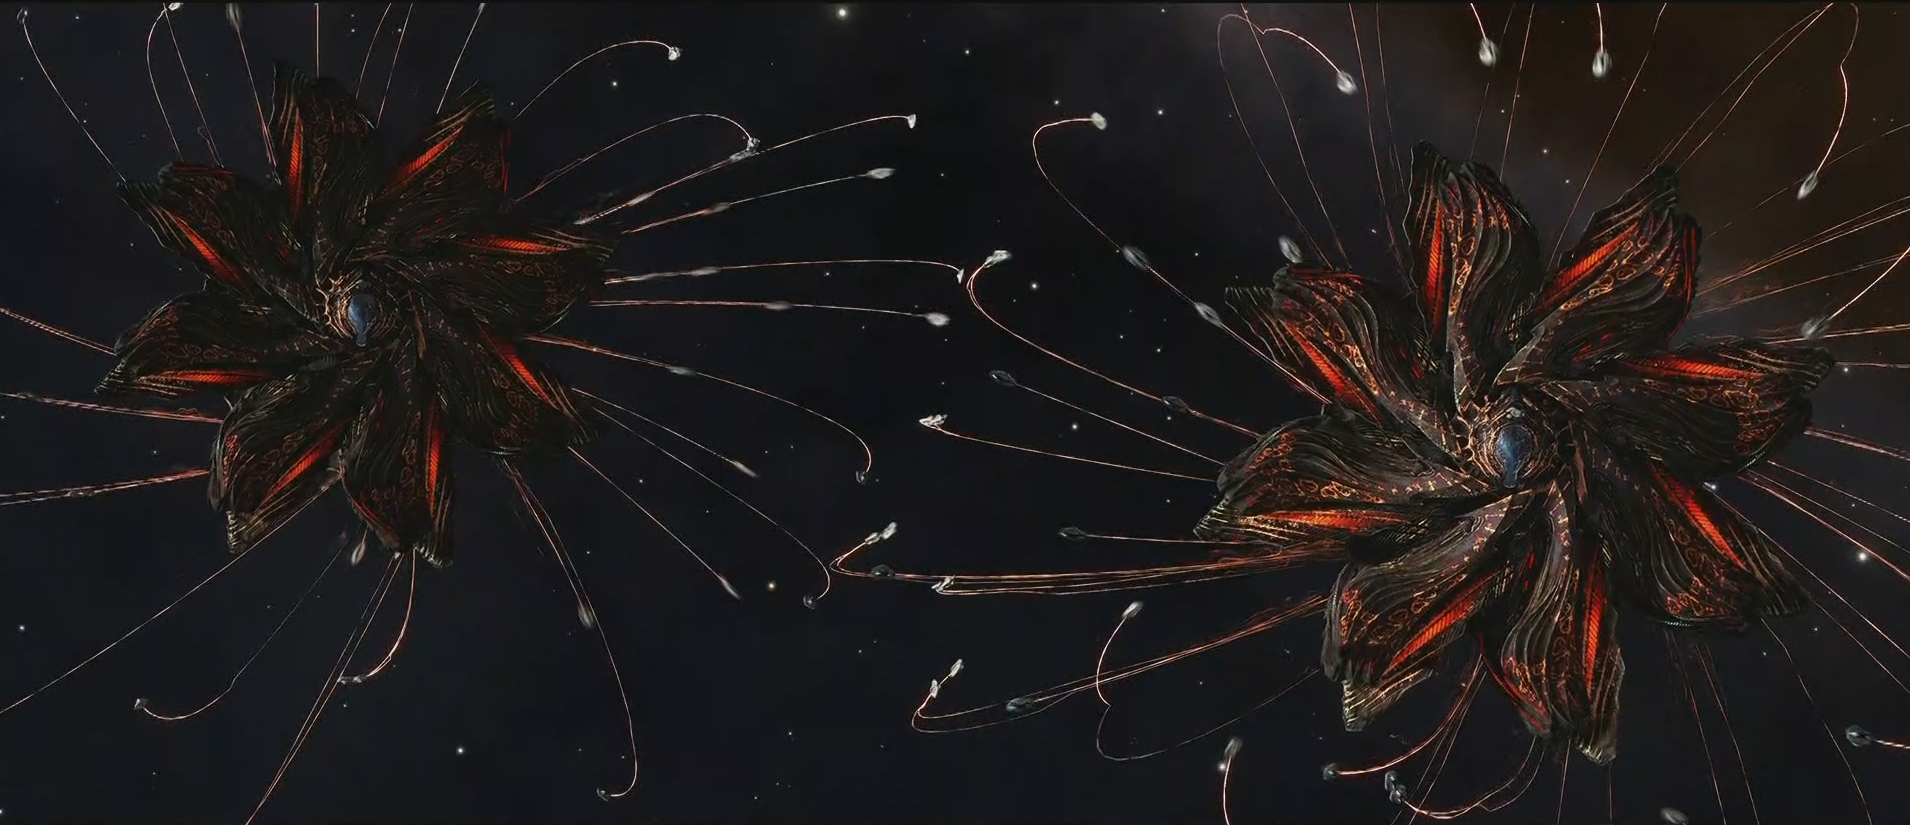
Their biggest known ships are the “Interceptors” class from which derive several variants such as Cyclops, Basilisks, Medusas et Hydras.
They have Hearts regenerating their health points. To win, you will need to destroy their hearts.
This is high-level content, but if you play well it is possible to destroy “easily” a Cyclop Interceptor with a fast ship and 1 Guardian Gauss Cannon.
It is within the reach of all pilots if you follow the strategy.
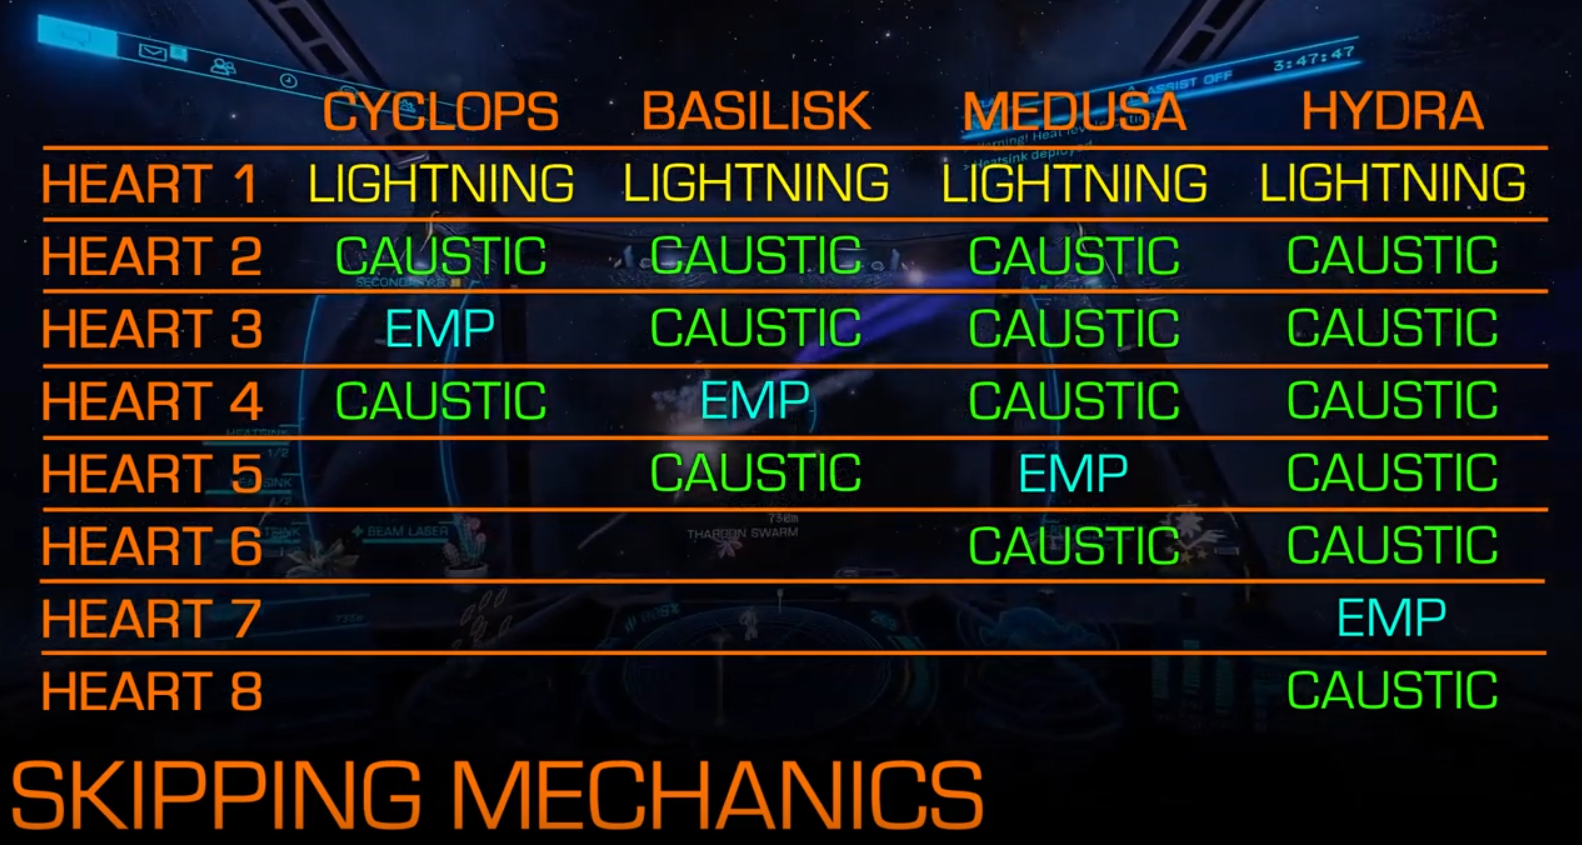
Follow the general combat processes and remember that each of the four variants of Interceptors have different stats.
You will need to adapt your strategy to the combat cards below.
You need a ship with a minimum speed of at least 450m/s to be comfortable.
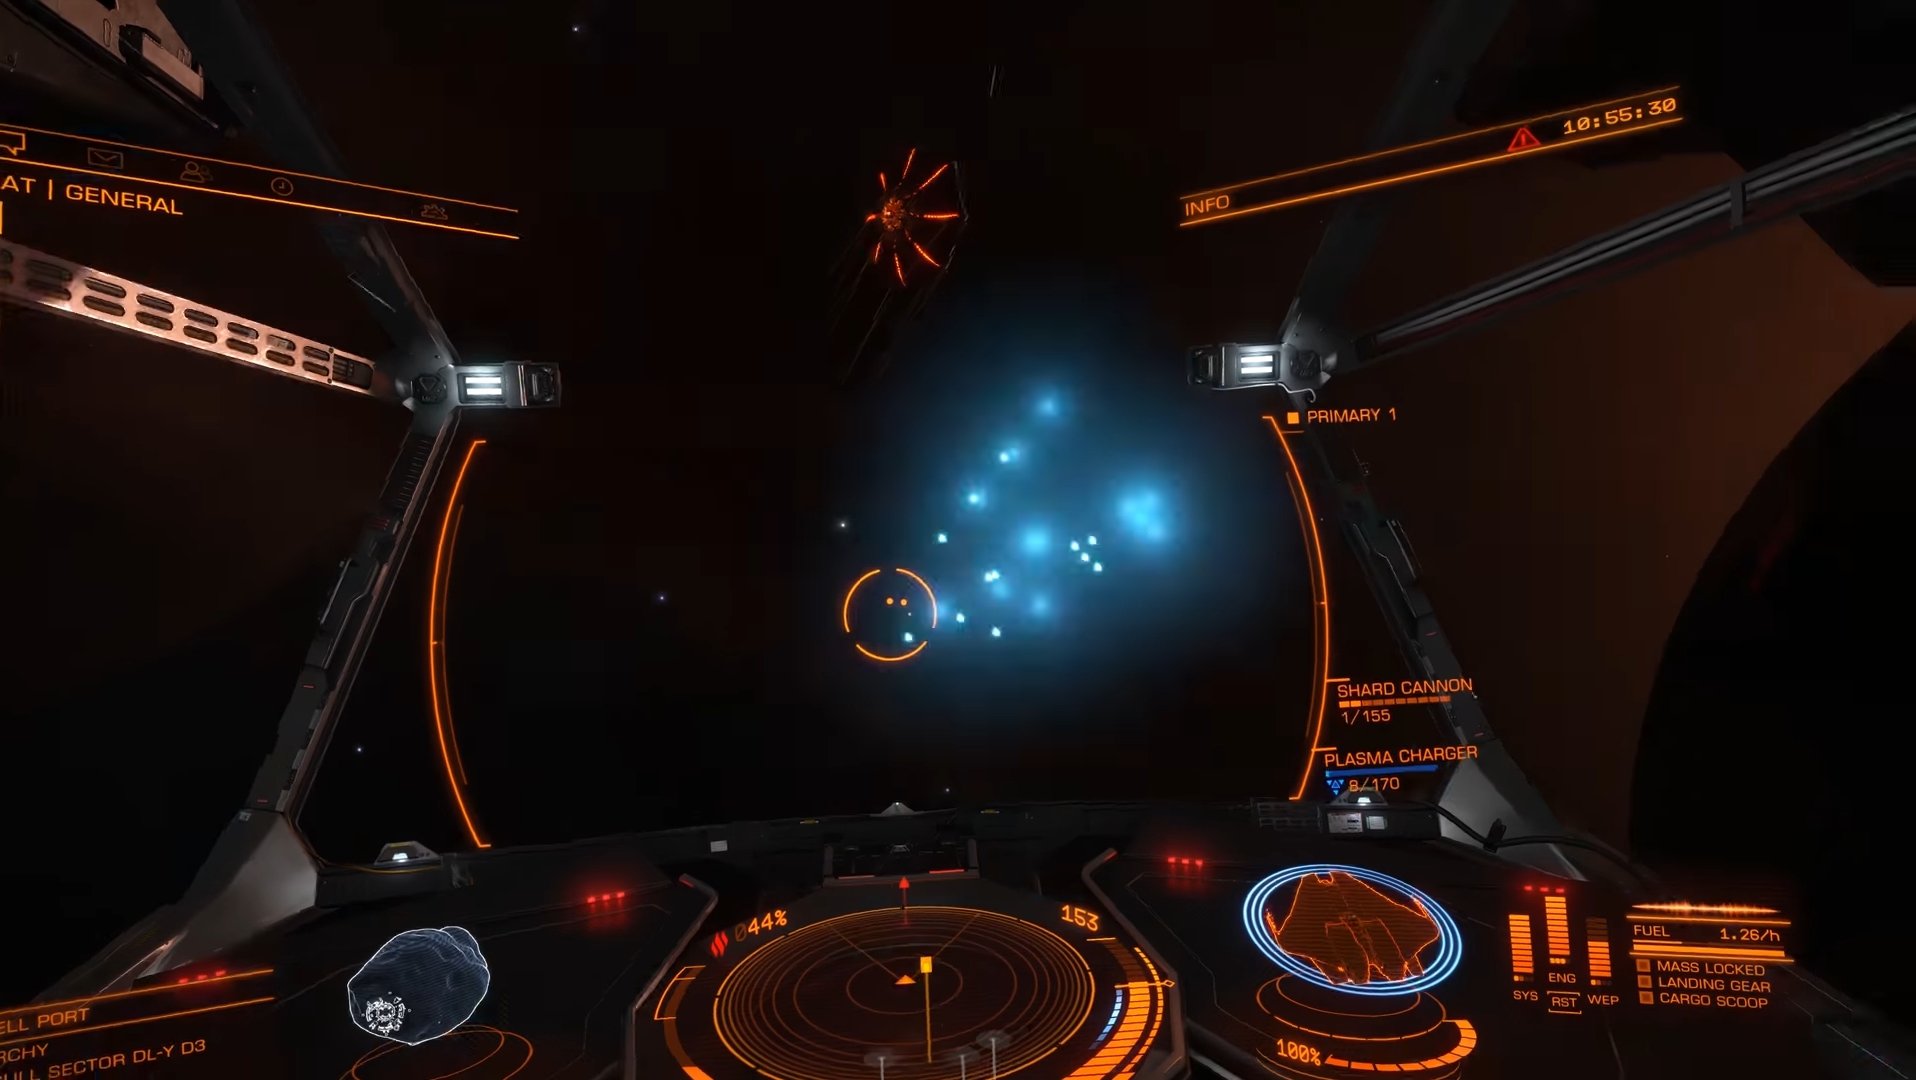
- When you engage the Interceptor, it will turn red and deploy a swarm of Thargons. Don’t underestimate them, but let’s first focus the Interceptor to damage its hull and trigger its regeneration (heart#1) to destroy this heart#1 as quickly as possible. The heart will be visible by turning red on one of the Interceptor’s petals.
- Then boost away while you enjoy a break of 30s~ where the Interceptor will not move and make a special attack depending on the number of hearts left. At this stage, it will unlock the Lightning (Range of 800m) and activate a temporary Shield. You can destroy it or run away while waiting for these limited shields to deplet by themselves. Better not to waste ammunition, so we carry out a strategic retreat.
- You flew away, now Fly Assist Off (FAOff) in order to fly backwards. This is called a “Reverski”, where you keep the same vector backwards while your ship is pointing toward your target. It is easy with nimble ships, but more difficult with large ones; This is why large ships have better defenses to absorb damage. Here, your target will be the Thargons chasing you.
- Destroy the Thargons as quickly as possible, always in Reverski. For that, use your Flak Cannon.
- It is possible to completely ignore the Thargons depending on your ship and if you are an extremely talented pilot, but I absolutely do not recommend it.
- Join the Interceptor who is getting closer to you. It will open fire with its cannons 3km from you. So, at 3.5km, launch a Heatsink to stay under 20% of heat while flying in FAOff in order to orbit around it. Thus, you will dodge all of its shots and you will be able to damage its hull to trigger heart#2.
- Destroy heart#2 and repeat step 2 of this process: boost away, then reverseski to destroy the Thargons in step 7.
- There, caustic missiles will be deployed and will target you. just repeat step 2: boost away, then reverseski to destroy the Thargons.
- Depending on the step of your Interceptor, it can also trigger an EMP (ElectroMagnetic Pulse)during step 7. Normally by this time you have already boosted away.
- Either you let yourself be deactivated by this EMP while going at full speed in a straight line, no one will be able to reach you. Wait to be reactivated then reverse to destroy the Thargons chasing you.
- or you prepare your Field Neutralizer and charge it when you hear the alert “Energy Surge Detected”. You will need all your points in pip SYStems because this module drains the system energy when it is charged, and you must maintain the charge until the EMP pulse is over (it passes over you). Then reverse to destroy the Thargons chasing you.
- Join the Interceptor which approaches you, Heatsink at 3.5km and orbit around it in FAOff, shoot it in order to trigger the heart#3, destroy this heart then boost away… repeat the steps until destruction of the Interceptor.
- Once the last heart is destroyed, there will be some health points left for the Interceptor but it will no longer be able to regenerate them: destroy the Interceptor !
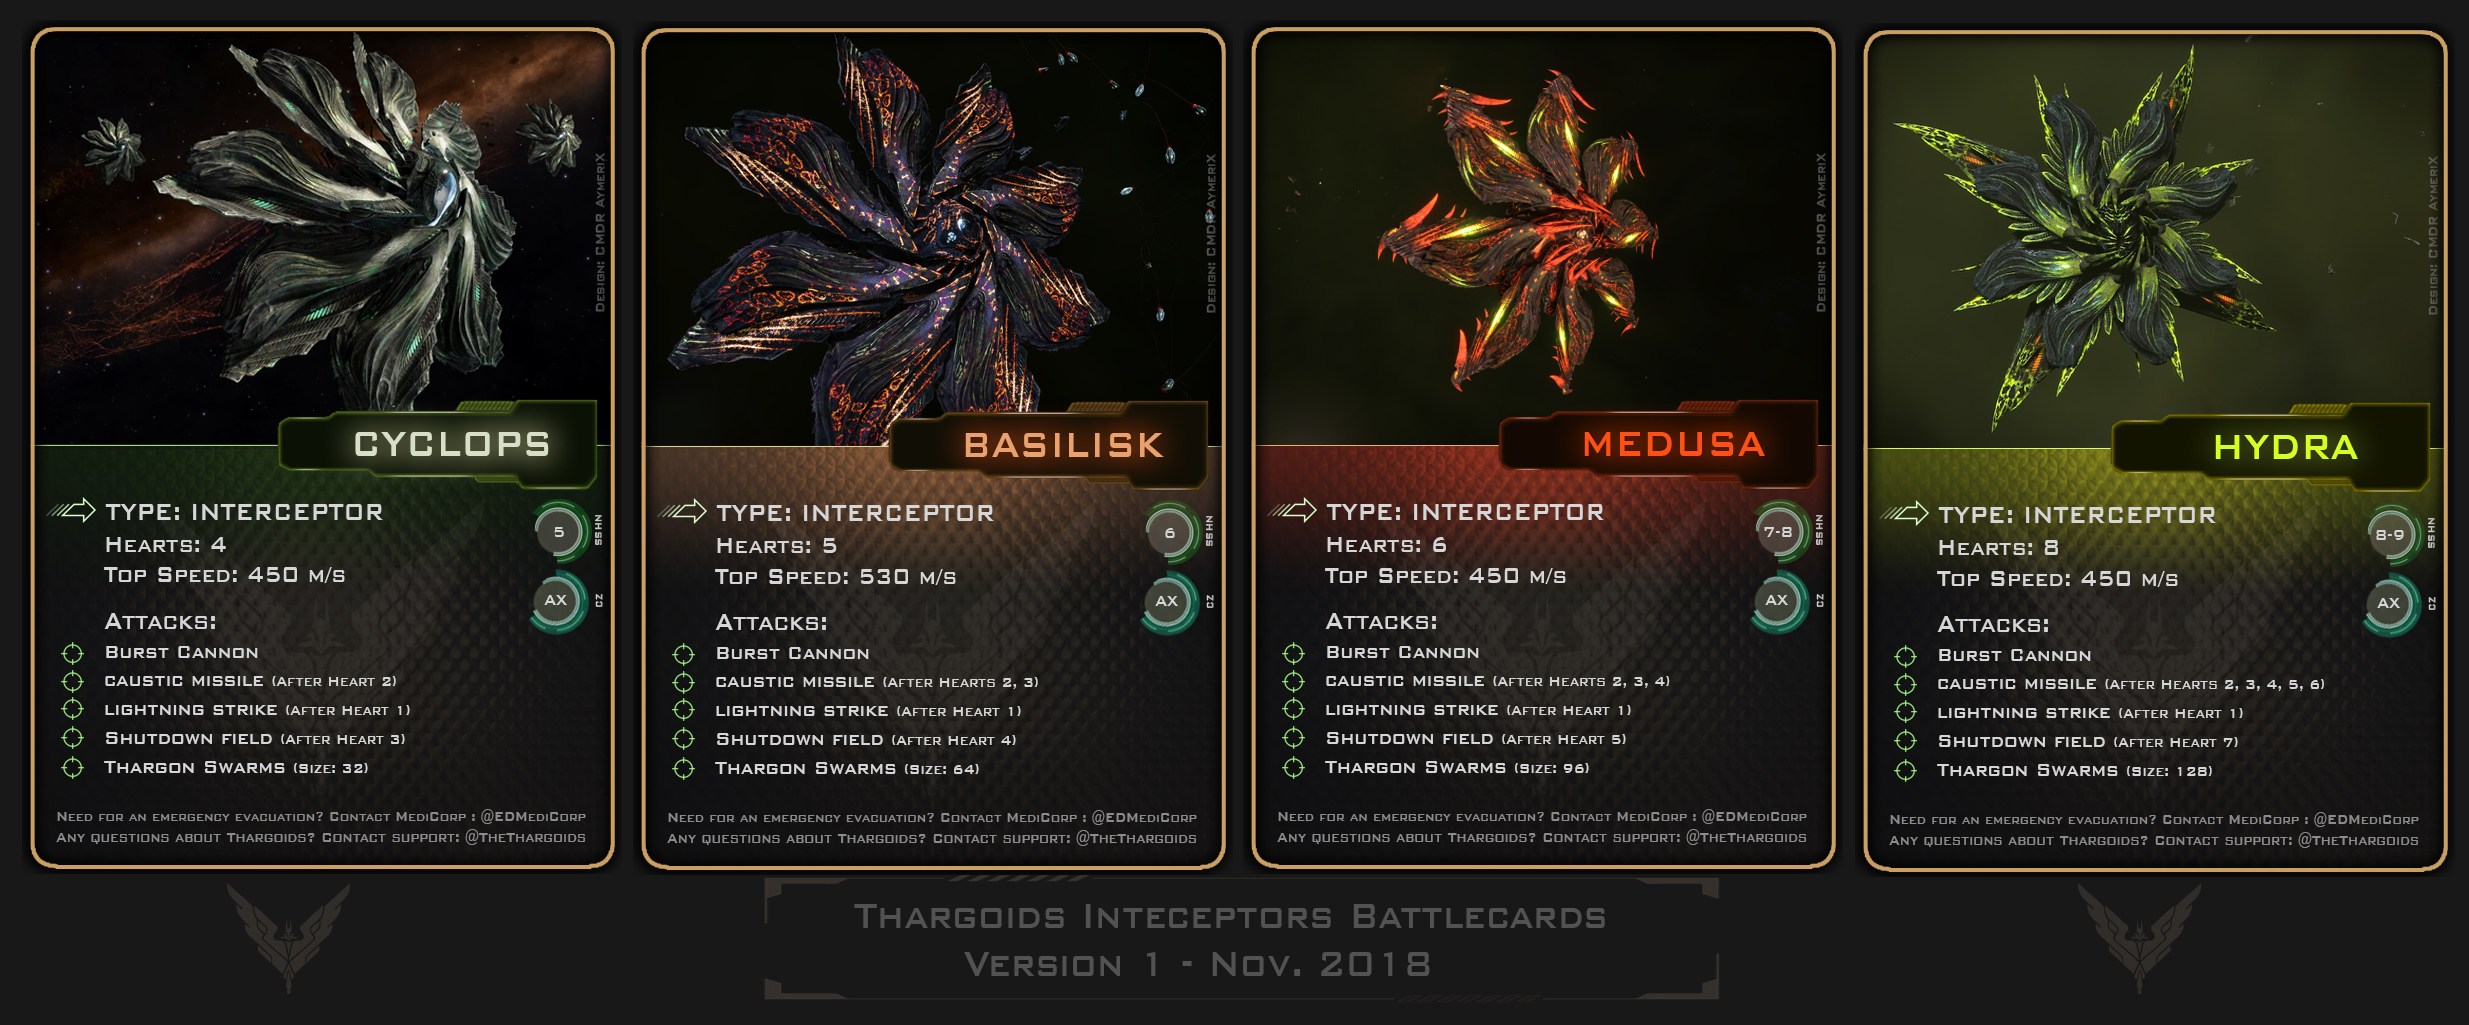
 Combat cards created by Aymerix
 Strategy Card created by AXI
► Thargons are extremely fast drones flying in formation.
They have weapons capable of penetrating your shield and inflicting damage directly to your hull. You can dodge them by staying more than 800m and under 20% heat. They can also kamikaze at 600m/s against your ships when there are only a few Thargons left in the formation. It does a lot of damage!
To destroy them, the only weapon is a Flak Cannon.
It is easy to use:
- Fire and hold the bind pushed;
- Wait for the projectile to get close to the Thargons;
- Once the circle is full, it means your projectile is in an optimal position and close enough to the swarm. Release your bind!
- If you aimed correctly, and followed the visual and audio signals, you should have been able to damage the swarm and the count of Thargons will decrease.
► Caustic missiles are extremely dangerous. Comparable to our torpedoes, they are slow and very resistant. They do damage on impact, over time, and most importantly, indefinitely.
If you suffer caustic damage over time, you have three options:
- Overheat your ship until 210-250% Heat (140%/160% may work). To do this, boost, launch a Shield Cell, go Stealth, everything you need…
- Use a Decontamination limpet, or ask an ally to do it for you.
- Dock at a station to be immediatly decontamined (though, you will loose the fight if you flee).
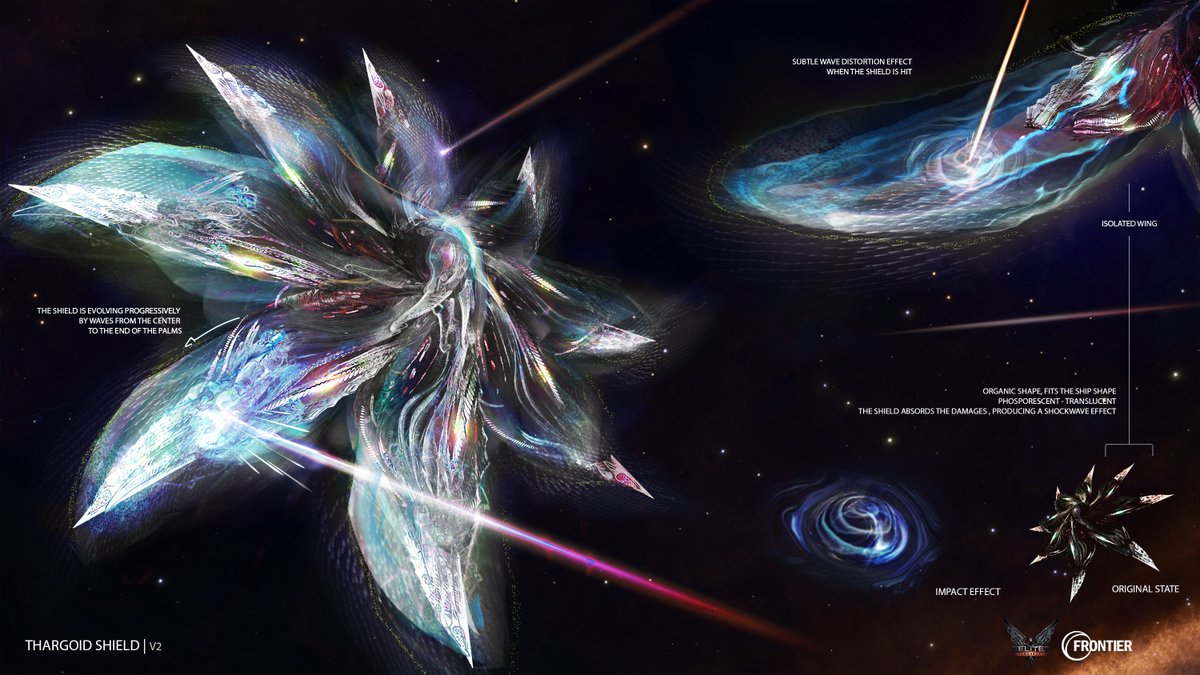
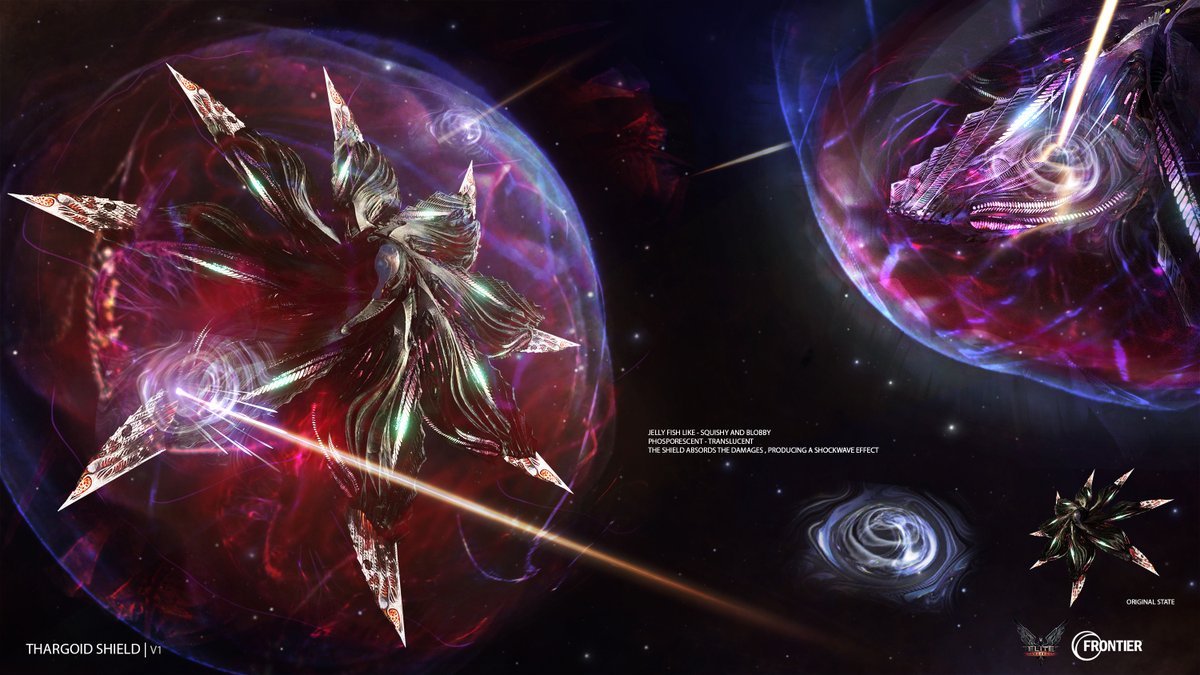
► If the Thargoid becomes yellow, it’s going to use the Lightning. Although only usable when you are at close range 800m, don’t take them lightly. They are very effective against shields, increase your heat generation, restart your shield boosters and can cause random module malfunctions while disturbing your thrusters! Guardian Modules Reinforcements are advised to counter some of the effects of these Lightning. If you are hit and in range, these Lightning last a maximum of 8/10/12/14s depending on the Interceptors and can completely collapse your shields.
► If the Thargoid becomes cyan, it’s going to use an Electromagnetic Pulse. If it hits you, your ship will be completely neutralized for around 30 seconds. However, you can protect yourself by using a field neutralizer. Note, it only takes effect when you maintain the charge and will quickly draw from your SYStems.
► When it targets you and is within range, the Thargoid Interceptor will continuously fire its Red Energy Cannons. The more powerful the Interceptor is, the more of these cannons it will bolster continuously firing at you dealing great damage. You can dodge them by flying 1km+ from it and being under 20% heat if you are doing defensive maneuvering.
► Shield Cells on large ships are to be used if the second circle of your shields is attacked. Depending on the ship, you can use a Cell, then a Heatsink, then another Cell to recharge your shields properly.
► Some vaisseaux utilisent des Rayons Laser. These are only useful on the Thargoid Shields if you decide not to flee and attack it. In addition, the “Thermal Vent” Engineer Experimental Effect allows you to dissipate your heat if these rays hit a target. Perfect for cooling your ship and dodging damage or just not overheating. Put this effect on a Long Range Mod.
In a wing, you could appreciate the following Experimental Effects:
- Regeneration Sequence: Perfect for large shields, the damage is transformed into healing on your allies’ shields, you must be in their wing. Works great with Laser Beams.
- Concordant Sequence: Perfect for small shields like the Bi-Weave, as it gives a bonus to regeneration. Works great with Pulse Laser.
► If you are playing with a large ship and your very powerful Shields have collapsed: your only moment to perform a Reboot of your ship and thus recover 50% of your Shields is just after destroying a heart, because the Thargoid will have 30s~ where it will not move and perform its special action. If you are at 800m+, deploy a Heatsink and restart your ship while standing still in front of the Interceptor. A reboot lasts 15s~
Besides, after this reboot, you can boost and ram the Interceptor in order to destroy its shields or seriously damage them. Do not approach the Interceptor before he has deployed its Thargons. Once deployed, ram it then boost and prepare to destroy the Thargons.
![]()
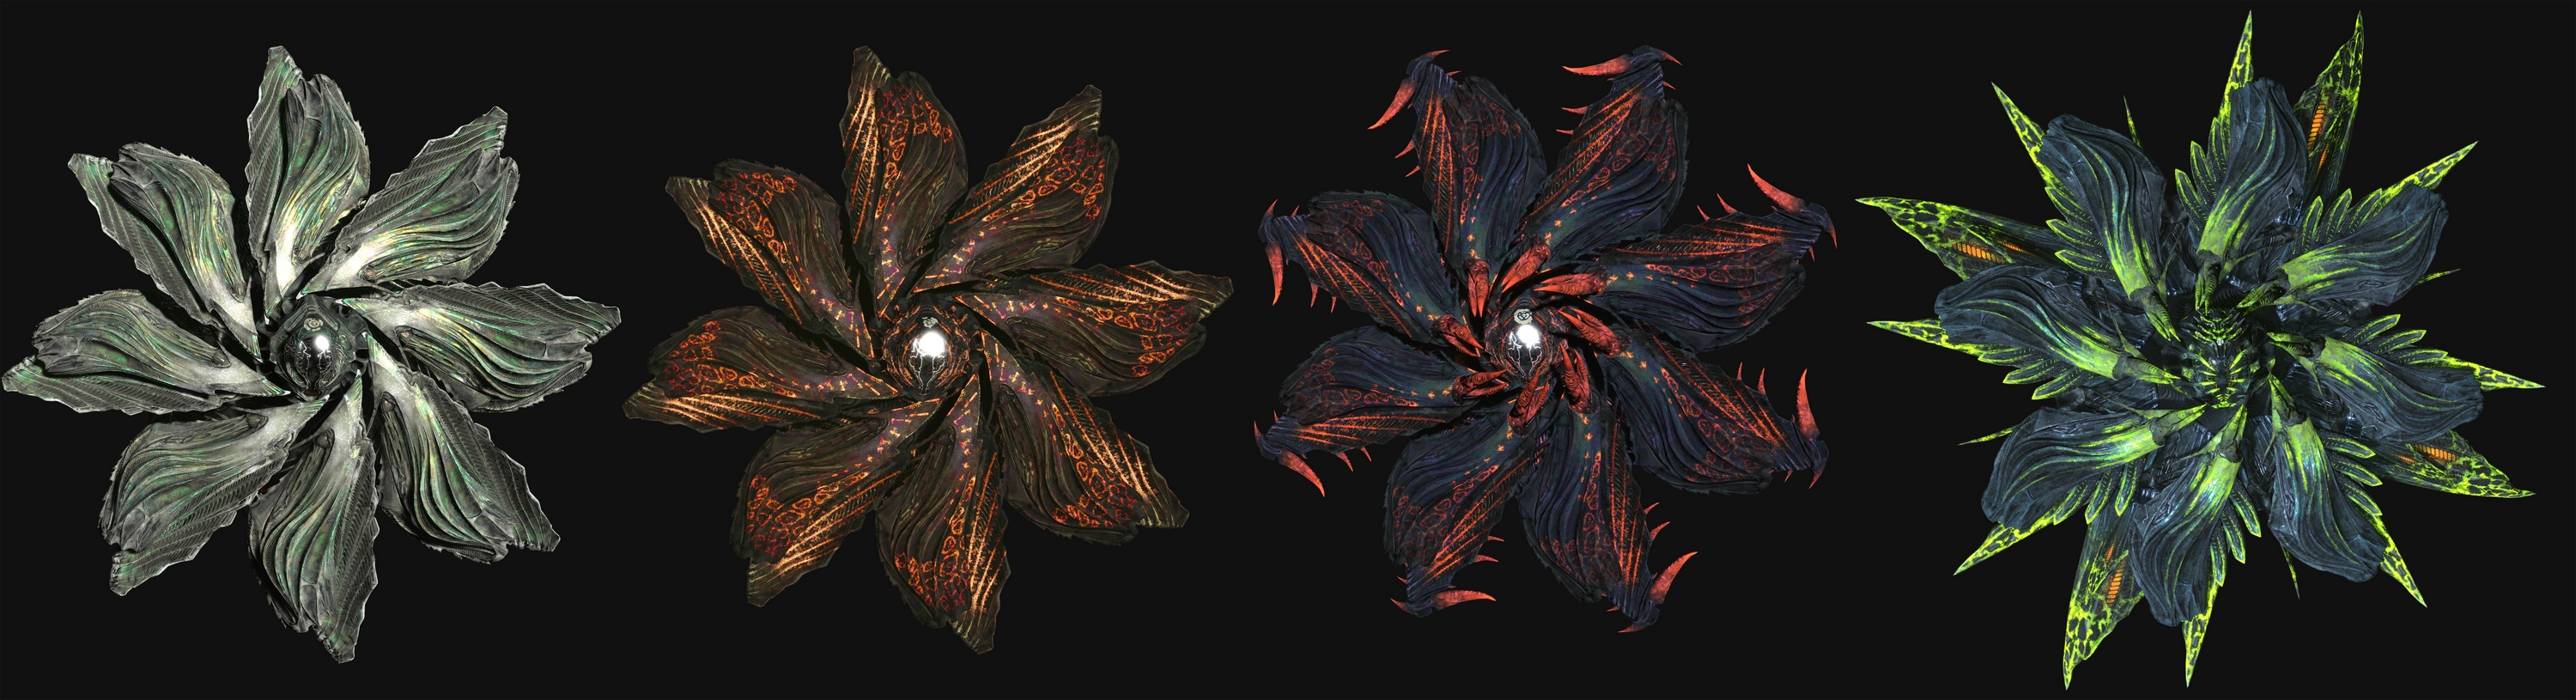
Thargoid ships
At the time of writing, we have only encountered two categories of ship: Interceptors and Scouts, which comes in several classes.
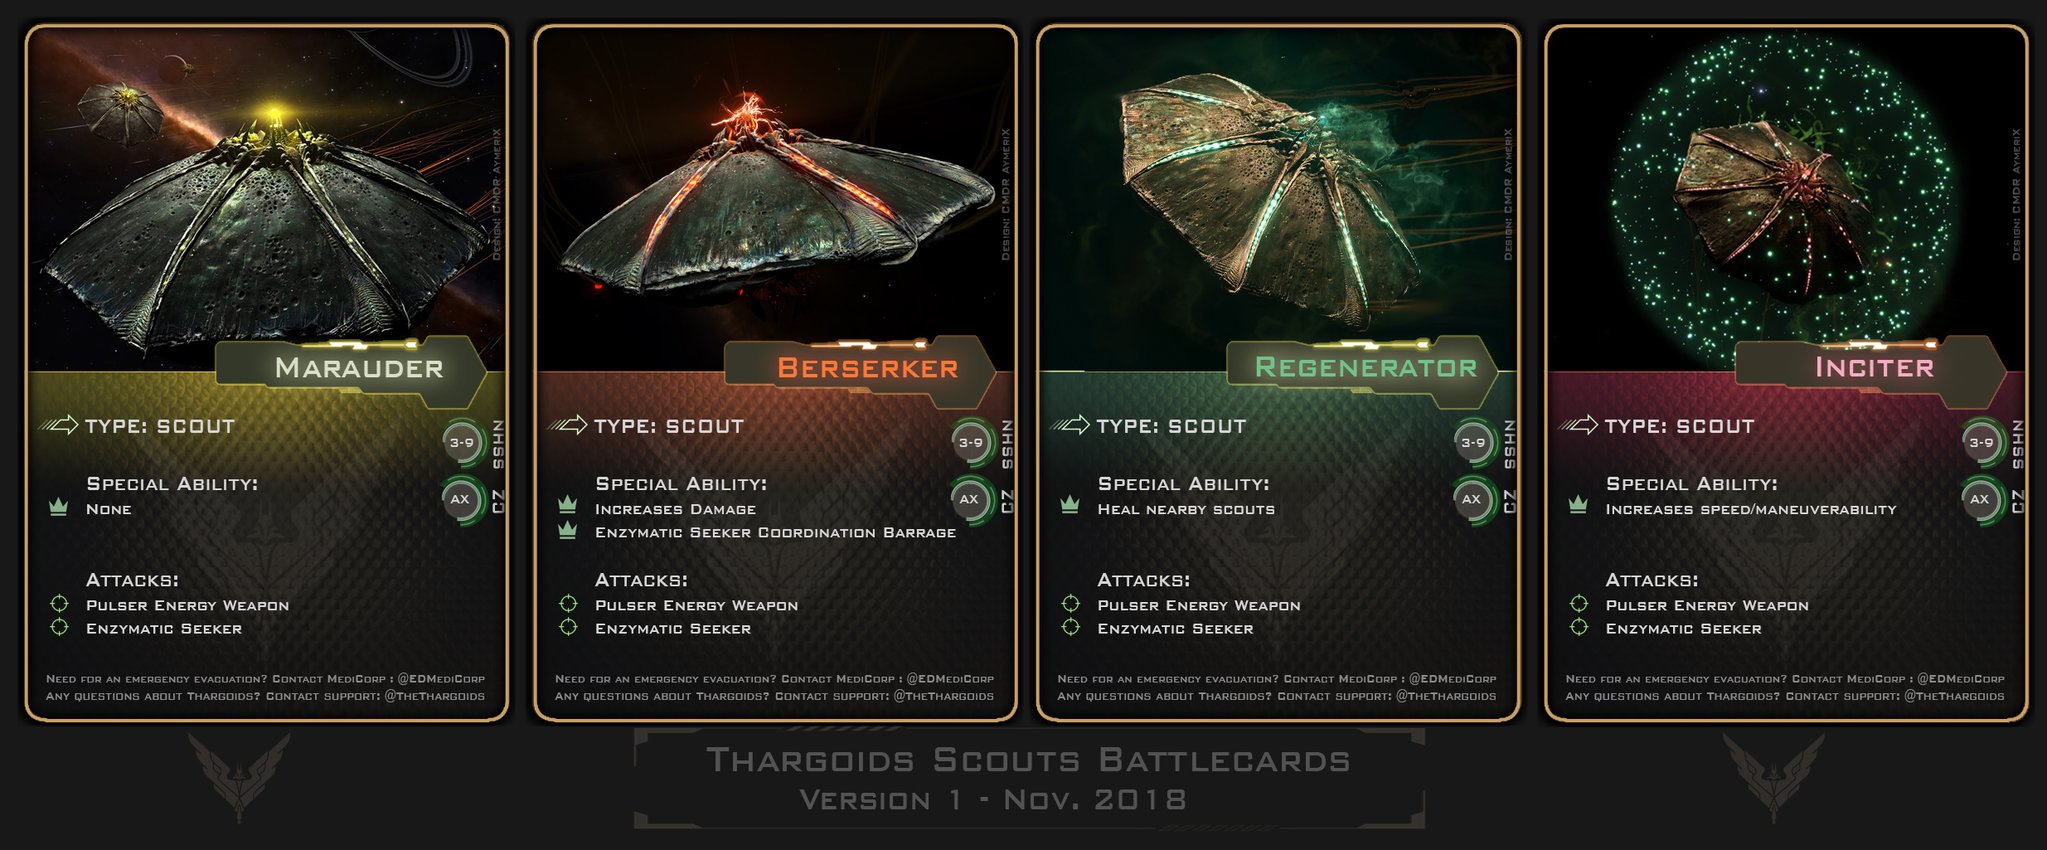
Marauders
Four classes of Marauder scouts are known.
You can find them in Non-Human Signal Source with a threat level between 3 and 4. They also escort Interceptor in threat level 5 to 9.
Depending on the threat level, they can be found in groups of 3 to 12, and sometimes accompanied by an Interceptor.
They are immune to missiles & torpedoes et have 77% resistance to human weapons.
Classes of Marauders :
- Marauder, the standard scout version.
- Regenerator, periodically regenerating nearby Marauders
- Incitator, periodically increases the movement/maneuverability of nearby Marauders
- Berserker, enhances the damage of nearby marauders. It also triggers a caustic missile barrage.
10k Credits Rewards.
-
- Filzar – Regenerator
-

- Filzar – Incitator

-
- Filzar – Berserker
Scouts are smaller and more agile than interceptors. Their offensive capabilities are rather limited.
Their main weapon, a high rate energy gun, is weak although some damage will go through the shields.
They also have a few caustic missiles, so stay alert.
But above all, they don’t benefit from any regeneration ability and are vulnerable to standard weapons. Take precise weapons using fast projectiles dealing kinetic damage if possible, and then it’s like fighting a boosted Eagle ship.
Note that the Pilot Federation count them as Elite targets. It’s an excellent way of increasing your Elite combat rank.
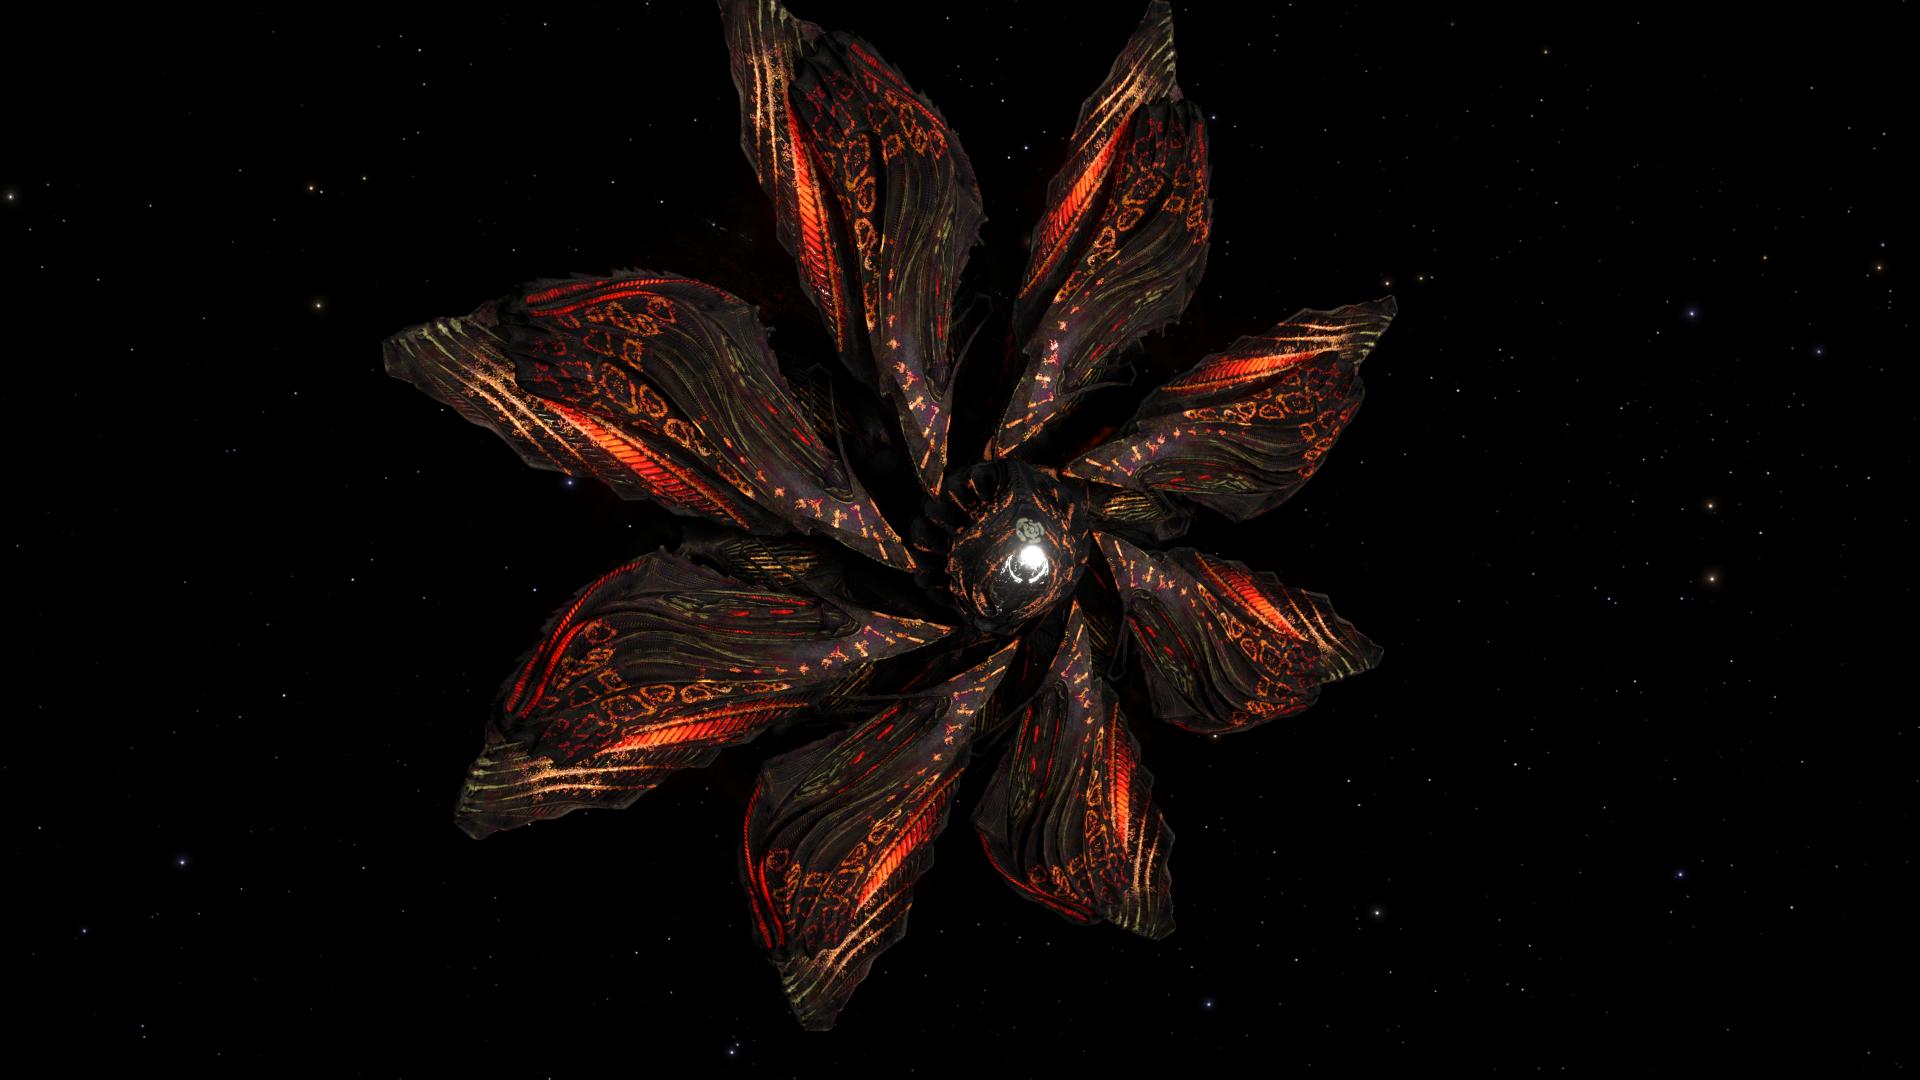
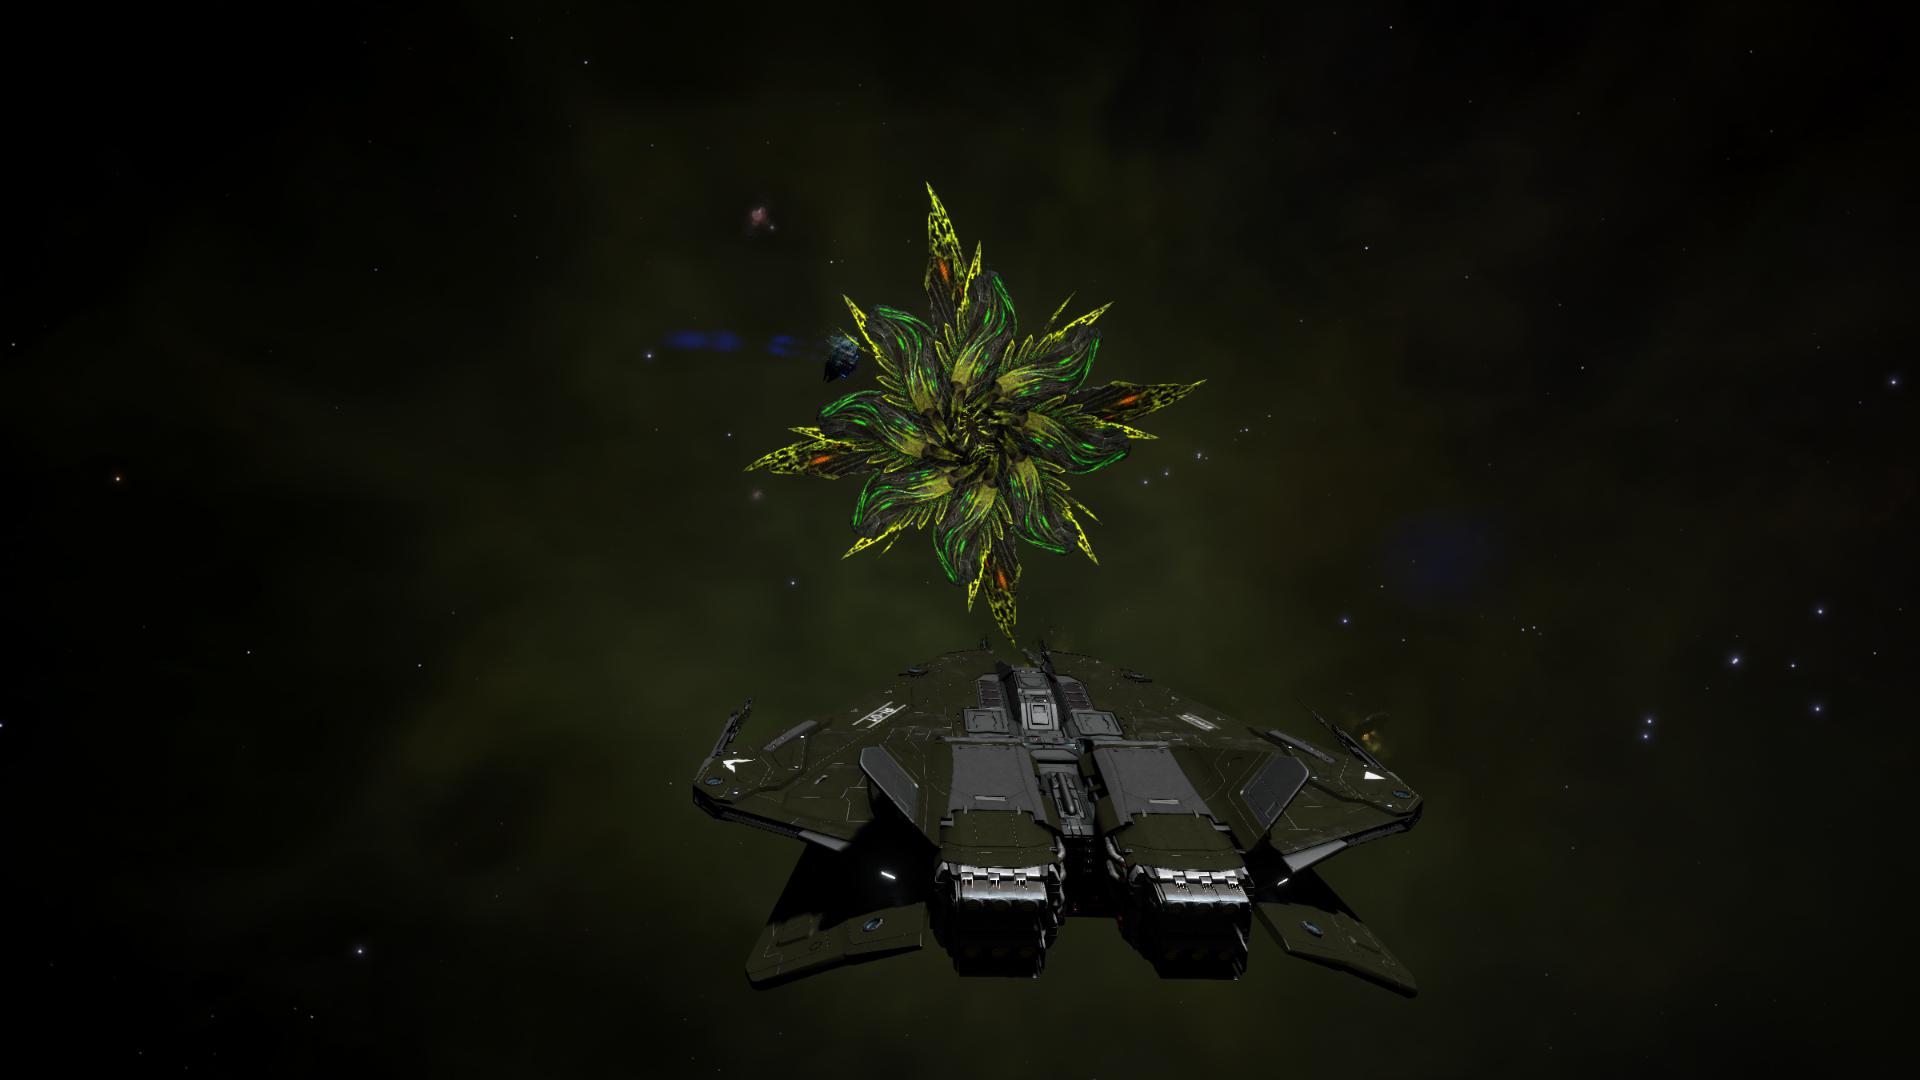
Cyclops
First Thargoids ships ever encountered, these interceptors are the weakest of the three. Found in Non-Human signal source with a threat level of 5 or 6, they are non-hostile but will attack if they feel threatened (repeated scans, flying too close too long, etc.), if you carry Thargoids items or if you attack them obviously.
They have four hearts, 20% hull each and a 32 thargons swarm. They have energy/caustic weapons firing in thin red lines, short range lightning attack and dangerous caustic missiles. Their EMP pulses are very powerful and can shut your ship down for as long as a whole minute.
Cyclops, Medusas and Hydras all have top speed of 450 m/s. You have 6 minutes to kill it before it enters Rage mode and deals more damage. This timer is resetted each time a heart is destroyed.
2M Credits Rewards.
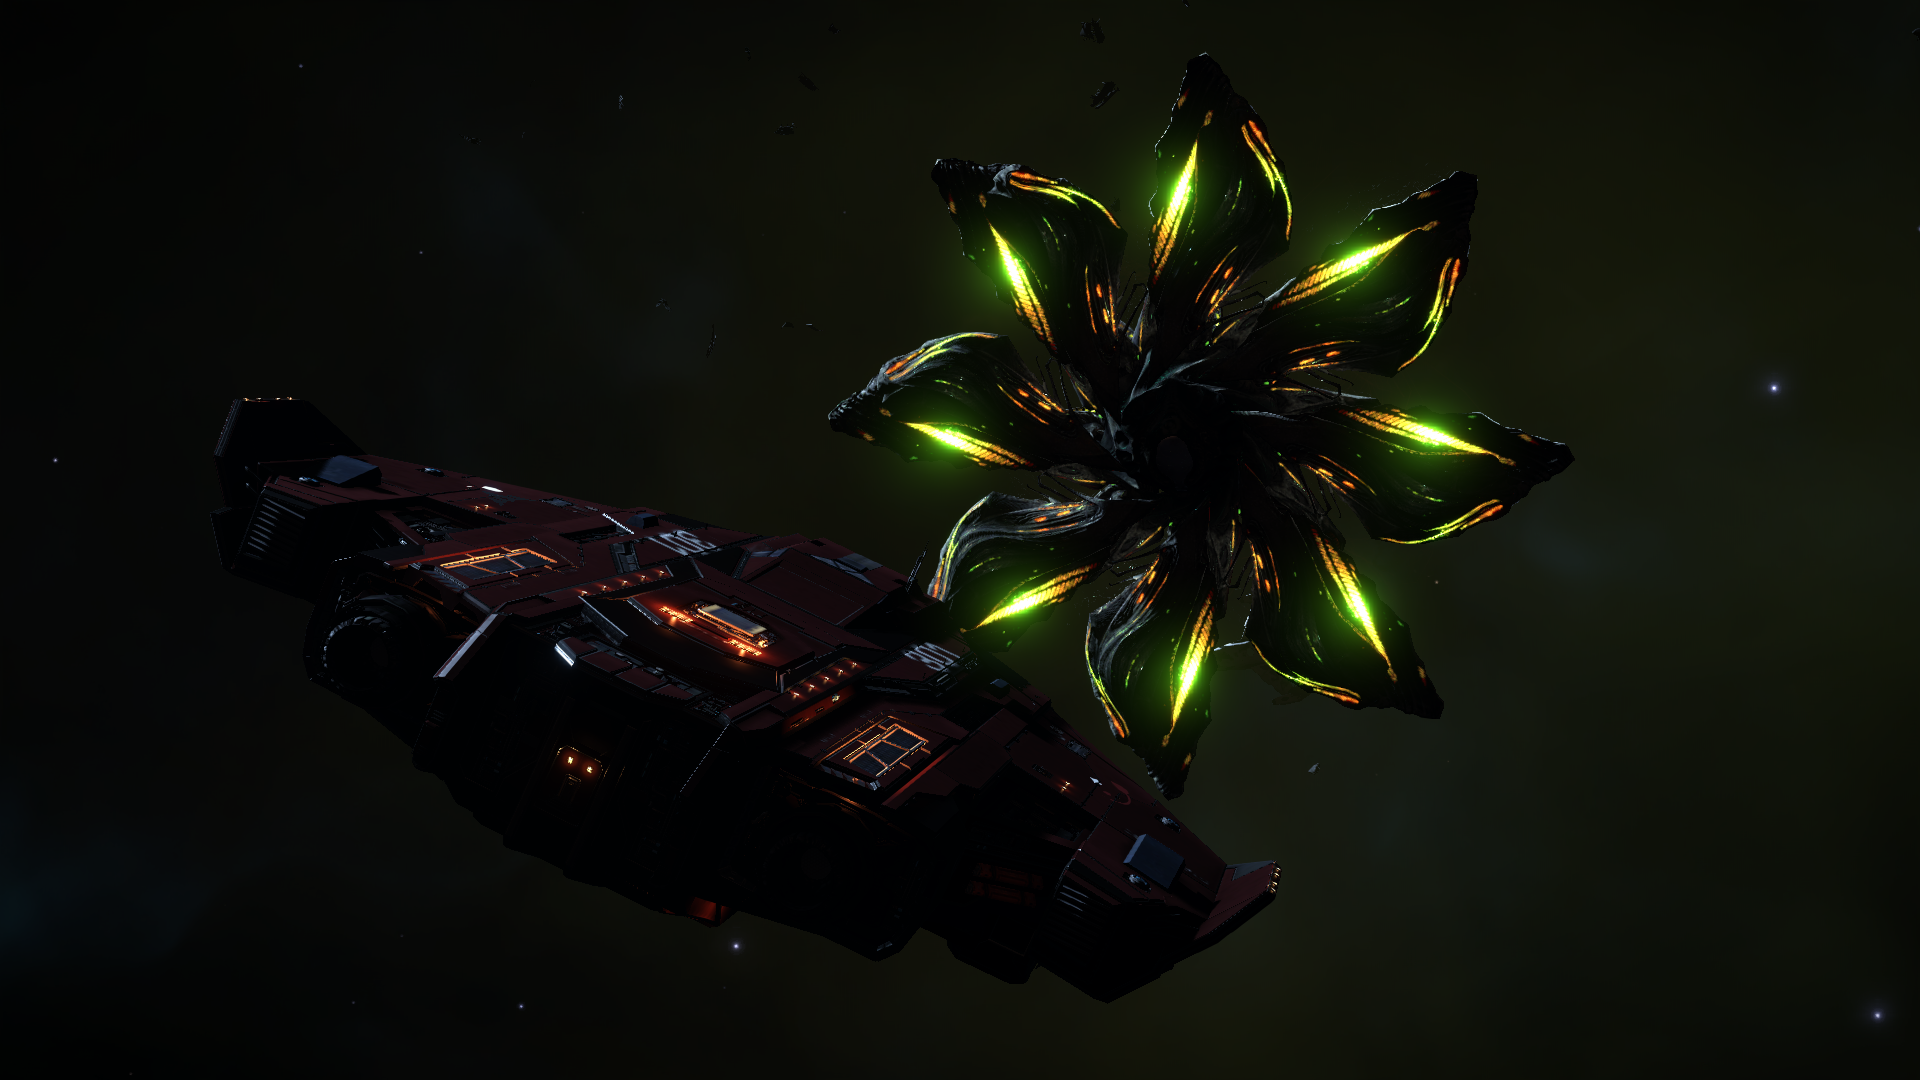

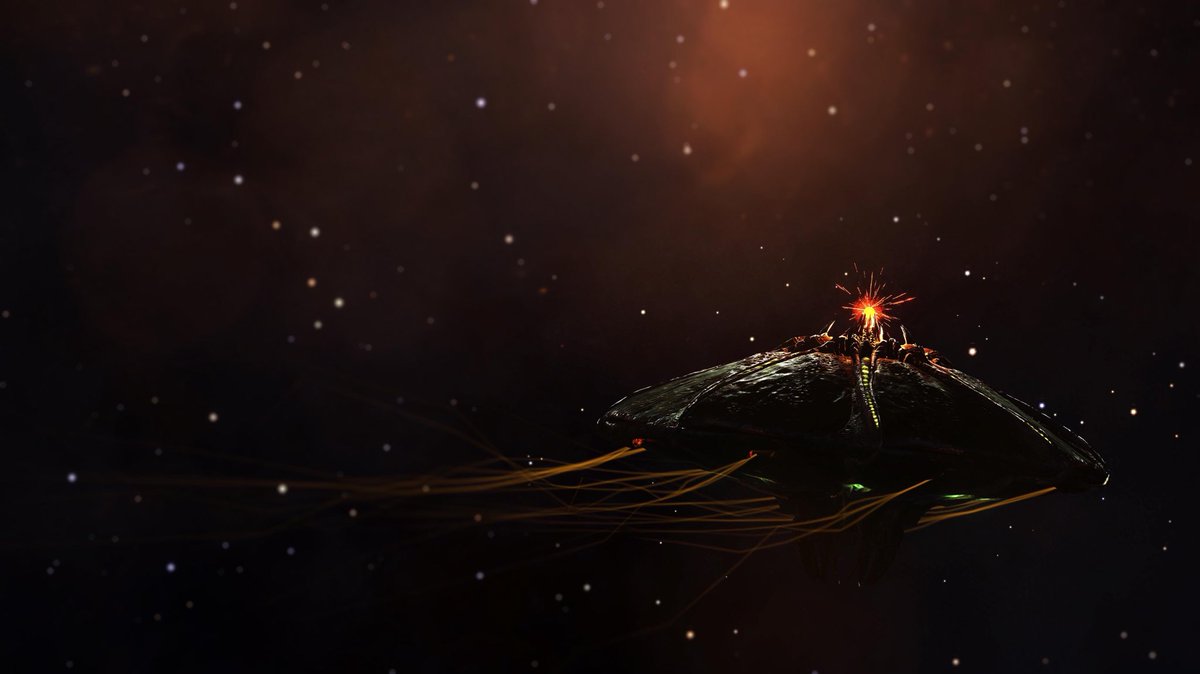
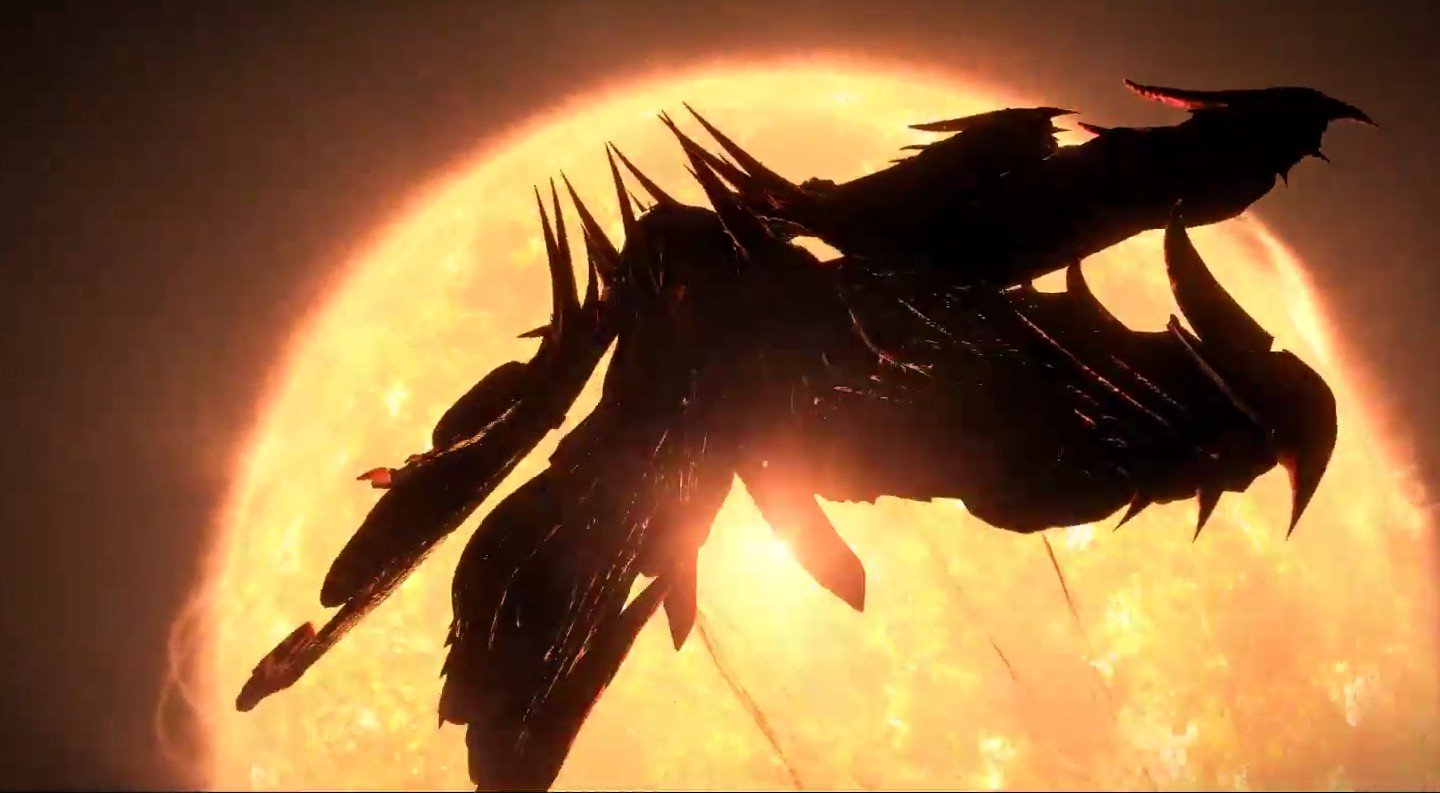
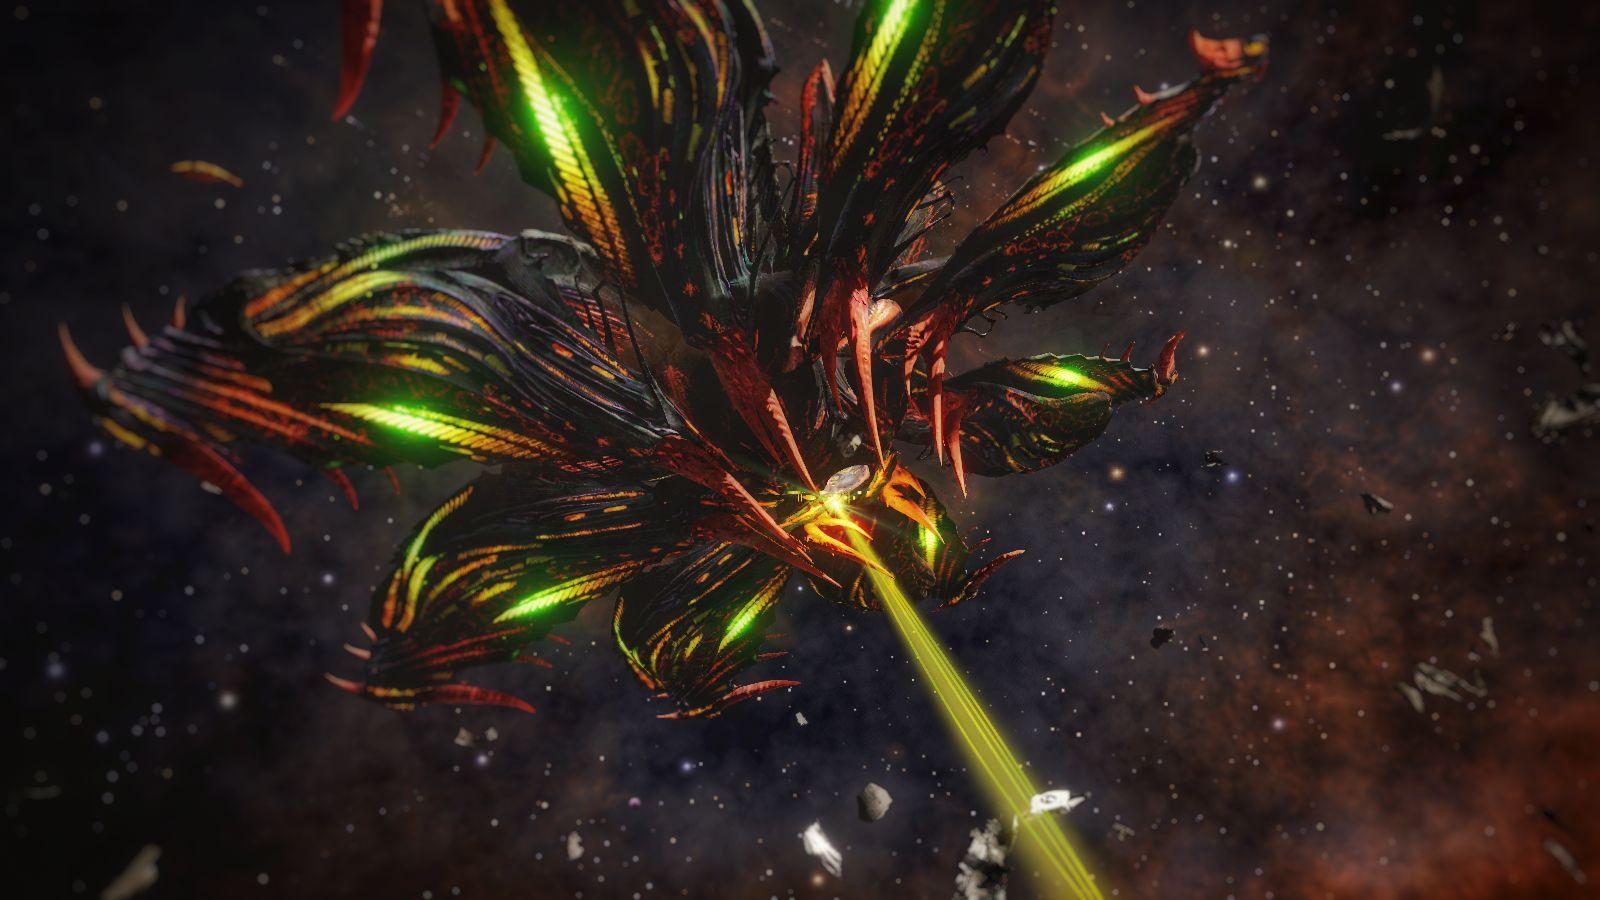
Basilisks
Found in Non-Human signal source of threat level 7, they are non-hostile but will attack if they feel threatened (repeated scans, flying too close too long, etc.), if you carry thargoids items or if you attack them obviously. Basilisks are nonetheless easier provoked than the Cyclops. They have a darker color and red spots. For now, we believe them to be older Cyclops and combat veterans.
Their offensive capabilities are significantly higher than those of the Cyclops. They have 5 hearts (16% hull each) and their swarm are twich as big : 64 Thargons. And, an added challenge: if you destroy a heart within 7 minutes, the Thargoid will deploy a new swarm.
The Basilisk is the fastest of the Interceptors with a top speed of 530 m/s. You have 7 minutes to kill it before it enters Rage mode and deals more damage. This timer is resetted each time a heart is destroyed.
6M Credits Rewards.
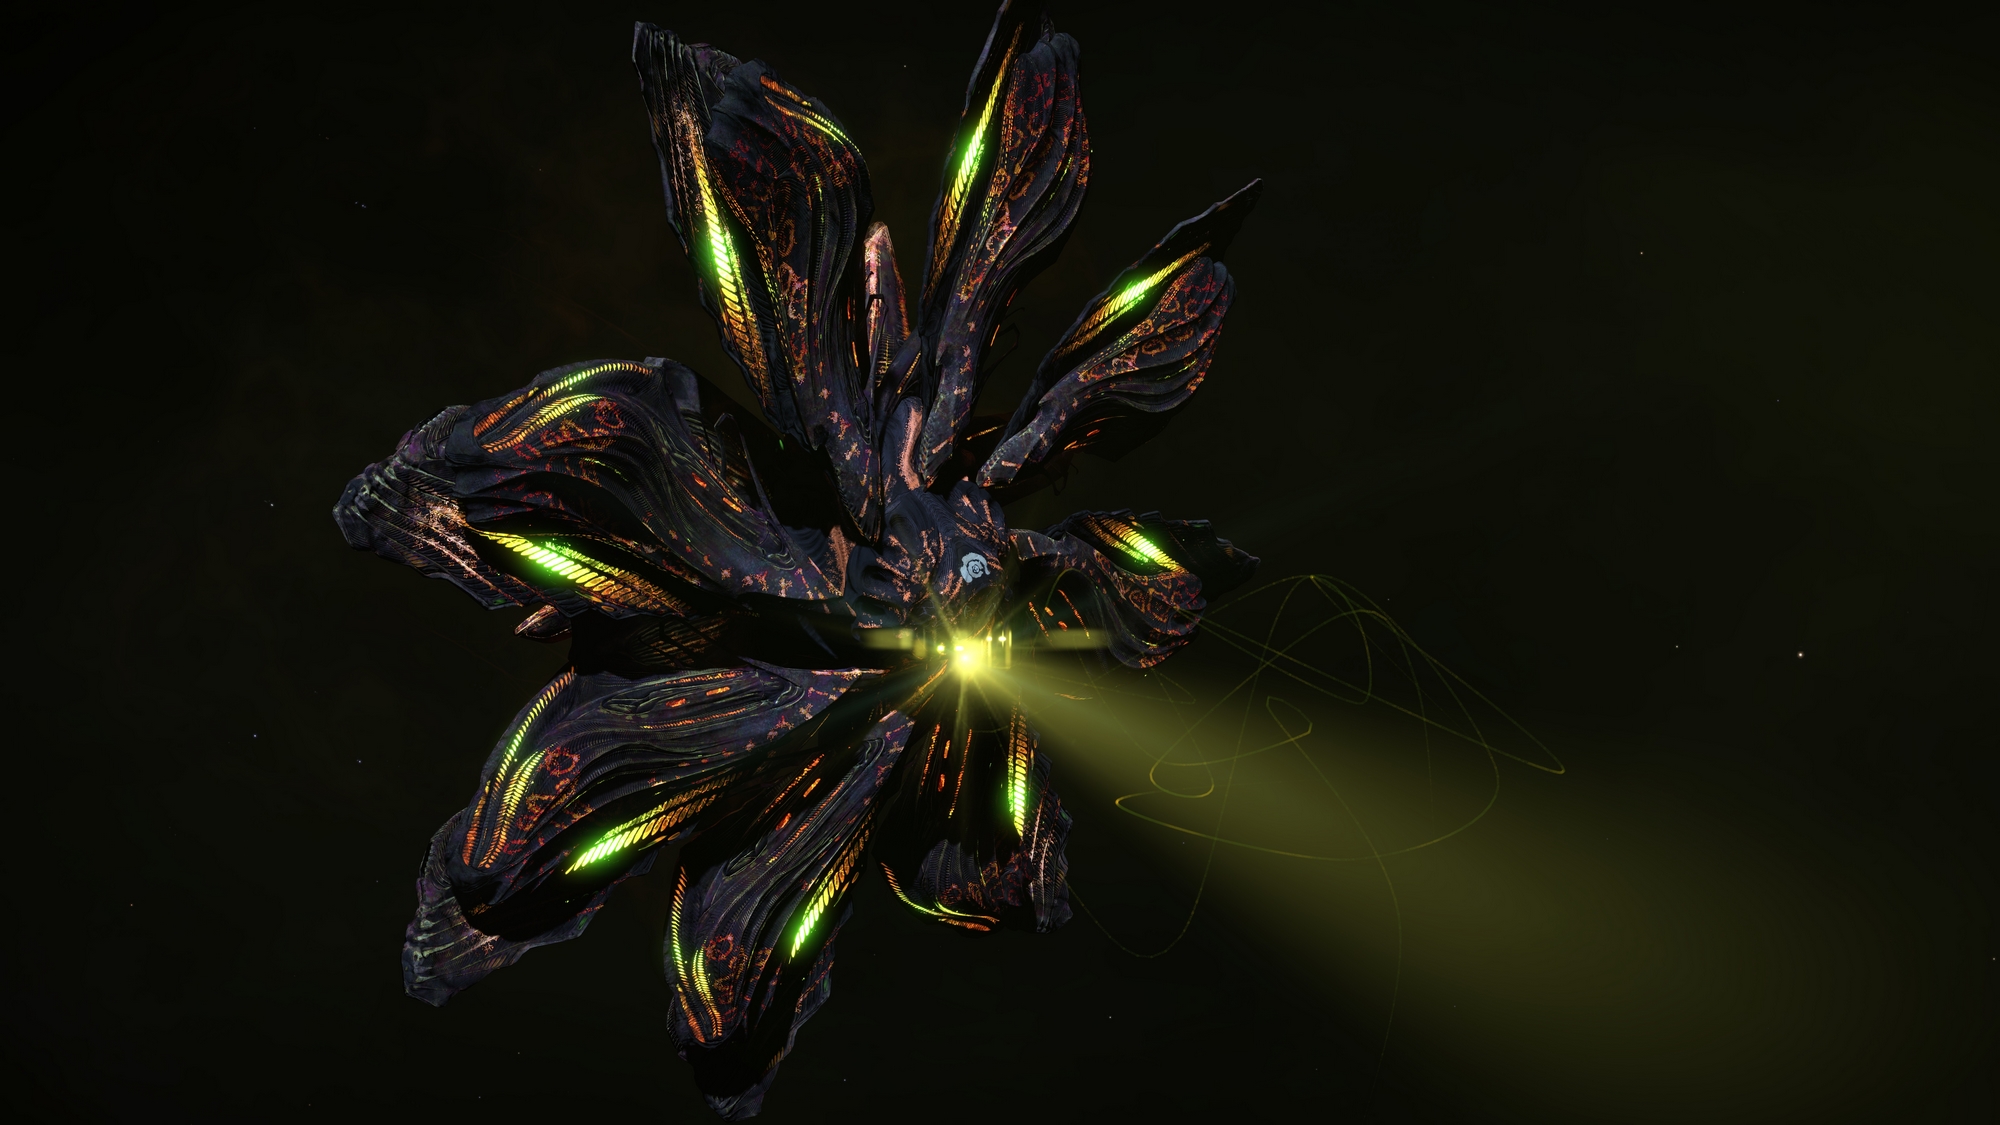

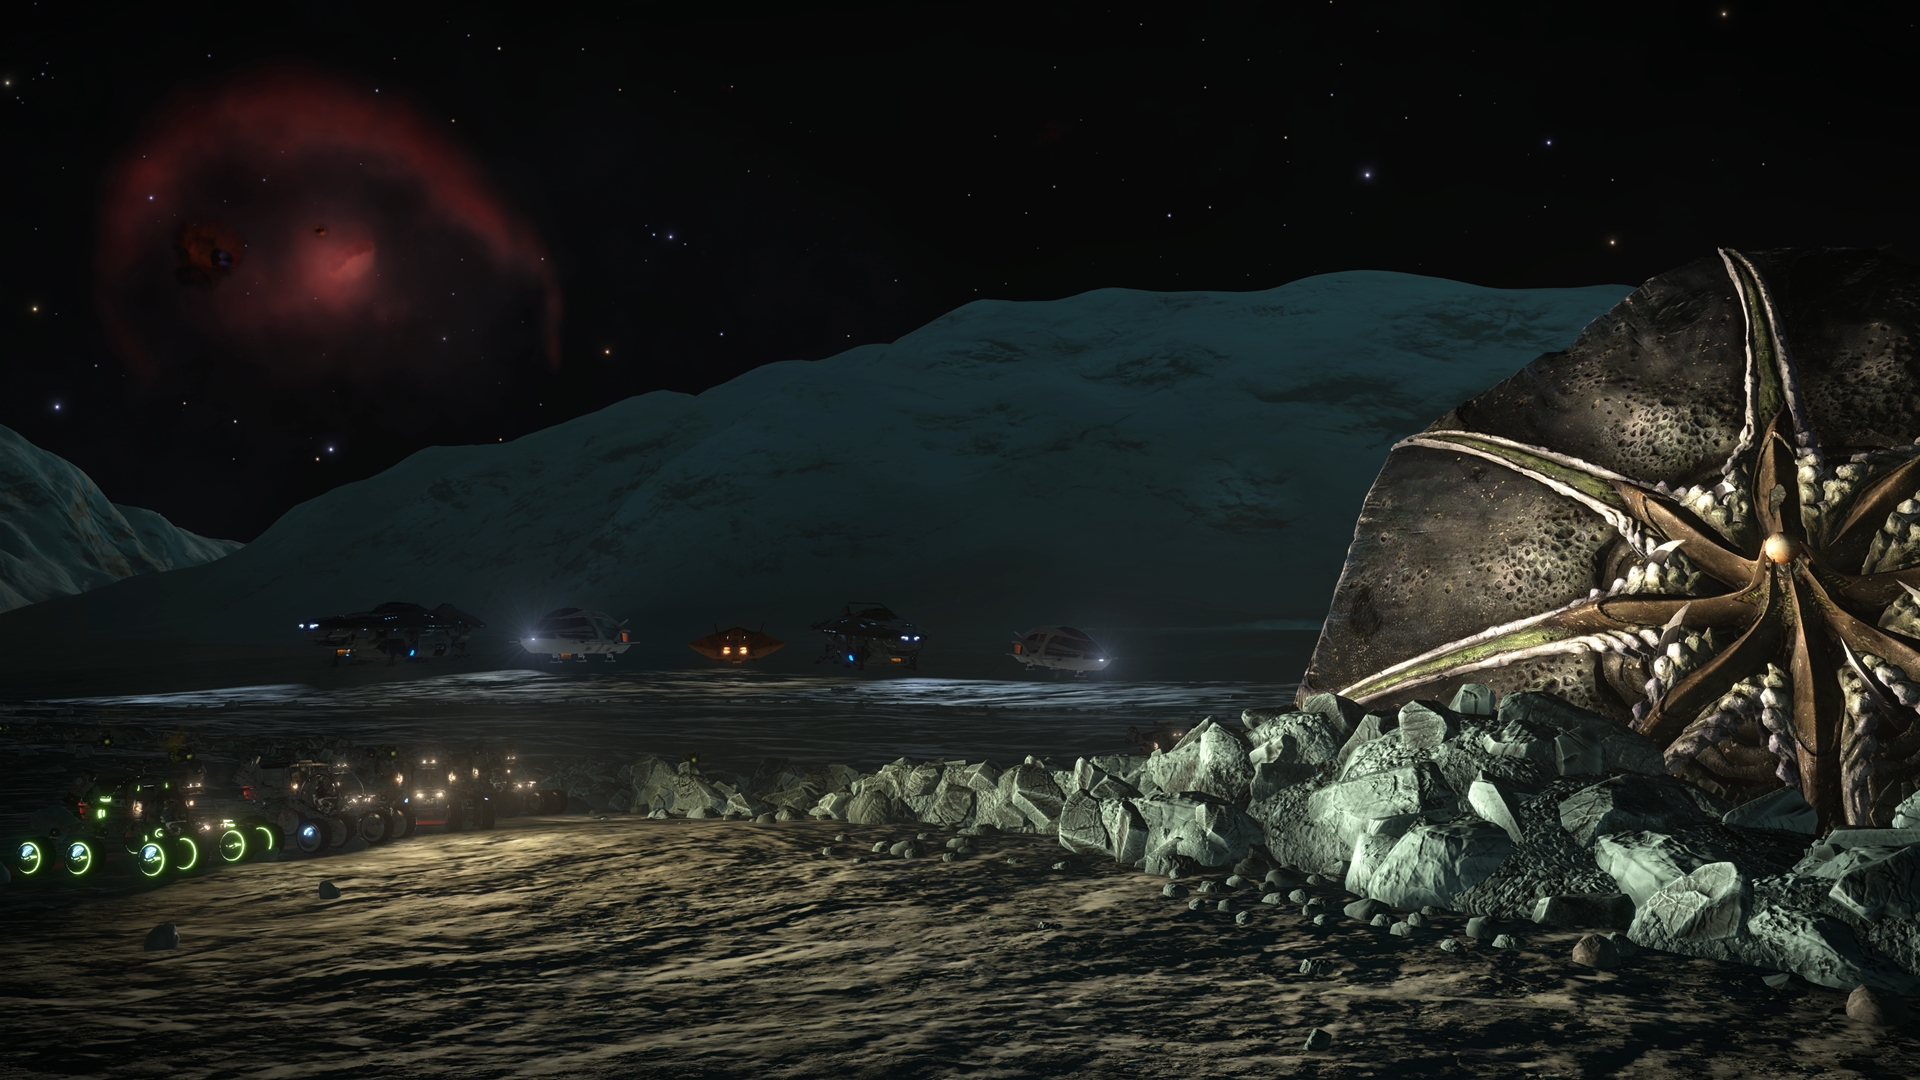
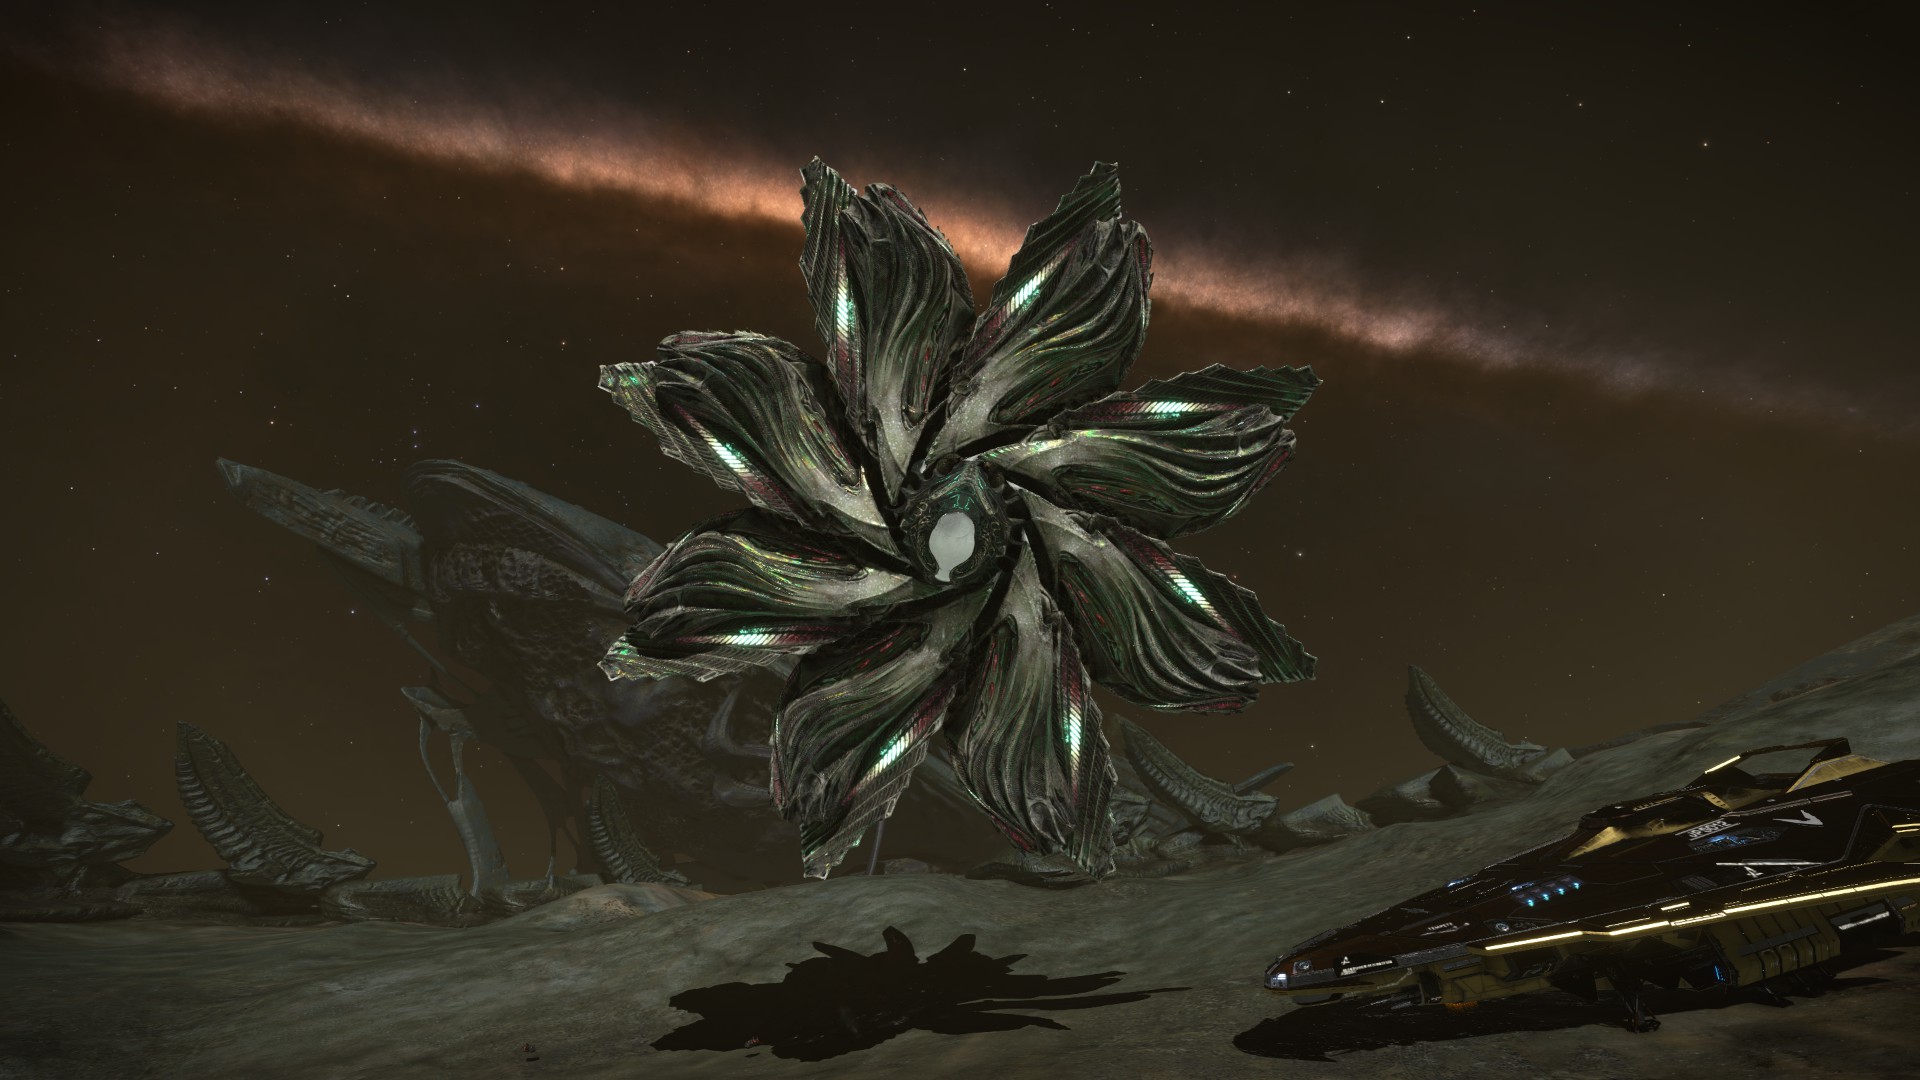
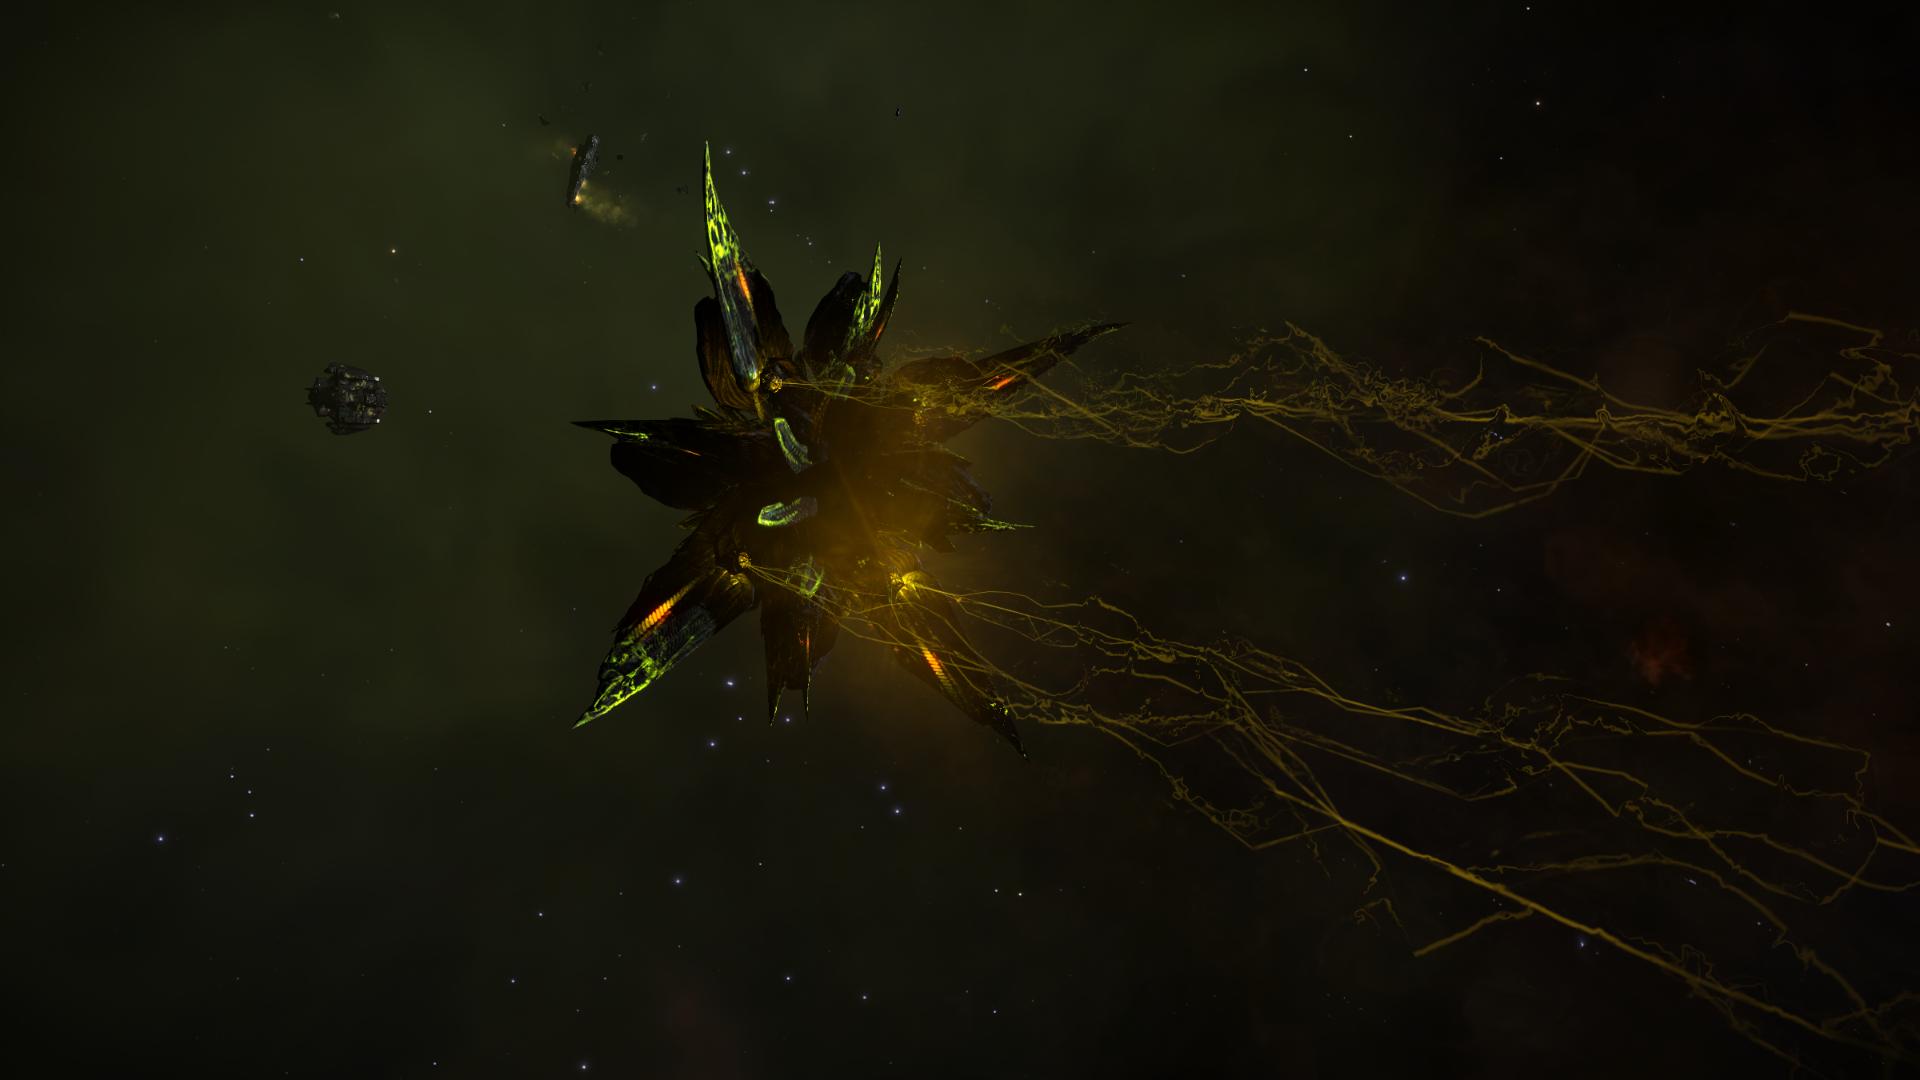
Medusas
Encountered in Non-Human signal source with a threat level of 8, they’re easily triggered, very powerful, and the attack on the first human stations were their doing. They’re not based on the exact same design as the two previous classes, but rather ressemble the thargoid surface bases that are thought to be crashed motherships.
It uses six hearts (13% hull each) and very big swarms of 96 Thargons. They are more powerful and more resistant than the Basilisks. In addition, as with the basilisk, to having to destroy each heart in less than 7 minutes, those Medusa hearts slowly spin, making them a bit harder to hit. This timer is resetted each time a heart is destroyed.
10M Credits Rewards.
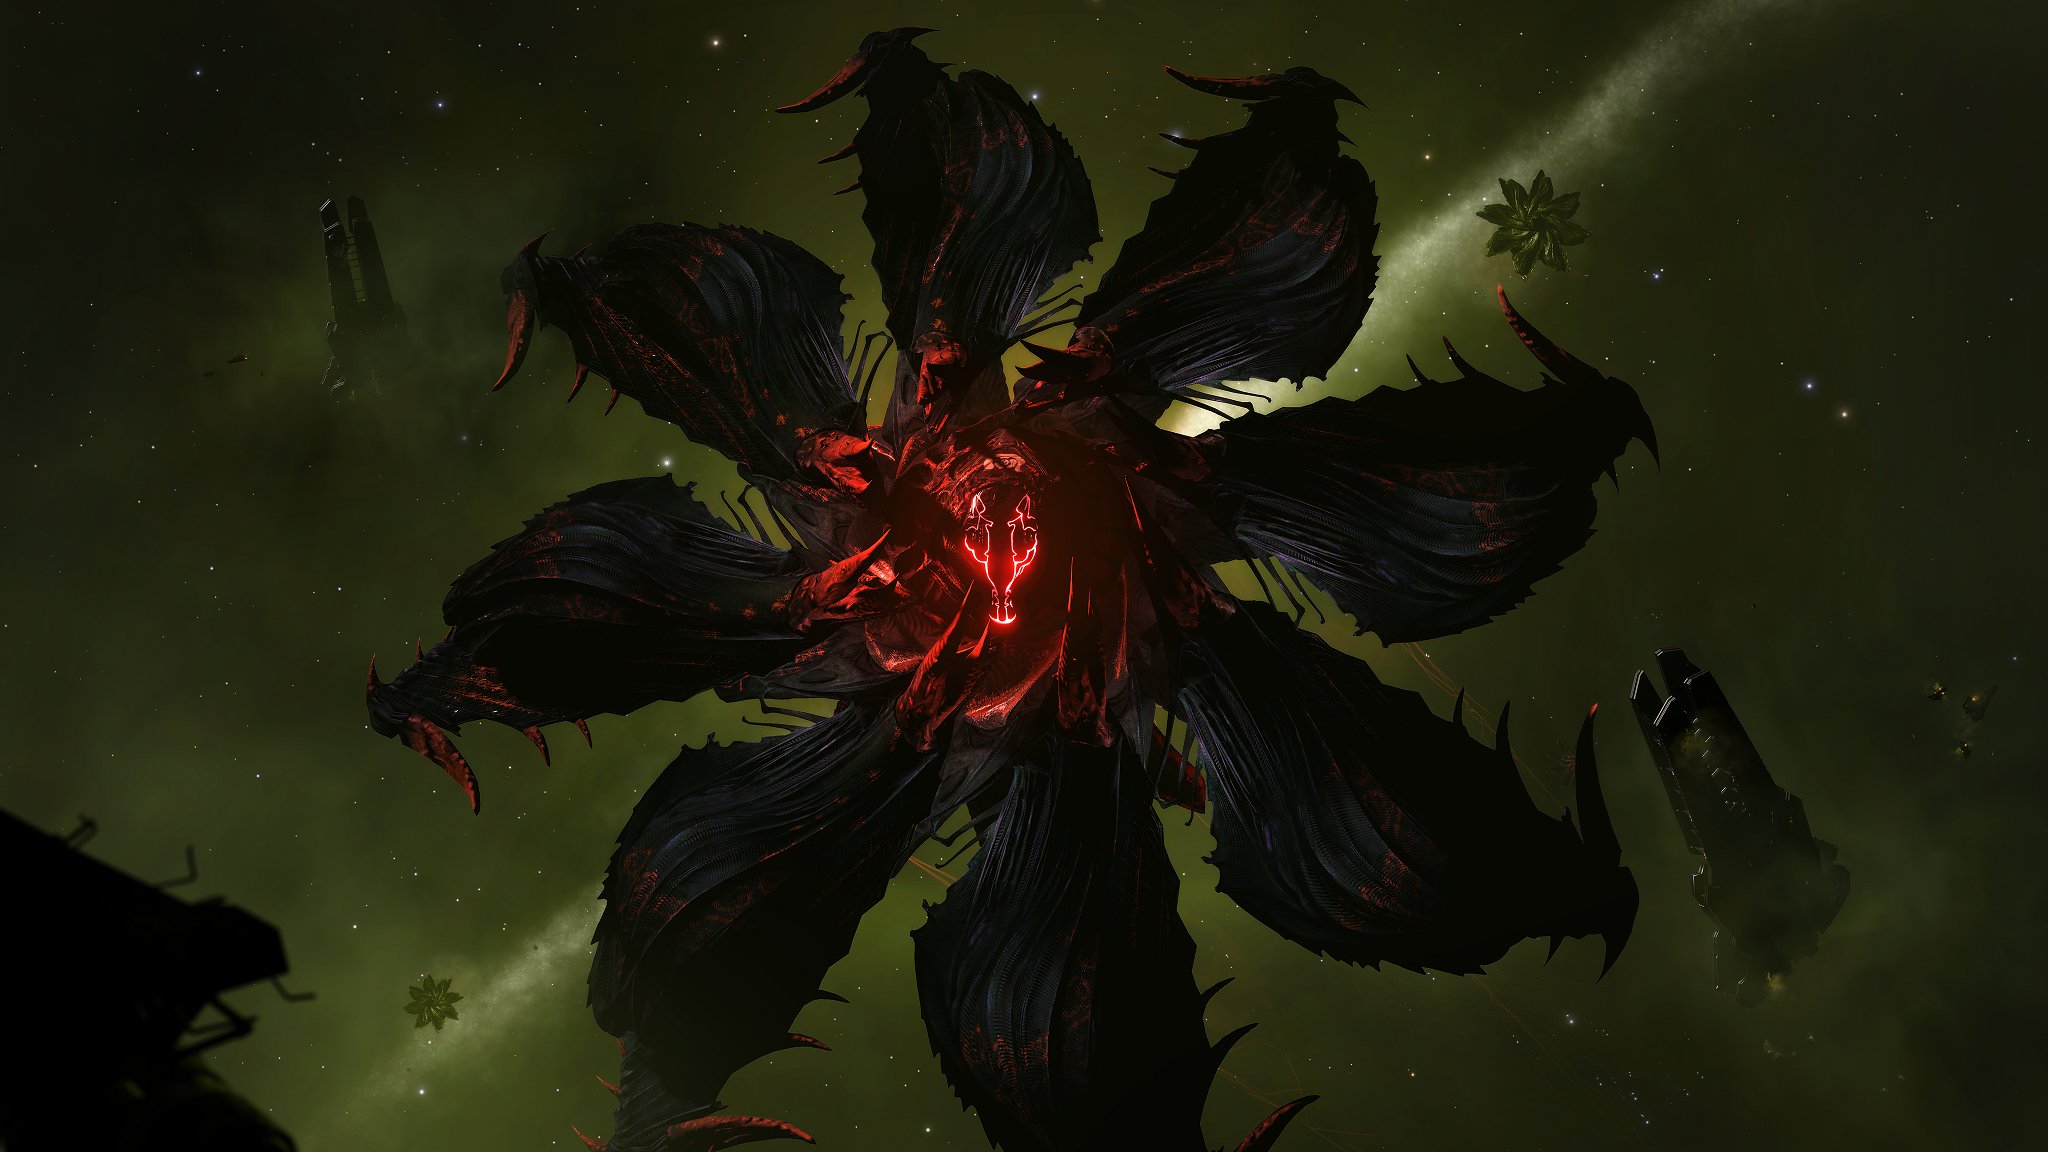
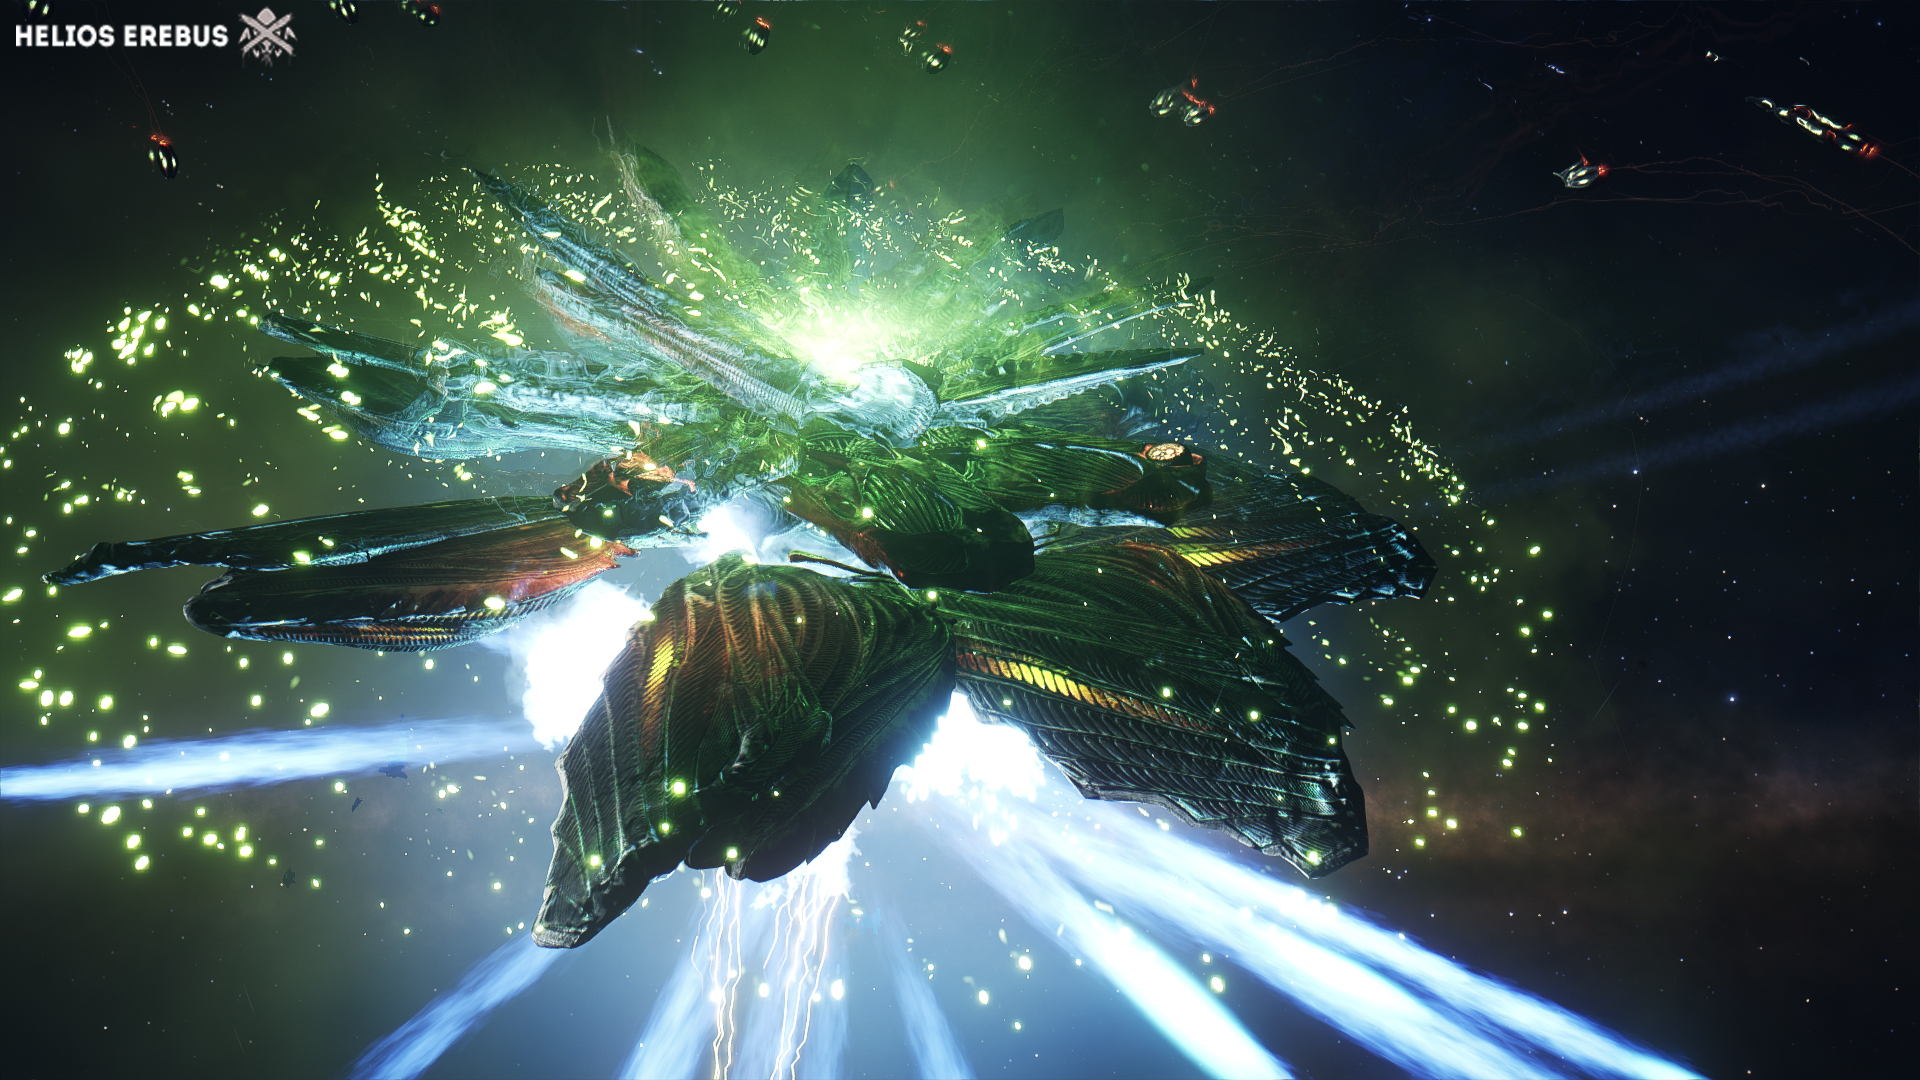
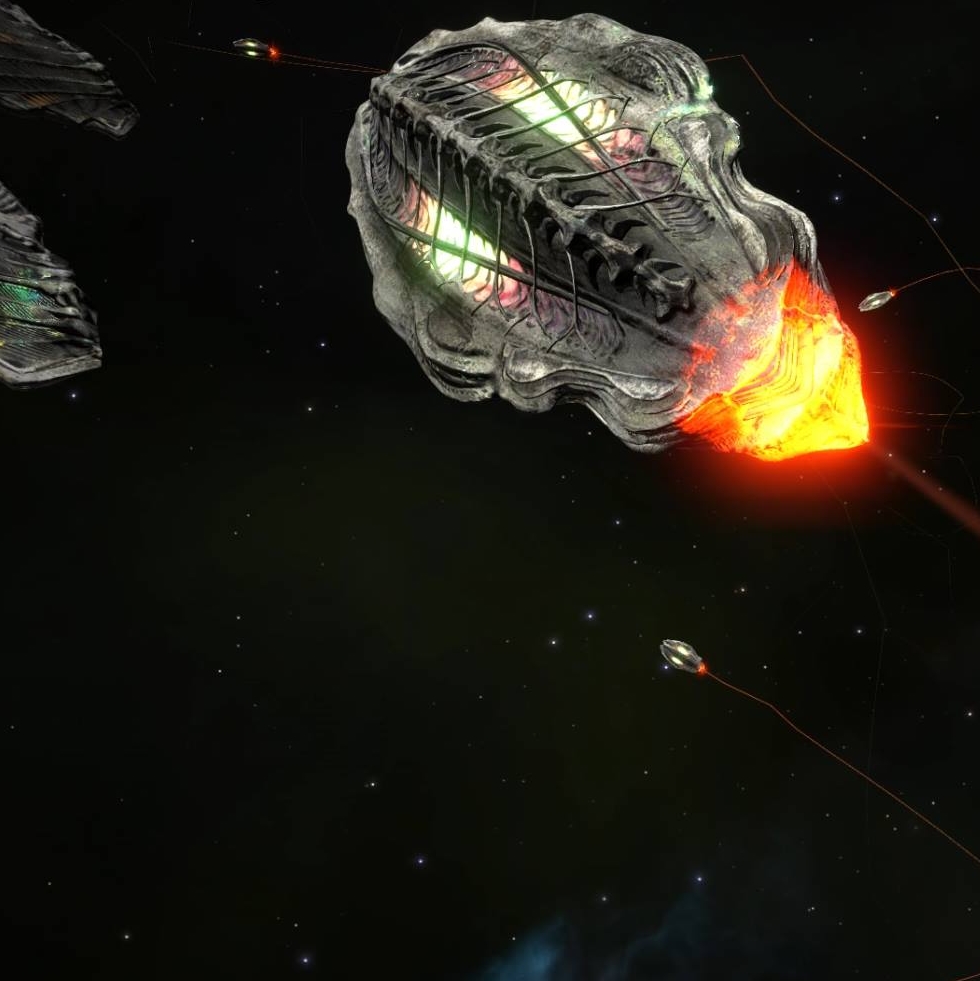
Hydras
Found in Non-Human signal source with a threat level of 9, don’t tickle them unless you have a very well prepared ship equipped with caustic resistance, as you will have to deal with almost non-stop firing and huge swarm of drones.
They have 8 hearts (10% hull each), and huge swarms of 128 thargons. The most powerful interceptor known to date. They were first found near Cone Sector and appears little by little near the bubble.
The 7 minutes time window still applies, and there’s an added challenge: the hearts of the Hydras are only exposed at their back and their rotating petals can block your line of fire. It’s easier to deal damage to its hearts from the front rather than from the back. This timer is resetted each time a heart is destroyed.
15M Credits Rewards.

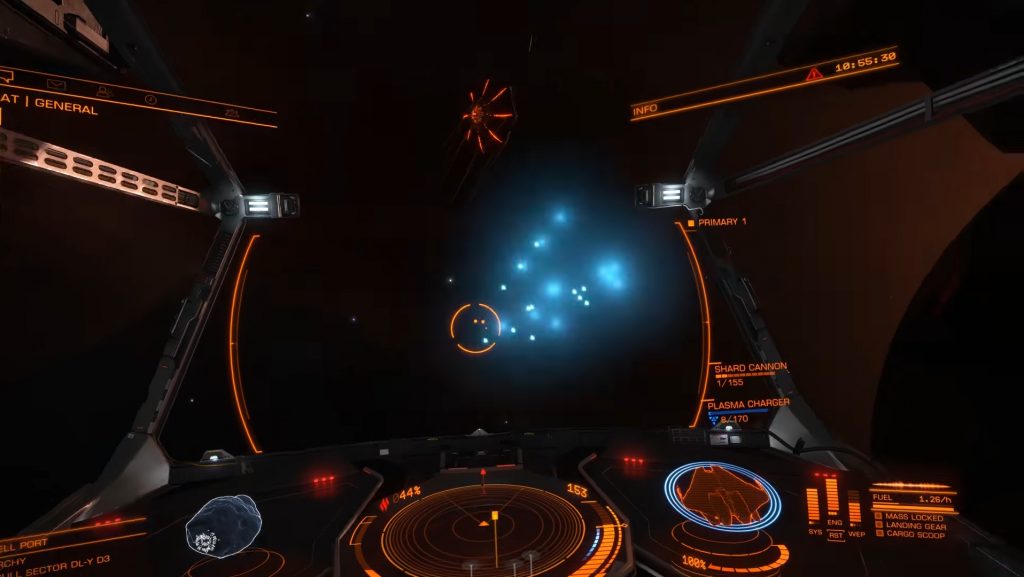
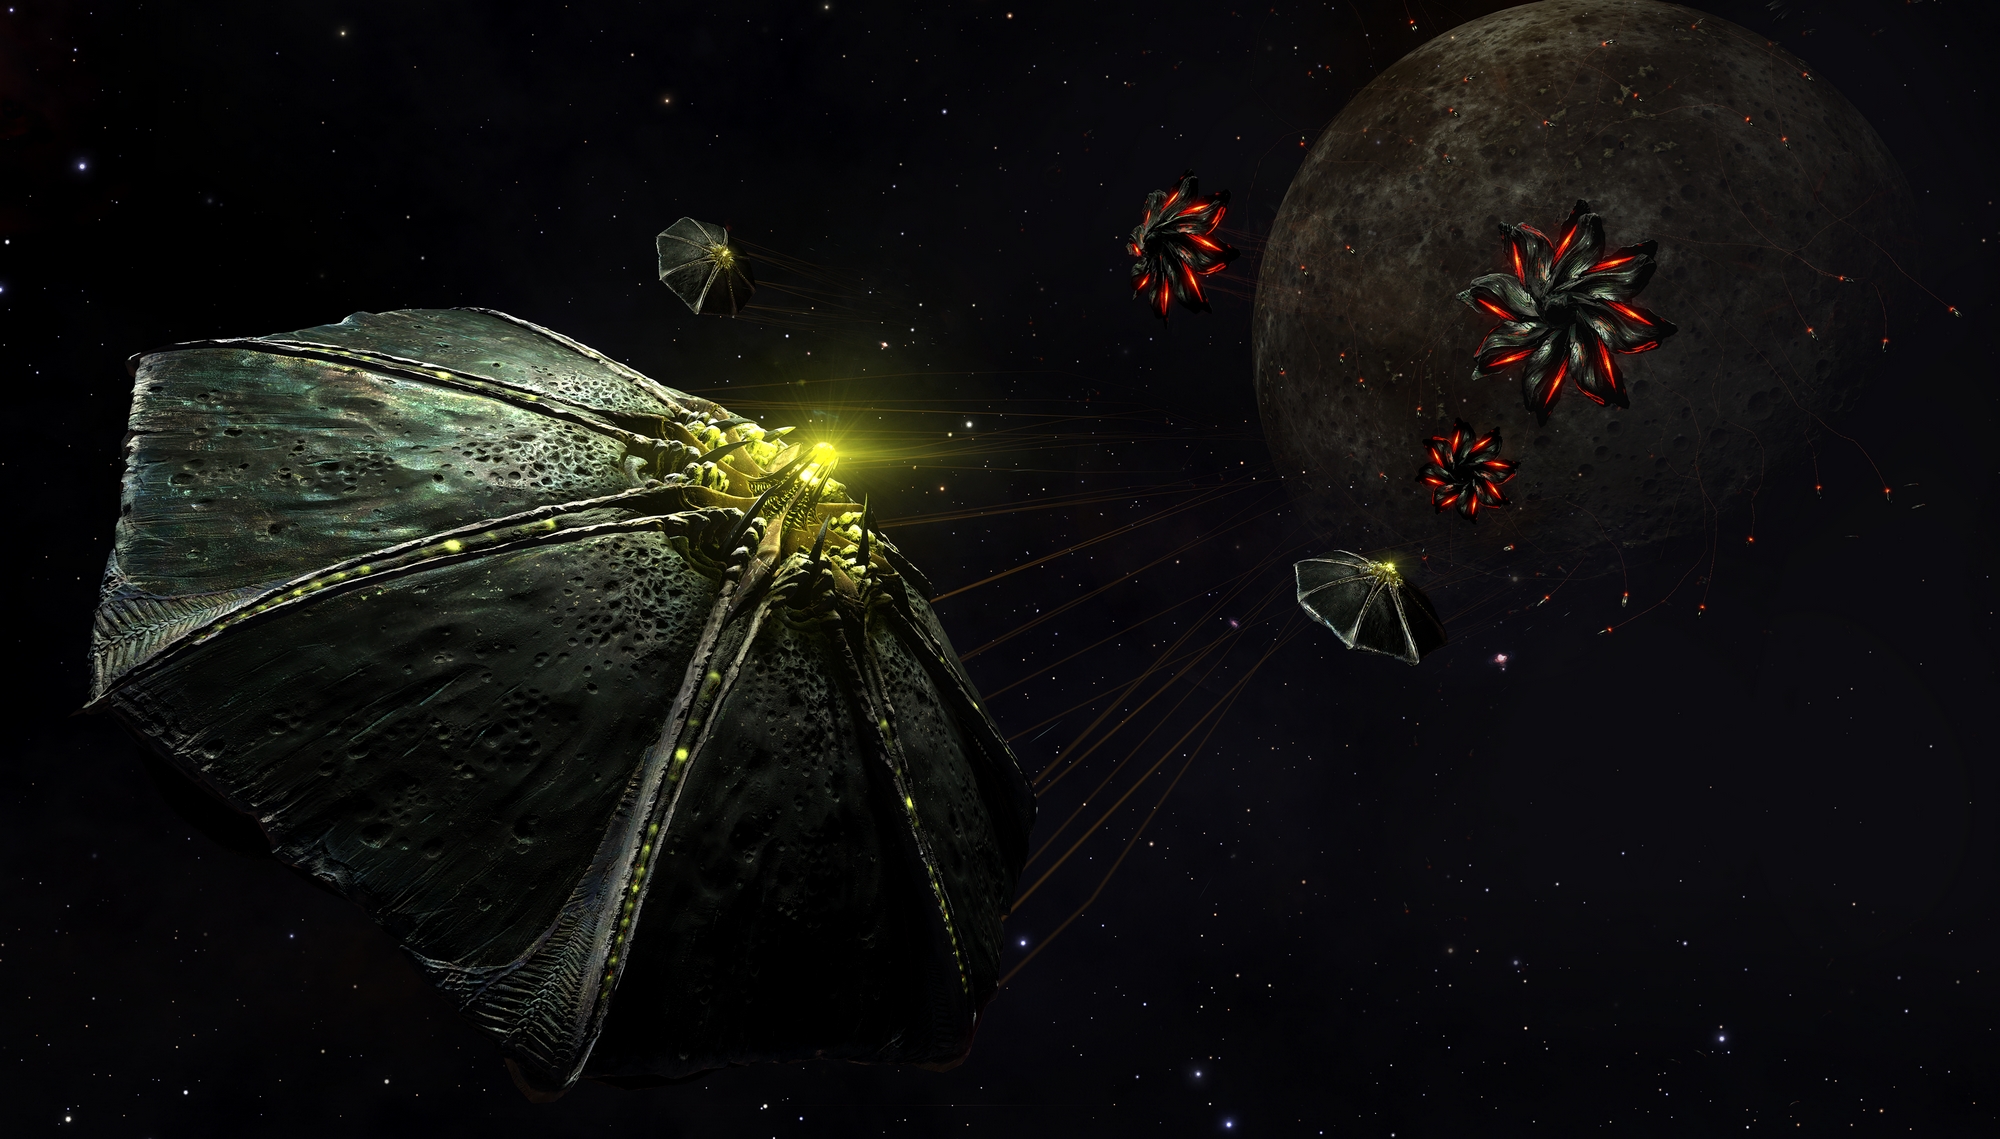
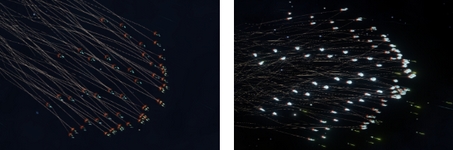
Thargons
They are contained in Cyclops, Basilisks, Medusas and Hydras interceptor and fly in swarms.
Pretty much harmless alone, they can be dreadful in pack if you don’t deal with them quickly.
Their joined caustic shots inflict respectable damage and they can even turn into a missile in order to inflict very heavy damage. At short range, they can inflict some damage with the same lighting attack used by the interceptors. To be destroyed with your Flak Cannons.
Note that they have to flight formations: Pursuit and Combat.
- Pursuit is the default formation, at a high speed of 500m/s. The Thargonds are packed and increase their speed. This formation is easy to destroy.
- Combat is the formation used to attack ships. You can usually see it when they pass around/through your ship. They fly at a lower speed, 360m/s and are more difficult to hit.
-
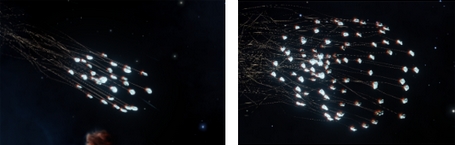
- Small Cone (Cyclop & Medusa) – Pursuit
-
- Small Spirale (Cyclop & Medusa) – Combat
-
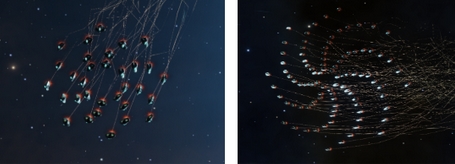
- Big Cone (Basilisk & Medusa) – Pursuit
-
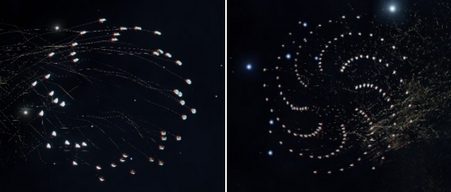
- Big Spirale (Basilisk & Hydra) – Combat
-
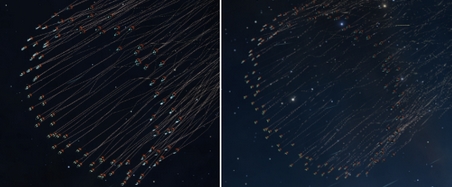
- Small Ring (Medusa & Hydra) – Pursuit
-
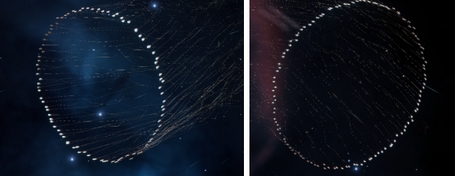
- Grand Ring (Medusa et Hydra) – Combat
![]()
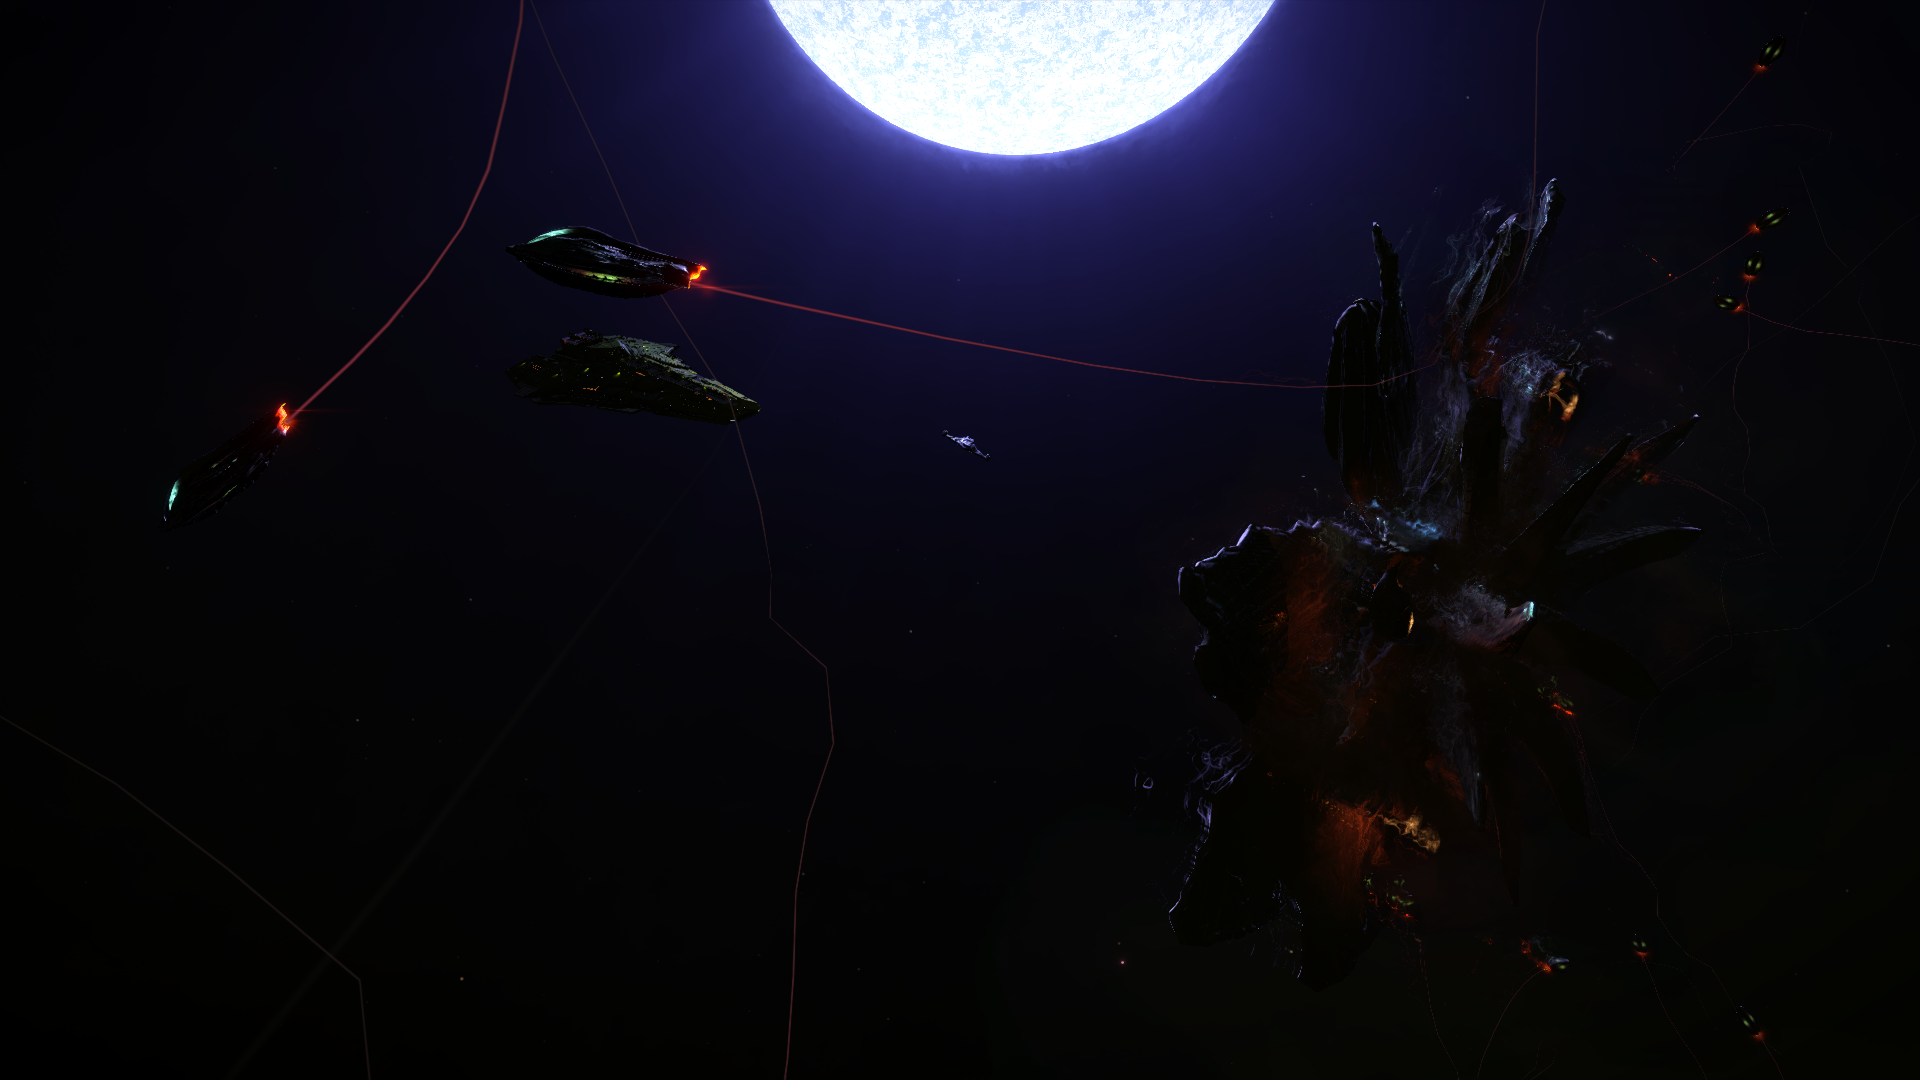
Anti-Xeno conflict zones
Similar to the human conflict zones, these zones are the scene of local conflict between Thargoids and Humans. New ships will arrive regularly, with humans fighting alongside you and the Thargoids being immediately hostile. Note, the Interceptors arriving on the battlefield will rapidly launch an EMP, so remember to use your Field Neutralizer.
The difficulty will increase with the threat level.
You will earn the credit rewards associated with each target you destroy.
- Marauders will generally form the 1st wave of the AX Conflict Zone.
Kill them all to fulfill the objectives at about 1/3, and then it will trigger the next phase.
You will earn 100k Cr and the Interceptors will then arrive. - 2nd wave, more Marauders but this time they will be supported by one or more Interceptors.
Remain vigilant, the NPCs will begin to be destroyed against Basilisks
If there are two Cyclops, alternate between them two by destroying the heart of one of them and then the other
If there is a Cyclop and another stronger Interceptor, separate them and take the stronger away while you take care of the Cyclop
Two Basilisks, good luck, separate them and fight them separately
You will earn 5M Cr for having completed this wave with all Marauders killed, and then the final phase will start - 3rd wave, the Hydra. Apply the strategies discussed and hold onto your buttocks!
You will earn 10M Cr for having completed the AX Conflict Zone.
Here’s a list of advices, provided by expert GluttonyFang :
- The best engagement priority order is: Damaged Interceptors > Shieldless Interceptors > Thargon swarms > Regenerator > Berserker > Inciter > Shielded Interceptors > Marauders
- Human ship NPCs are your allies, so help them stay alive: the more they are, the more efficiently you will fight interceptors.
- Ammos are limlited, especially with the guardian efficient weaponry. Position yourself, make sure you will hit before pressing the trigger. If possible, take guardian fighters like the Lance for the hearts, and the Trident/Javelin for the hull.
- Regenerators have a wide enough area of effect to cover most of the conflict zone with its shield, so focus on them, if you don’t have anything more urgent to do.
- In solo: You will periodically hit by caustic attacks. Stock as many heatsinks as you can, and enough material to repair modules and synthesize new heatsinks and Flak ammos. Unless you don’t trust yourself against the more agile scout ships, make use of a Gauss cannon preferably.
- In squadron: scan data are shared. Define everyone’s role upfront: specialize your equipment against interceptors or scouts, and be there to support your allies (long range shield regenerating lasers, drones, Flak…)

![]()
Anti-Xeno ship fitting
Regarding weapons, the choice is fairly limited: guardian weapons or AX Aegis weapons.
- AX multicannons are efficient against hearts. They can even be used against Cyclops and Marauders hull. Not advised against Basilisk, Medusa or Hydra interceptors.
- AX missiles are efficient against hull. Attacking hearts with them is possible, though require great precision. Non-used recently due to the new Guardians weapons.
- Guardian Plasma Charger are efficient against hull. It is possible to hit the hearts with that. Efficient mid-range.
- Guardian Gauss Cannon are currently the best weapon against the Thargoids, inflicting great damage to both hull or hearts, while being very precise. Efficient long range.
- Guardian Shard Cannon are melee weapons to spread large shards at the Thargoids. Heavy damage, low power draw. Efficient in melee and perfect against the Interceptors shields.
- Flak Cannon are essential against Thargons. You or your allies must have a couple, they’re a primary target.
- On the bigger ships, some lasers can be added to weaken a Thargoid shield.
Regarding internal modules:
- Damage will mostly affect your hull, therefore, make sure it’s as resistant as possible. There’s no advantage with having a powerful shield, it’s better to equipe Bi-Weaves as they can charge up much faster.
- Maximize your modules integrity, so pick A or B-rated ones.
- Take an Auto Field-Maintenance Unit to repair your module when needed. Repair and decontamination limpets are also good. Laser regenerating shields can greatly help in a team.
- Don’t forget to bring a Shutdown field neutralizer, and a Xeno-scanner (optionnal)
- If you can, Take some ship launched fighters, preferably Taipan AX or better, Guardian, that can be useful in distracting and adding up to your overall damage output.

Now, here’s a sample of ready to combat AX ships:
Only equip a Xeno Scanner if you need it in a special case, otherwise you will waste a Utility slot.
Note that a Prismatic Shield is advised, but depending on your access to it, your credits or Power: a Standard Shield max Class and Rank A will work as well.
- Viper MkIII (30LY / Gauss) – 8M 095k credits
- To prove to you that there is no need for a huge ship to boot your Combat AX career, this Viper MkIII is quite capable of competing against a Cyclop. With 4 heatsinks to dodge the cannon shots of the Cyclop, as well as three Gauss 1C2 + 2C1 for the hull and the hearts. The few Guardian Reinforcements will help you not to burn instantly if you are hit by a caustic weapon. You can apply this fit to the Cobra MkIII and even an iCourier. Besides, with its three C2 weapons, the latter will be easier to play against a Cyclop: 2 Gauss + 1 Flak
- aChieftain (31LY / Shard) – 84M 377k credits // Variant Marauders // Variant Gauss
- My Chieftain and his Shards to counter Cyclops and Basilisks in close combat. Its gameplay is very different from the usual strategies: 25% caustic resistance, an Bi-Weave shield + melee weapons. The goal is to always stick to the Interceptor in order to get the aggro. What we are looking for is a the Interceptor’s Lightning because we precisely have the defenses to counter it with a shield that recharges quickly, anti-caustic defenses and protections of our modules. We can stay a whole fight with caustic damage over time without being afraid of it. Applicable to the fAssault.
- Fer de Lance (17.2LY / Gauss) – 131M 587k credits
- Only in a Wing, you will play a supporting role thanks to your Beam Laser regenerating the shields of your allies, all with 4 Gauss Cannons very well centered to easily destroy hearts. Shoot the 4 Gauss against the shell but I recommend having a group of weapons with just the 2 most centered Gauss to attack the hearts.
- Krait MkII (20.7LY / Gauss) – 212M 991k credits
- An excellent fast and nimble ship to counter all types of Interceptors with dodge gameplay and fast hearts destructions.
- Anaconda (23.22LY / Gauss) – 626M 657k credits // Variant Decontamination
- Once again, the Gauss cannons are used because they are essential for their damage and precision. A high-level ship more popular than the iCutter and the fCorvette because it has more base armour and better placed weapons. It remains however the slowest of the three and can show difficulties against the Basilisks and their 530 m/s.
- fCorvette (16.7LY / Gauss) – 718M 566k credits // Variant Decontamination // Variant non-prismatic // Variant Marauders
- More maneuverable than the Anaconda and the Cutter, this high-level ship is not regularly played because of its canopy which tends to break quickly and its weapons placements that aren’t optimal for AX.
- Type 10 (22.2LY / Laser & Gauss) – 849M 725k credits
- Unfortunately not the AX ship we were hoping for, it can still be useful as a support in a Wing. Its role will be to regenerate its allies shields, decontaminate and also tank the damages.
- iCutter (21.5LY / Gauss) – 1B 064M 207k credits // Variant Decontamination
- The best tank in the game at the moment, and the fastest large ship. However, its maneuverability leaves much to be desired, and the AX experts are debating this ship a lot. The weapons spaces are not optimal.
One of the best fights against an Hydra
Main sources are: