This post is also available in: Français (French)
WARNING, this guide isn’t up to date, read it [here] in English!
Update: 8th of February 2020
![]()
Prepare the Hubble, let’s leave the Bubble: Welcome to the Exploration Guide!
To explore the worlds and the many neutrons! To unite all pilots within our nation! To Supercharge our adventures and love! To push the boundaries and always aim above! Nicou! You! Team-xplorer blast off at the speed of liiiiiight! Fuel Scoop now or prepare to die!
Other guides: Miner | Trader | Pirate | Fighter | Liner | AX Combat
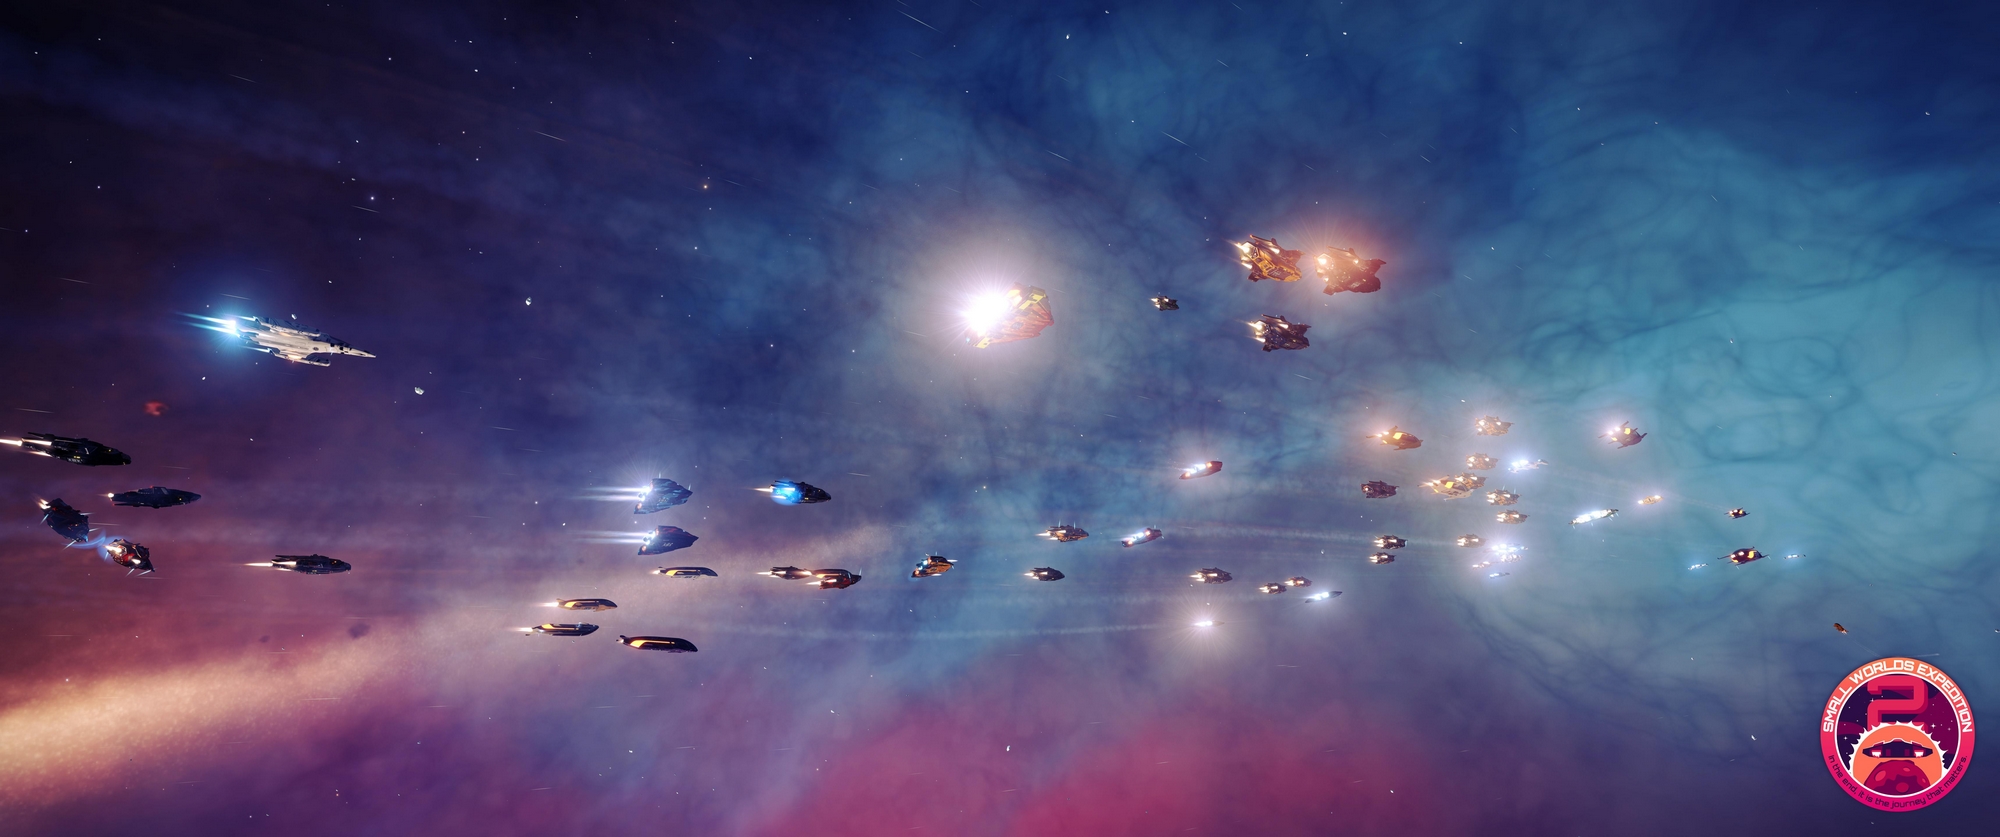
Small Worlds Expedition 2
Summary:
The role: Explorer
As an explorer, your goal will be to move away from the human space in order to discover new systems and planets that may be of interest to humanity. While exploring space, you will discover many systems, some of which could help foster economies, contain interesting materials or even shelter life! Then, sell all your data and earn your well-earned credits.
What qualifies a good explorer?
- A light but very well equipped ship for your many plans: Exploration in space or on the surface, Cartography, …
- Weapons are recommended but not mandatory, in order to protect you from the pirates’ interdictions or unexpected encounters. At least a very fast ship of at least 500 m/s. If your ship is destroyed, your data will be lost. A Shield is advised.
- Outfitting: Surface scanner, excellent FSD, repairing module, heat sinks, a SRV bay, a fuel scoop, Guardians FSD Boost, …
- A jump range as high as possible in order to go fast and far, however you may miss some interesting systems on your way, it’s up to you. Usually, 30LY to 50LY is the average of a good explorer. The comfortable zone being around 50LY to 65LY, and the best around 83.5LY but they are very fragile and light. Once again, don’t neglect your security and role for more jump range. It all depends on what you want to do.
- A sturdy Power plant to dissipate heat and stay longer in flight.
- Knowledge of systems, stars, their prices, their dangers and the scoopable stars.
Ships and modules
Every ships can explore the confines of space, yes… but some are of course better than others. Let’s see what Elite: Dangerous has to offer to explore in the best conditions. I myself started in a Viper MkIII, others do it in Eagle MkII or even in Type 9. They are far from optimized for this role but again with Elite: Dangerous: take a ship and have fun!
– Quick Exploration
Every ships can explore, as they all have an integrated Discovery Scanner and the Analysis Mode available. This mode turns your interface blue.
Don’t forget to buy a Detailed Surface Scanner to scan interesting astral bodies.
A Fuel Scoop and a few other options like a Repairing module if you explore high Gravity planets.
Tibeule, exploring in a Sidewinder
– Long Exploration
Each of these builds allow you to explore securely.
It is possible to create extremely lightened, stripped versions, in order to increase even more your jump. However note that it will prevent you from boosting, you will be very fragile and each damages like the deterioration of your FSD module will lead you to a certain death.
→ The goal is to have the longest jump range, to be as light as possible with your toolset and to keep in mind your security.
Don’t neglect your Shields, Thrusters and Power Distributors if you explore the planets’ surfaces.
If your modules aren’t powerful enough, your ship couldn’t handle the high gravity… and you will fall like a rock!
- Hauler (32.2LY) – 1M 384k credits // Hauler, enhanced Engineers & Guardians (63LY) // Hauler, optimisé surface (45.2LY)
- With jumps up to 28.5LY in its standard version, the Hauler will be your first ally if you are an explorer. Your best defensive allies will be your smallness and speed in order to quickly get out of difficult situations. For longer explorations trips, consider adding a Surface Reconnaissance Vehicle (SRV) and a Repair Module as well as better Thrusters.
- Type 6? Yep, why not! However this ship is better at short range exploration, that’s why traders love it for the Rare Trading routes. In the end, it tends to heat quite rapidly, and you will end up with recurring damage to your internal modules.
- DiamondBack Scout? Still ok, but you can do better for less with a Hauler.
- Diamondback Explorer (39.27LY) – 12M 827k credits // DBX, enhanced Engineers & Guardians (74.24LY)
- An excellent step before the Asp Explorer, the DBX is the ship with the highest jump range without optimizations, but of little use once you bought an AspX. It is one of the best, if not LE best for dissipating heat, which allows the ship for quicker FSD jumps while you’re still near the stars, where other ships would need to move further away so they don’t overheat. The DBX has a better jump range than the AspX, but fewer survival tools.
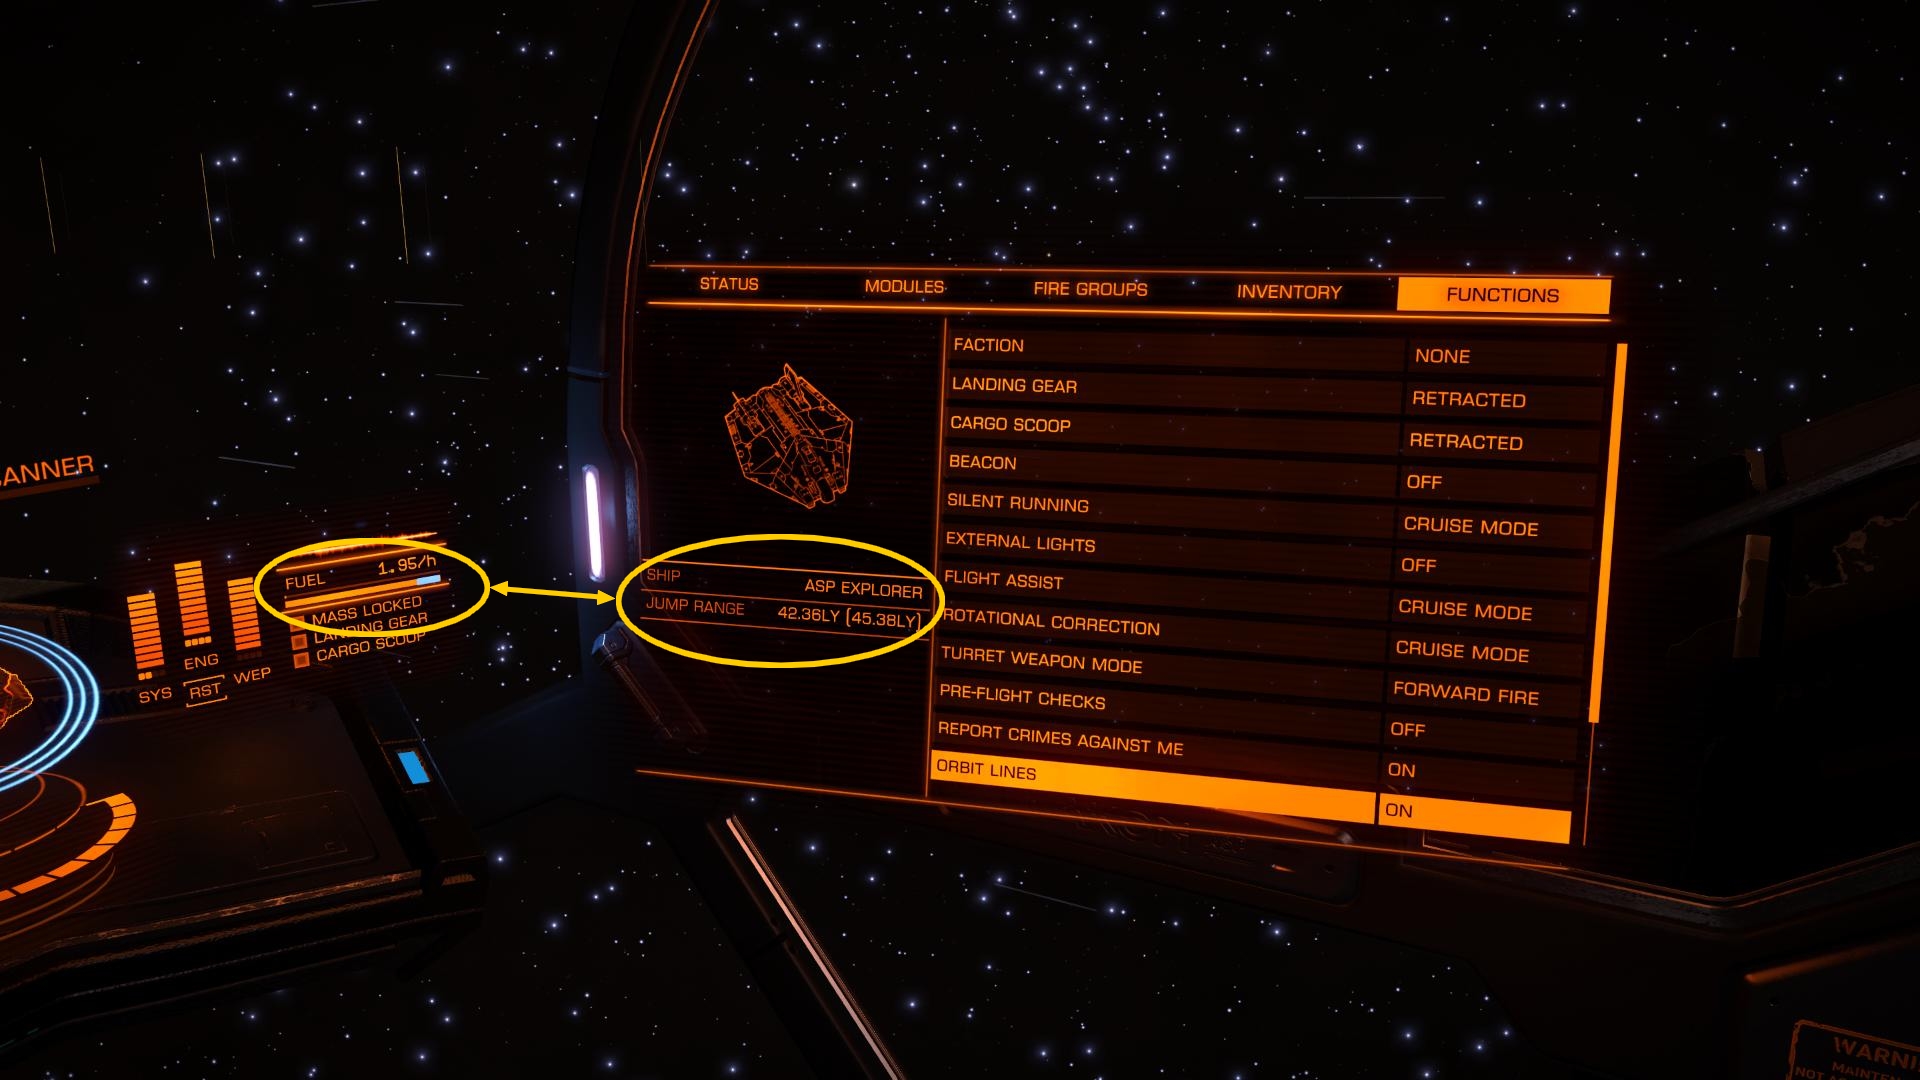
- Asp Explorer (34.83LY) – 43M 688k credits // AspX, enhanced Engineers & Guardians (71.18LY)
- The Asp Explorer is designed to take you anywhere, with all your exploration outfit. 32.36 LY is slightly less than a DBX but you will have far more equipment and modules available for your expeditions. The AspX is the companion of any veteran explorer.
- An Orca or Dolphin? Yes, it fits in the Top 5 best exploration ships! However I would rather use it as a Liner, for passengers.
- Krait Phantom (30.82LY) – 87M 374k credits // Krait Phantom, enhanced Engineers & Guardians (71.96LY)
- In the Top 3, it bolts a 28.87 LY jump without optimizations and can boost its power thanks to new technologies. It costs more than a Lakon AspX, but Faulcon DeLacy has been able to create a superior ship in every way, with better defenses. A ship at the top of its generation and excellent value for money.
- Anaconda (32.38LY) – 272M 542k credits // Anaconda, enhanced Engineers & Guardians (80.59LY)
- The Anaconda is large and does not usually jump much farther than an AspX, with 31.27 AL. However, the Anaconda is one of the best exploration ships: after optimizations, you will exceed 80 LY of jumping range, increasing to more than 320 LY after a supercharge on a neutron star. Note that I still prefer a medium ship to fly on the surface, even more near Points of Interests.
Of course you can even kill some modules to gain jump range; here, I prepared comfy ships to resist time and soften issues that might arise when you explore.

About Exploring
Here we are, once you have chosen ship and outfit, let’s go!
You will make a large number of jumps in order to travel from systems to systems to discover new places.
☼ Fast navigation and economical navigation can be switched in order to travel in different ways:
- Fast navigation: Jump as far as your ship allows, to quickly move on your route.
- Economical navigation: Economical journey, you will jump on the nearest system, saving your precious fuel. You will visit more systems.

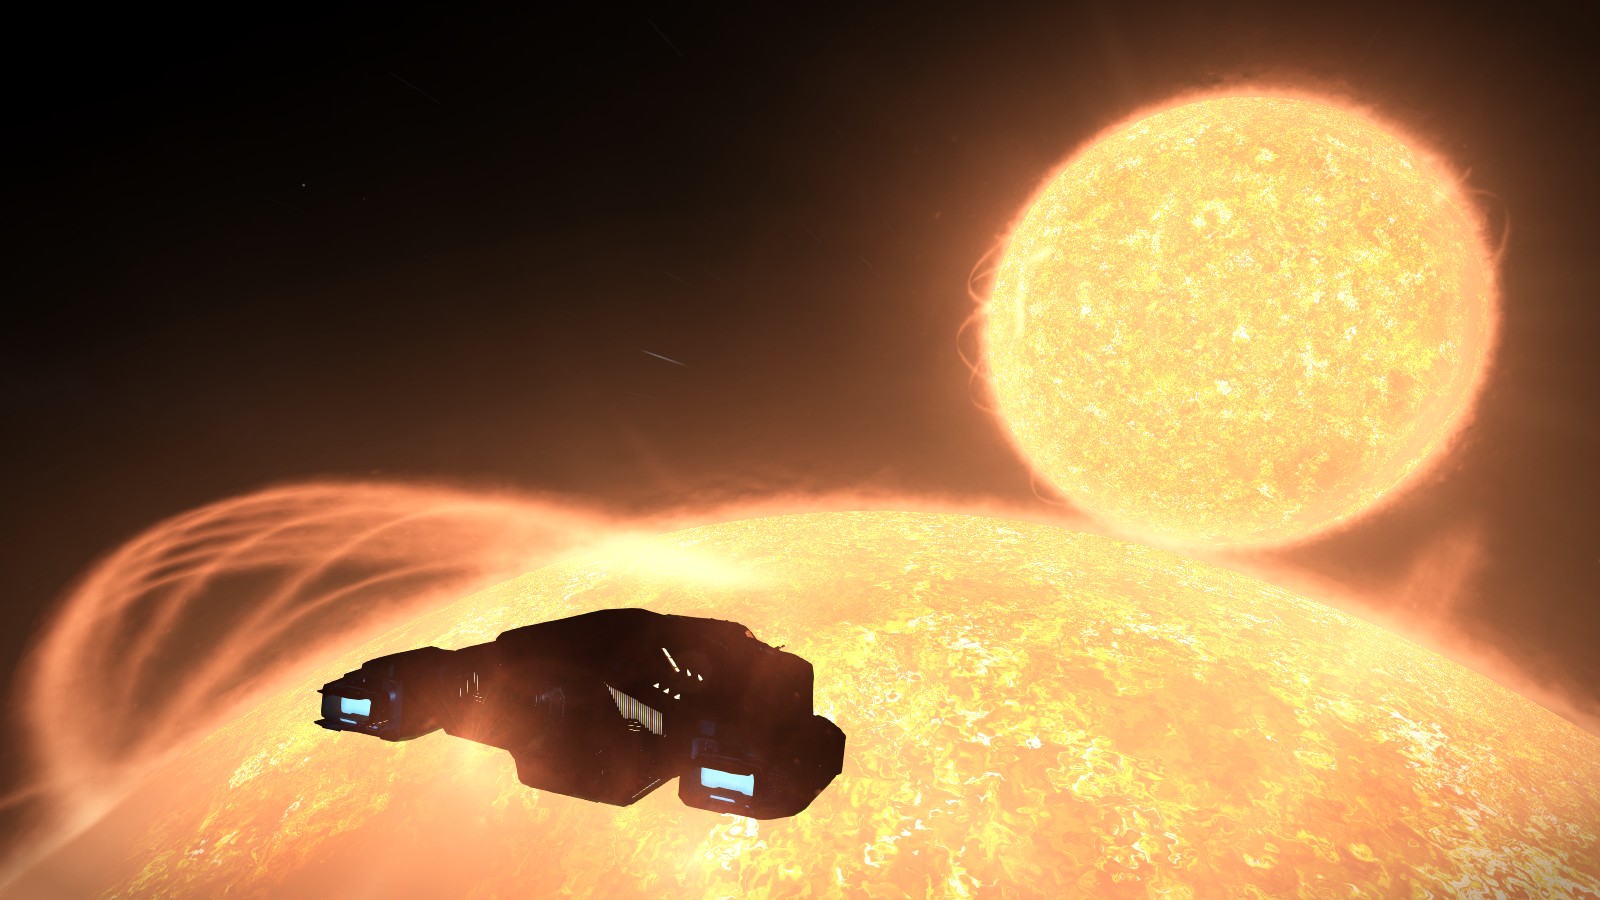
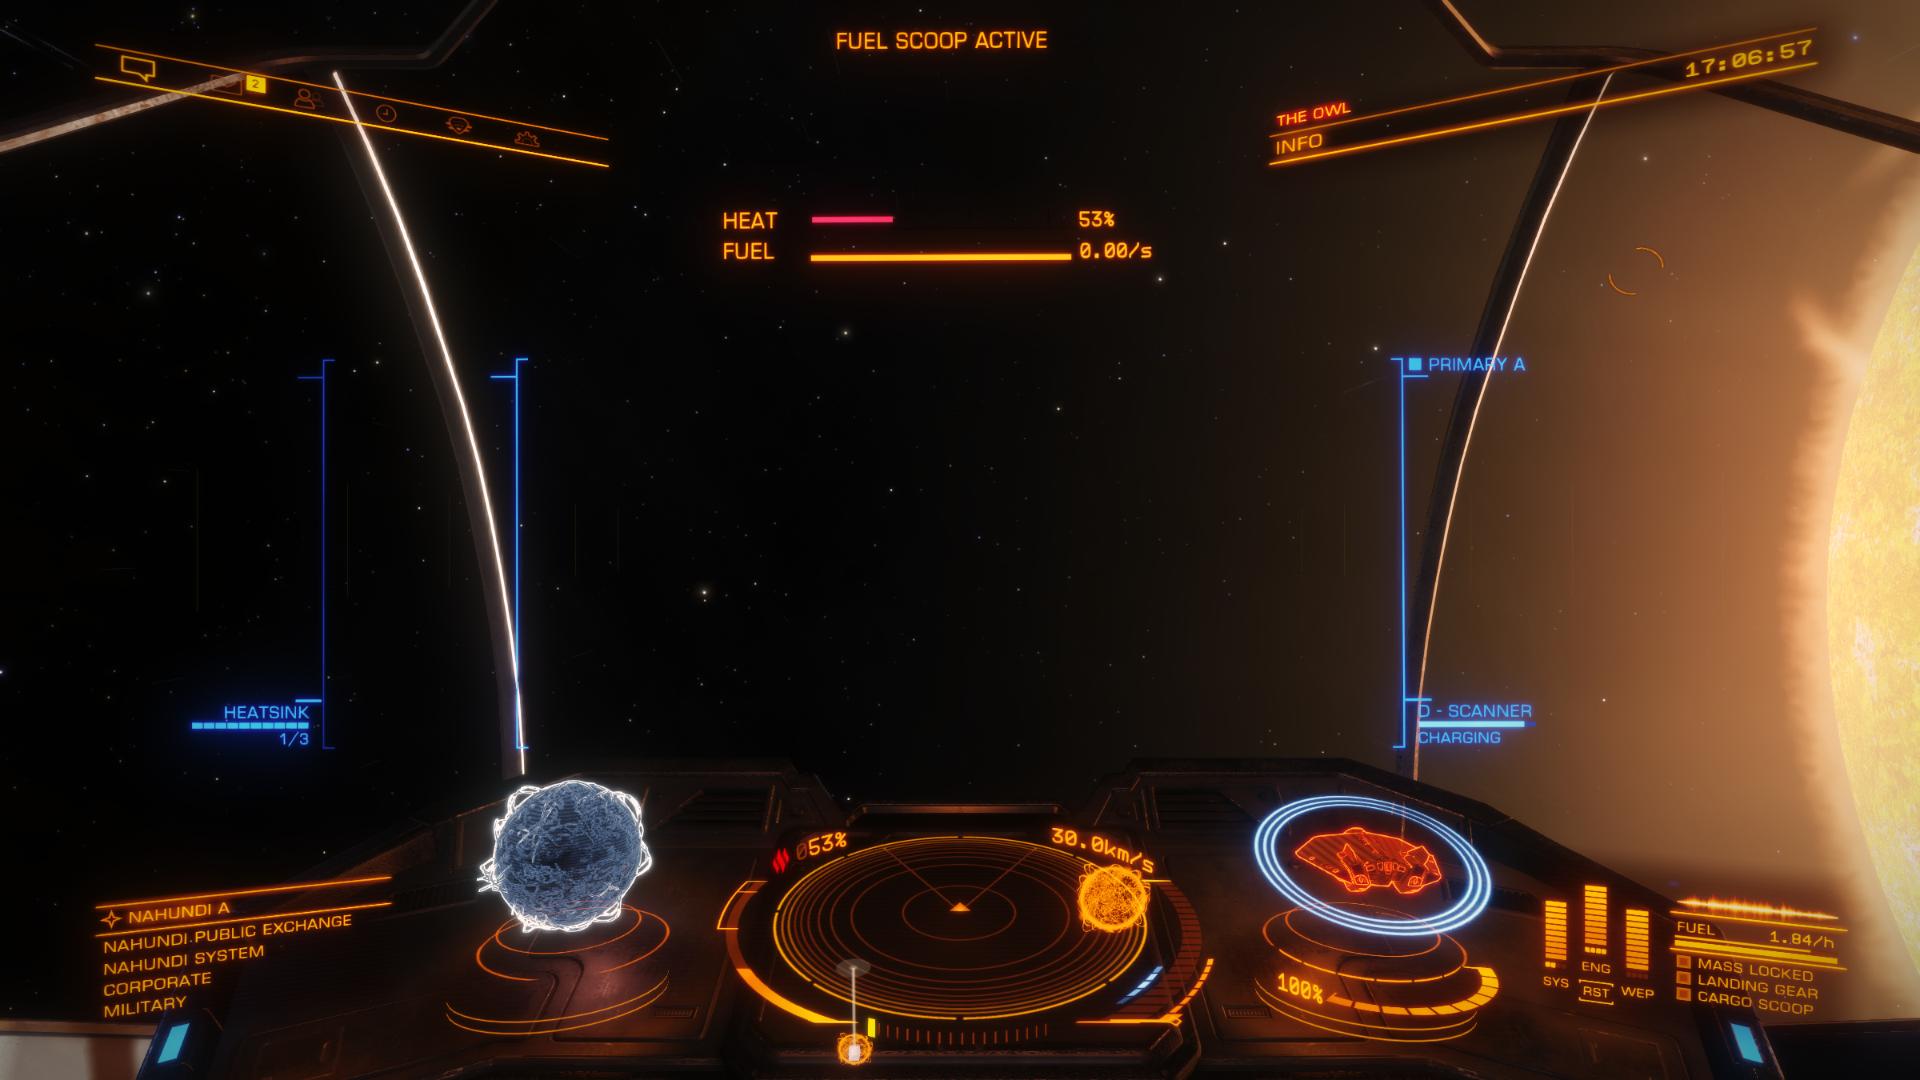
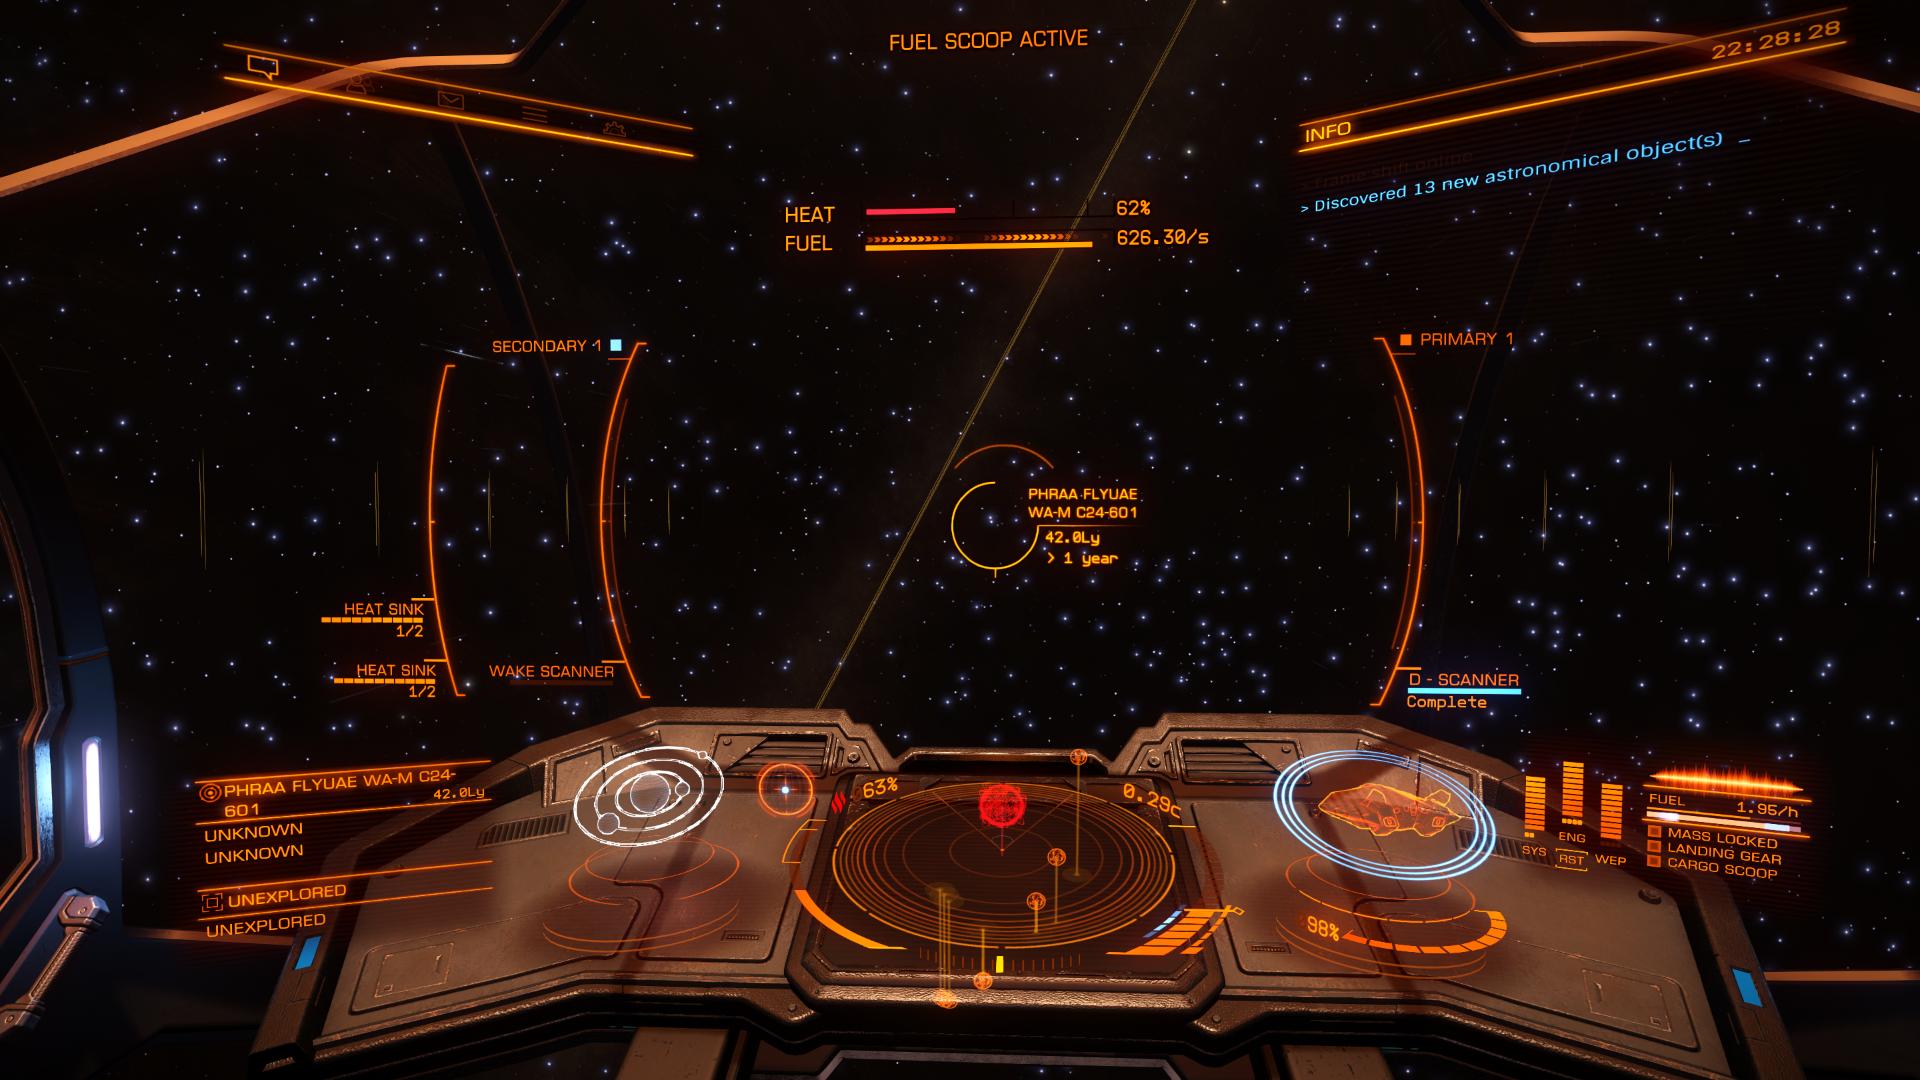
☼ With these long journeys you will have to scoop fuel on the stars. Some stars can be scooped using a fuel scoop and others are not eligible, like the brown, red or neutron stars for example. The stars have various classes and the scoopables stars are A, B, F, O, G, K and M.
Here is my trick to remember them:
- Always
- Be
- Fueling
- Or
- Gonna
- Kill
- Myself
If you have no more fuel to travel… well… you’re quite in the spatial turd. I invite you to call a friend who can refuel you, to self-destroy if you don’t have friends or better: call the Fuel Rats!
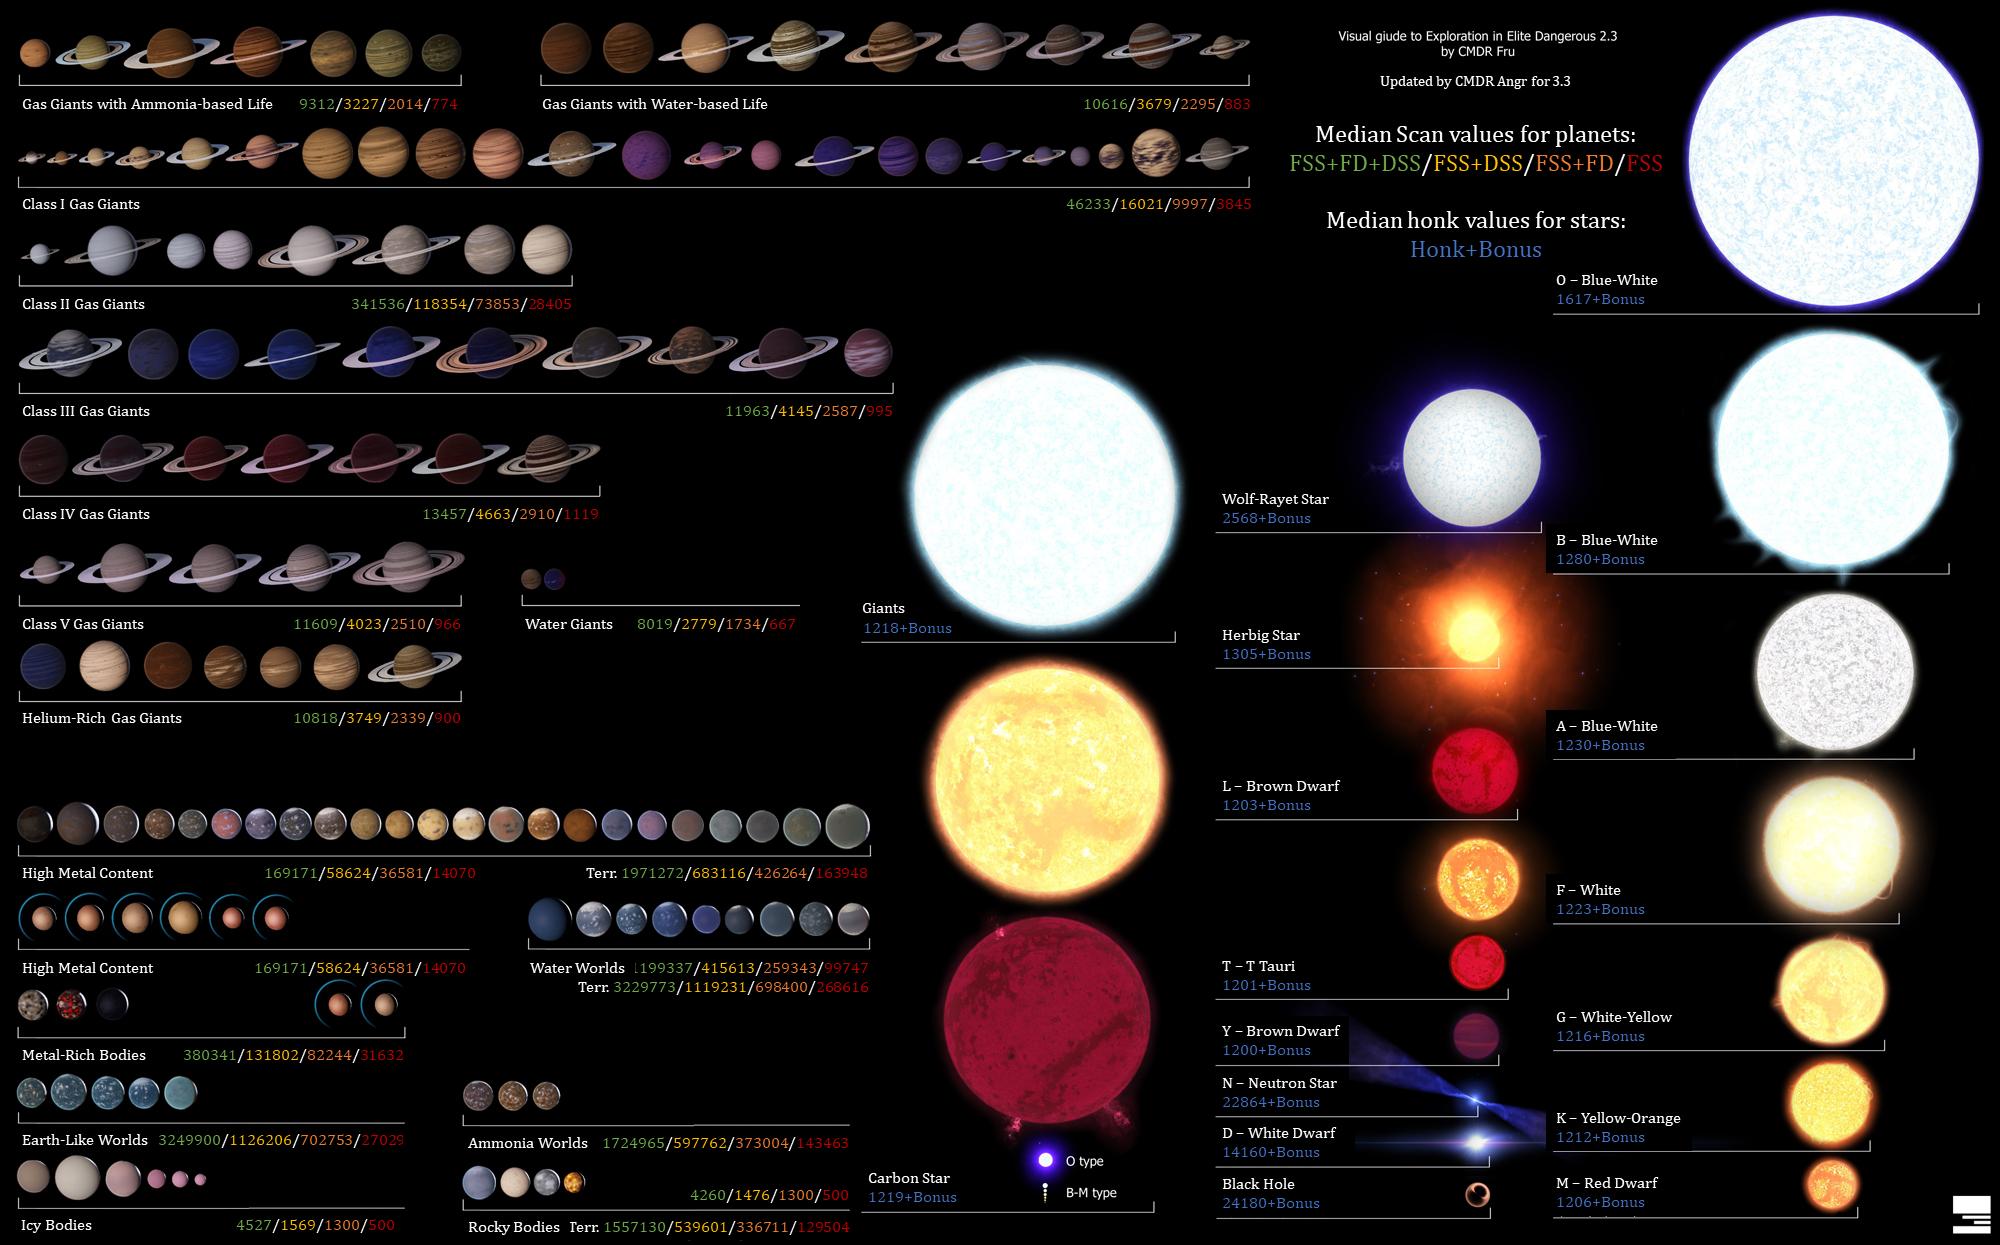
☼ Then comes the knowledge of the stars, it’s simple, take a look at the visual guide created by the CMDR Dubardo.
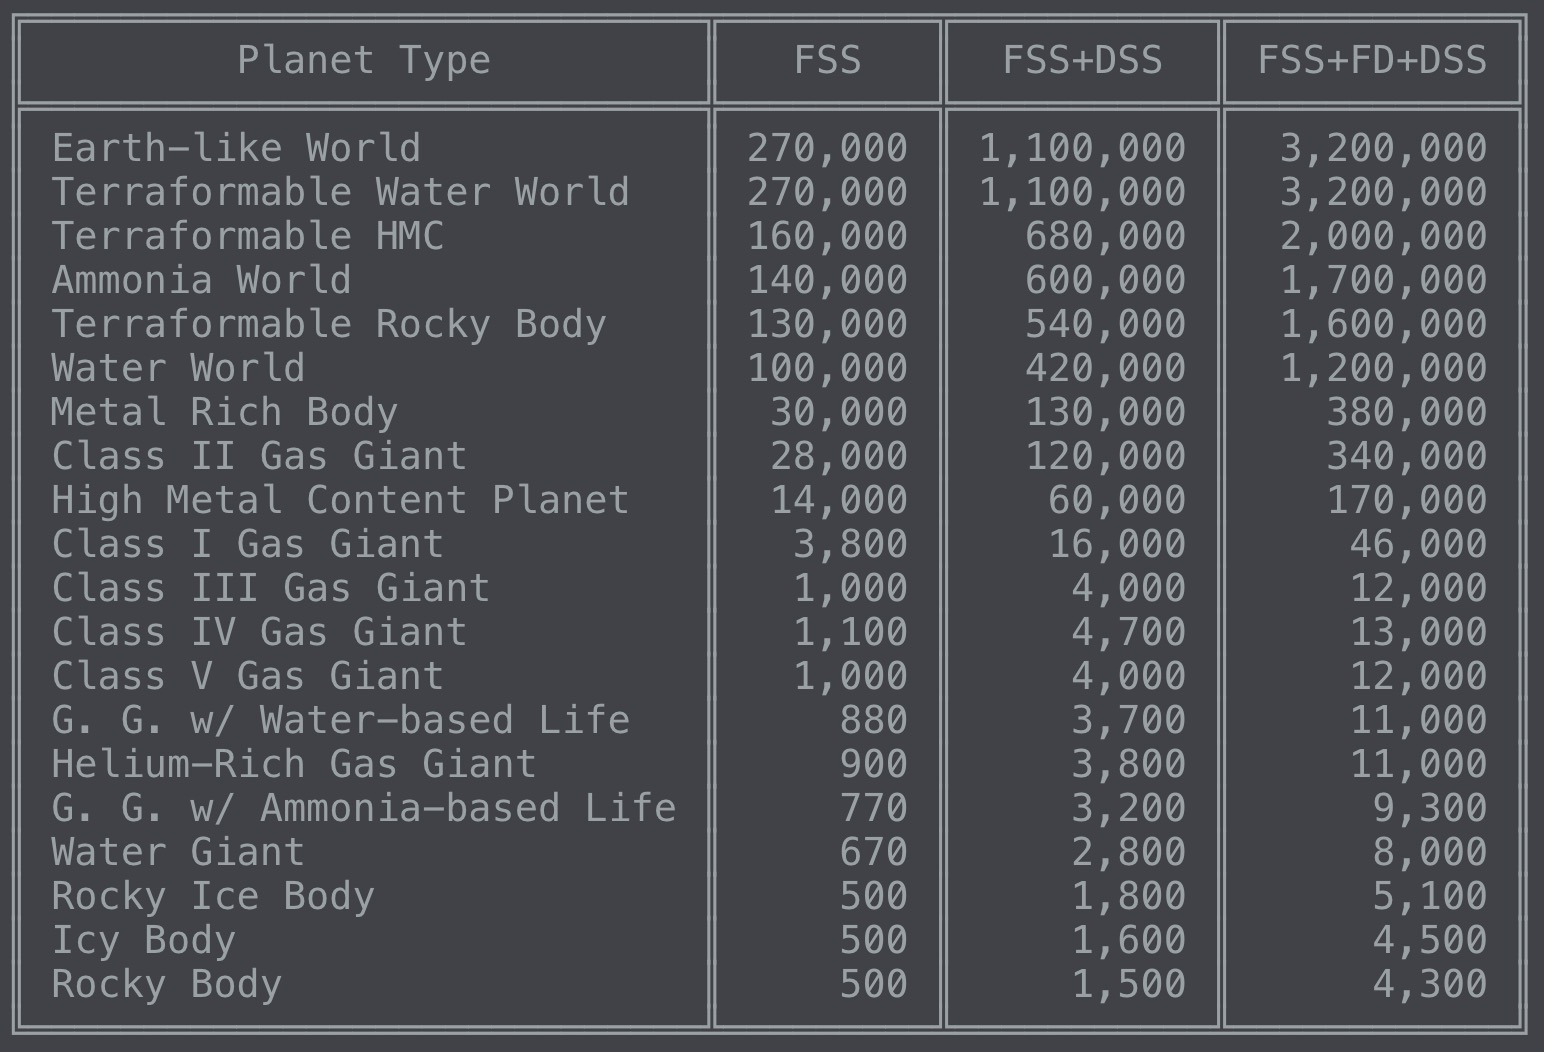
You will discover the stars, planets and more importantly their values turned into data. Better trust my second board for the values.
- FSS/Full System Spectrum = simple scan
- DSS/Discovery Surface Scanner = cartography
- FD/First Discovery = First Discovery
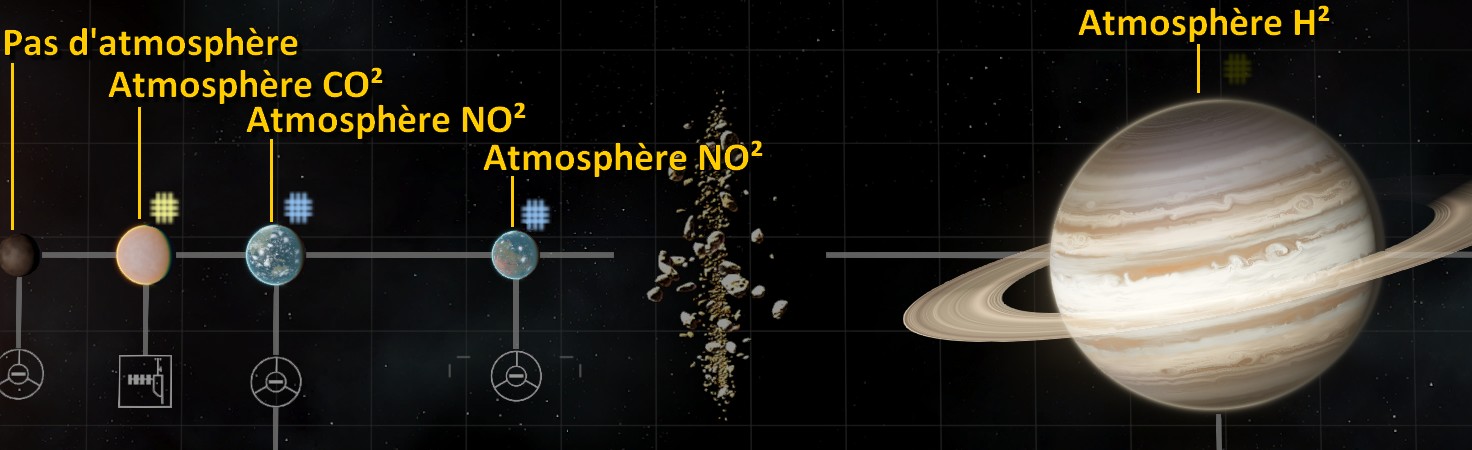
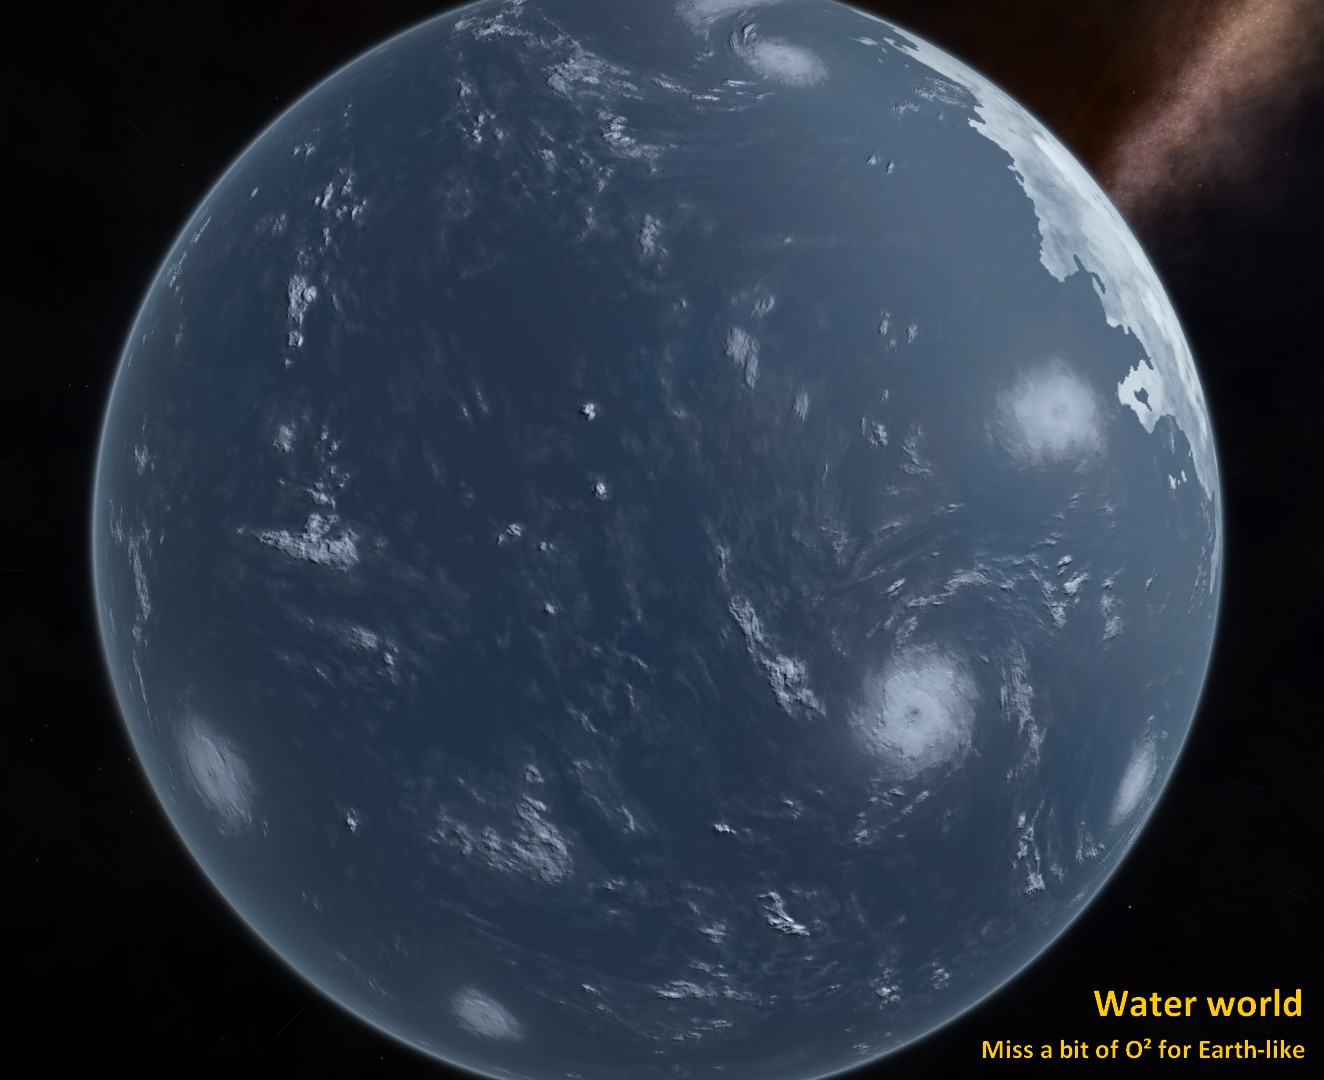
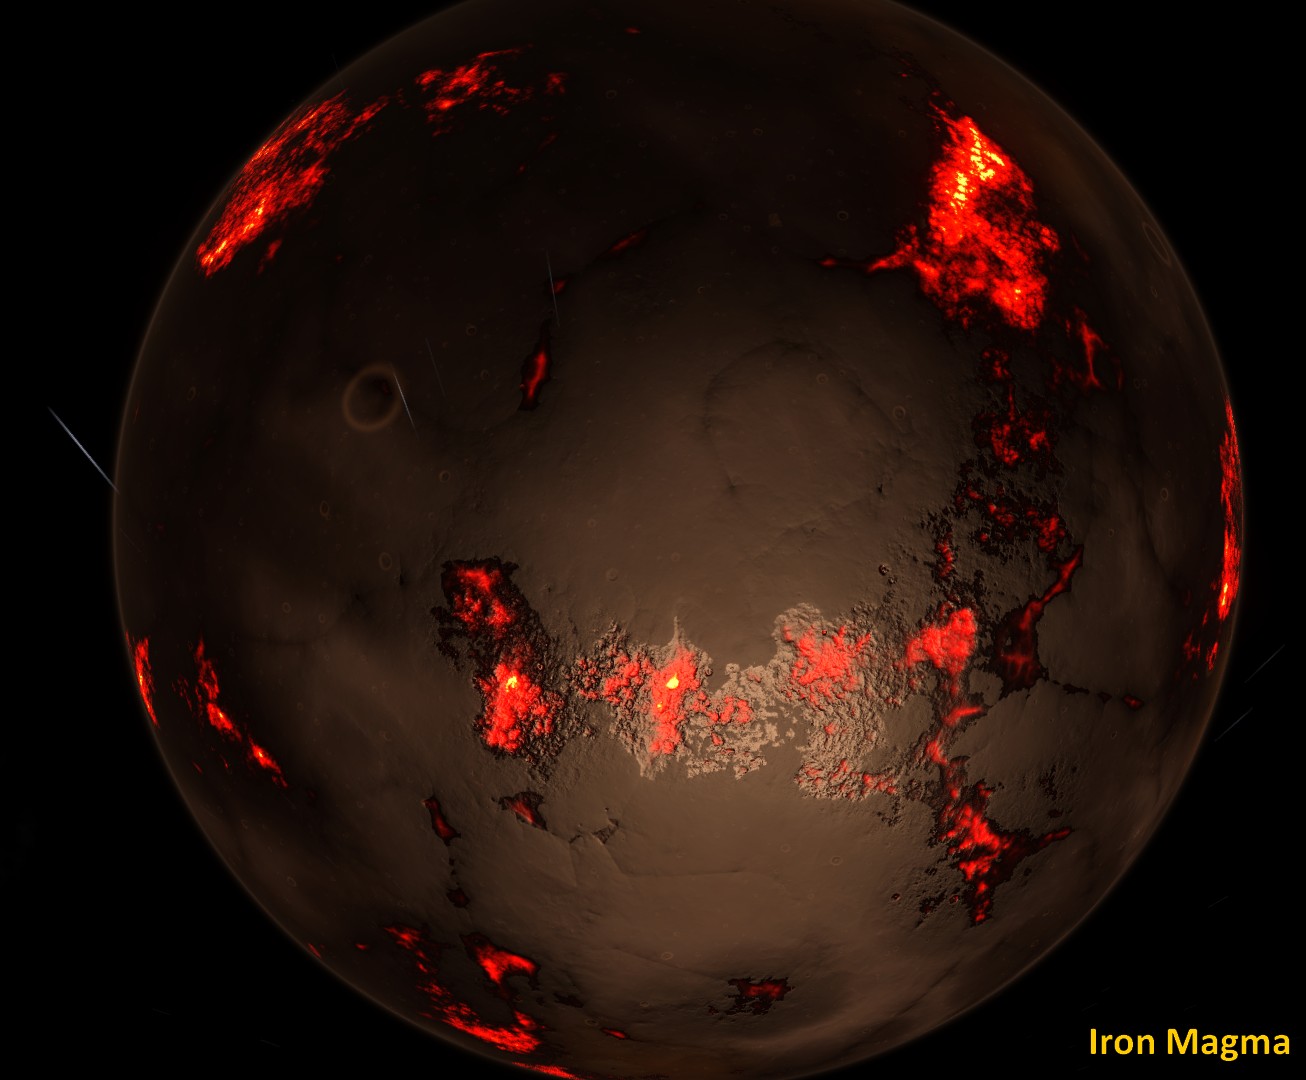
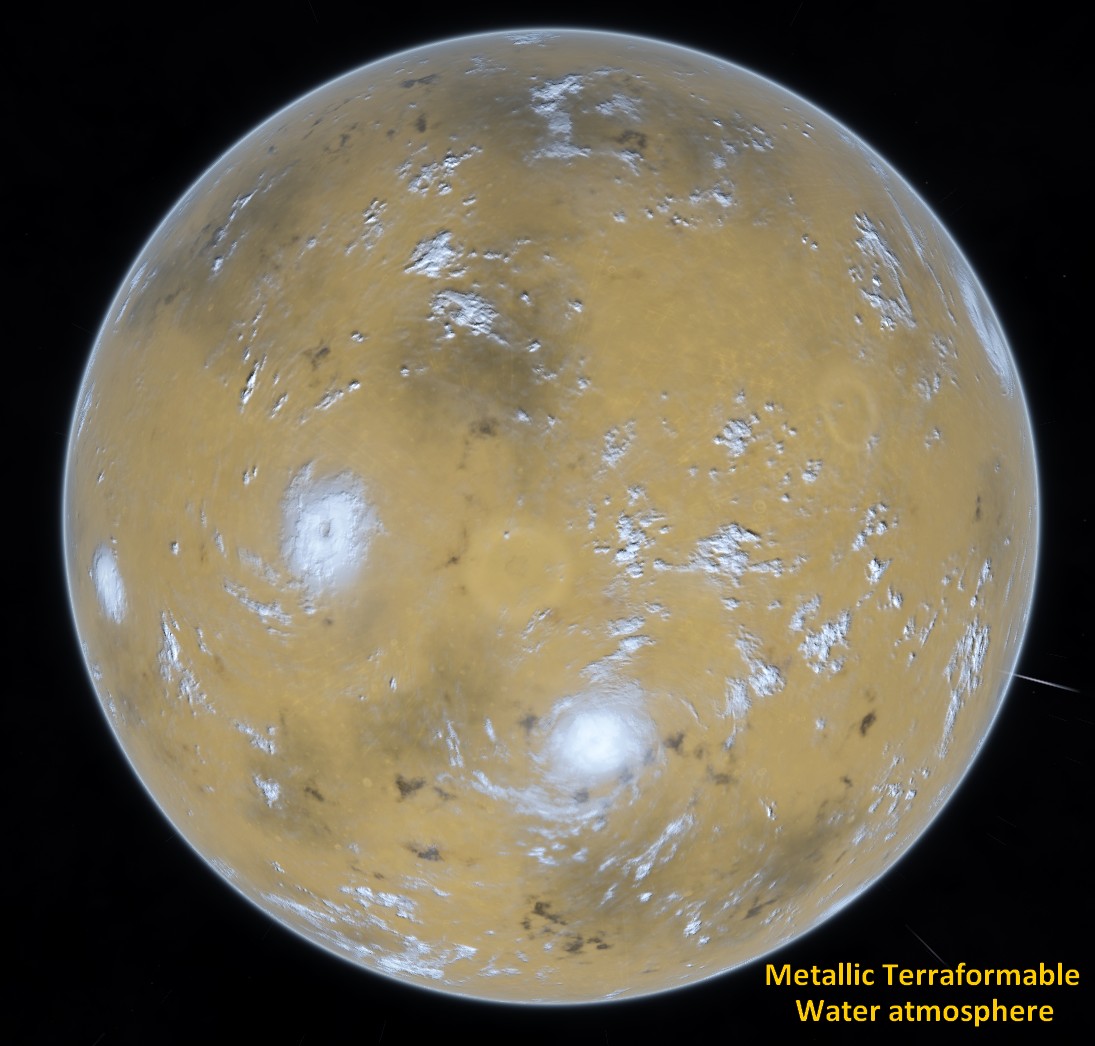
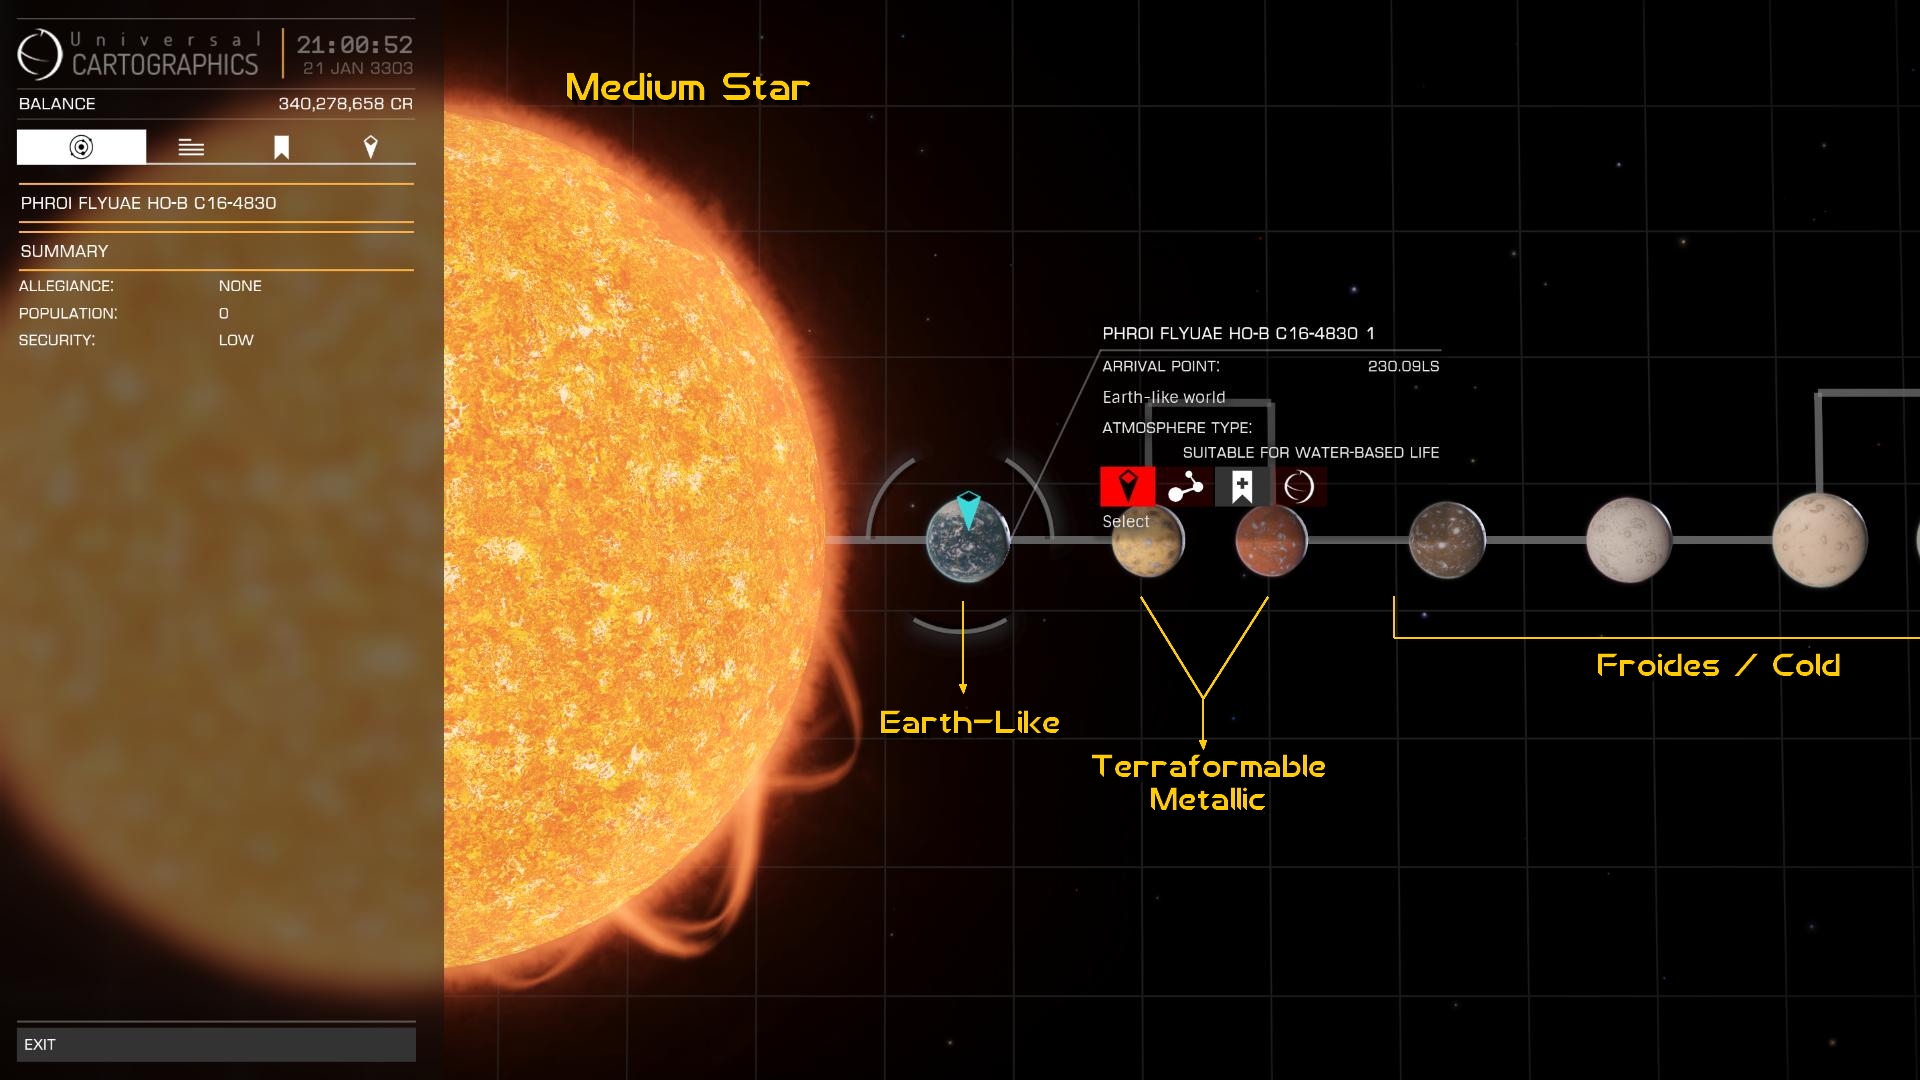
☼ Note that the planets have many parameters (composition, atmosphere, volcanism, temperature, Pression atmosphériques, …), and these parameters depend on the visual of the planet. An atmosphere can be detected by the thin layer highlighted around it. The colour of this atmosphere will change according to their chemical components and parameters:
- Yellow: Carbon dioxide (Venus, CO²)
- Green: Ammonia
- Dark blue: WaterVapour (Rare, quickly turns green if there is some ammonia)
- Light green: Methane
- Cyan: Nitrogen (Earth, NO²)
- Brown: Hydrogen (Jupiter, H²)
- …
- If there is no thin coloured layer, there is no atmosphere
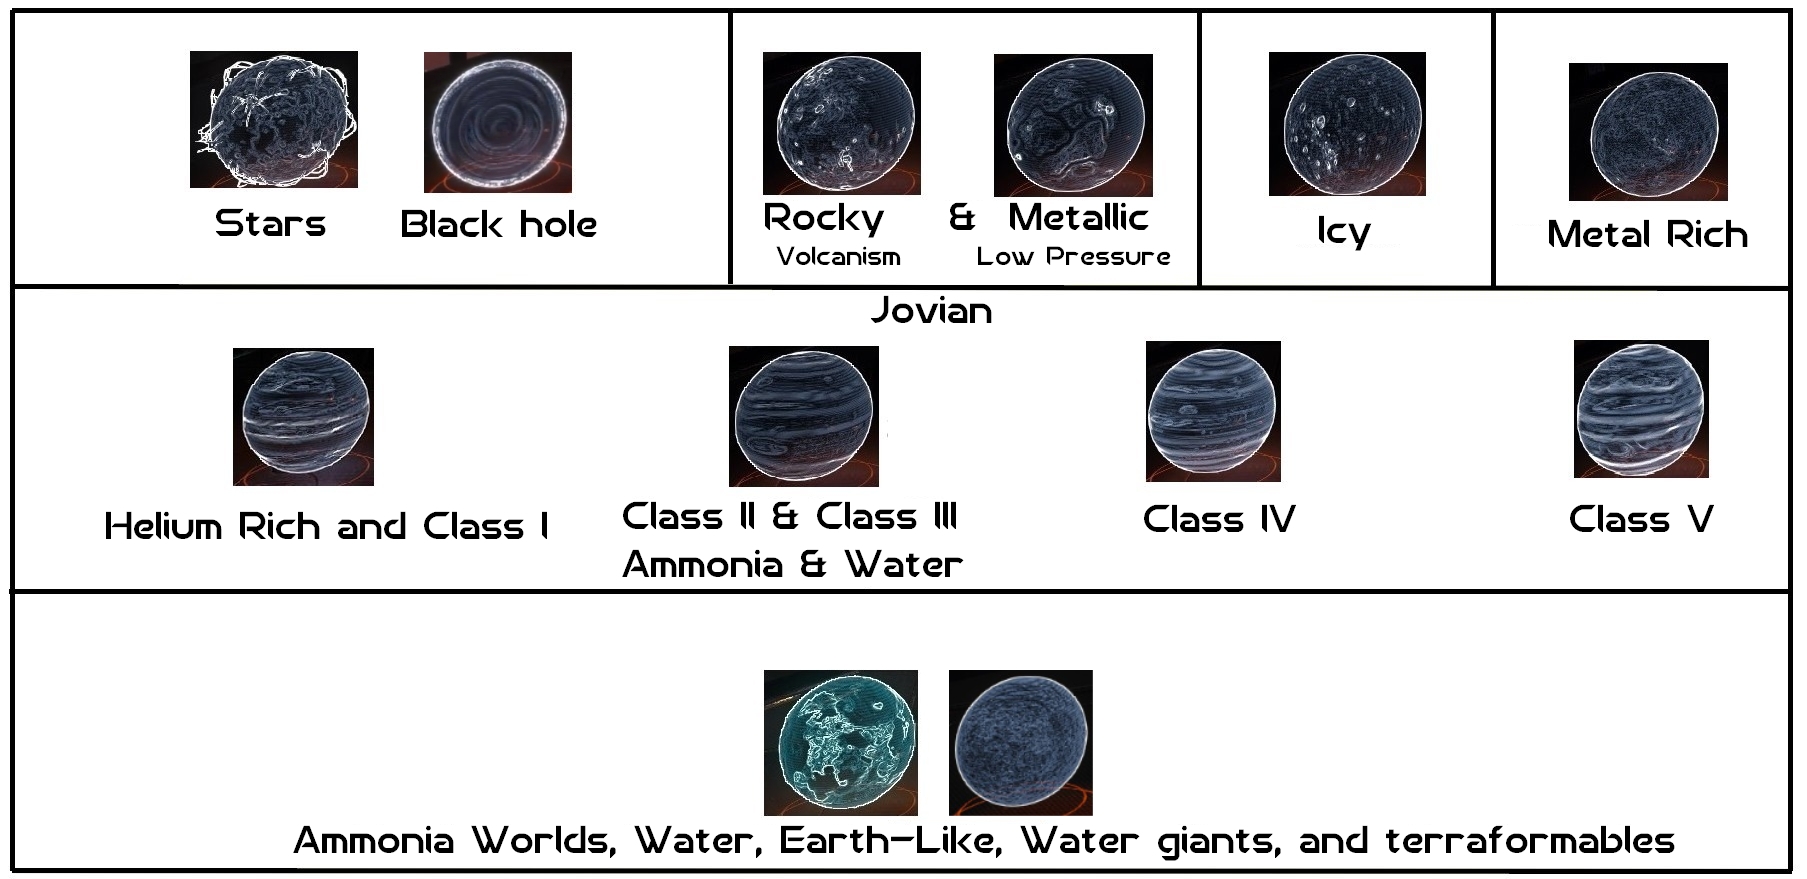
Also, when you target a planet, it will have an appropriate image in your ship. Here is a table to identify them.
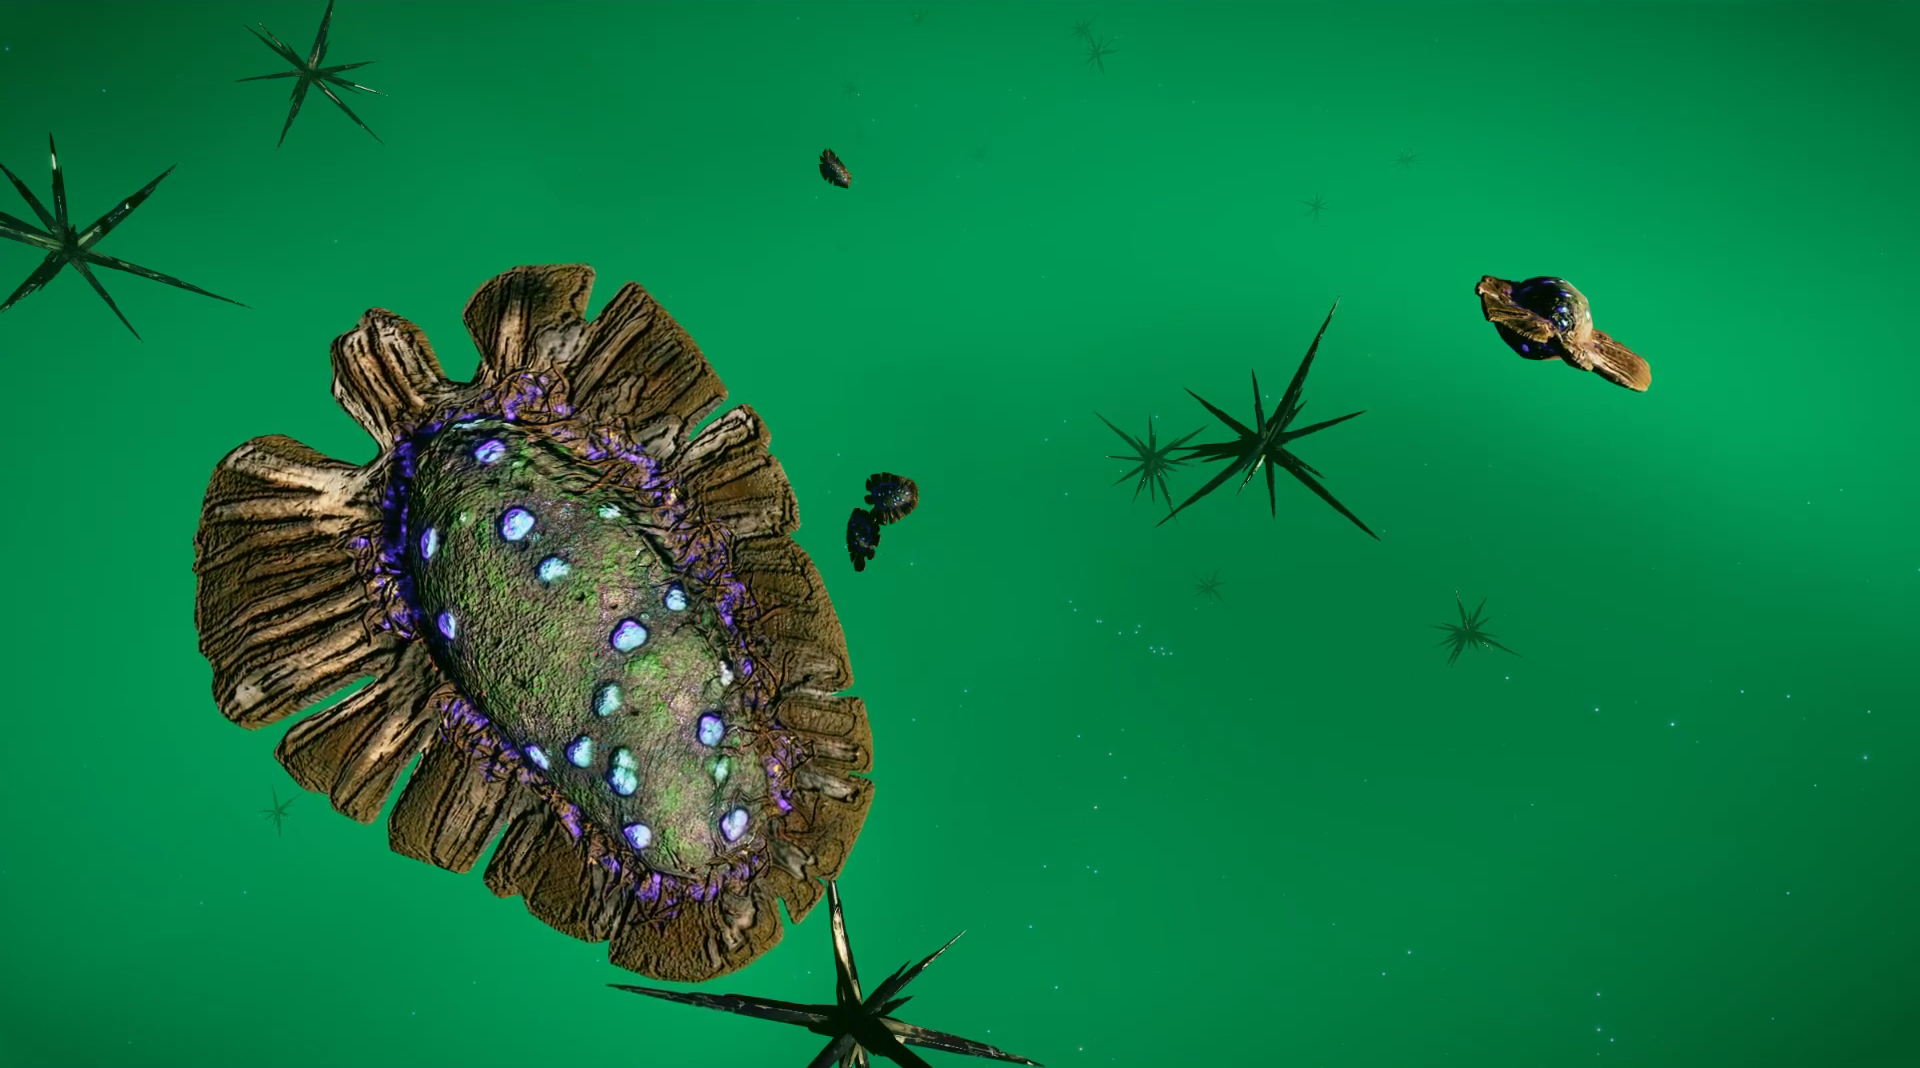
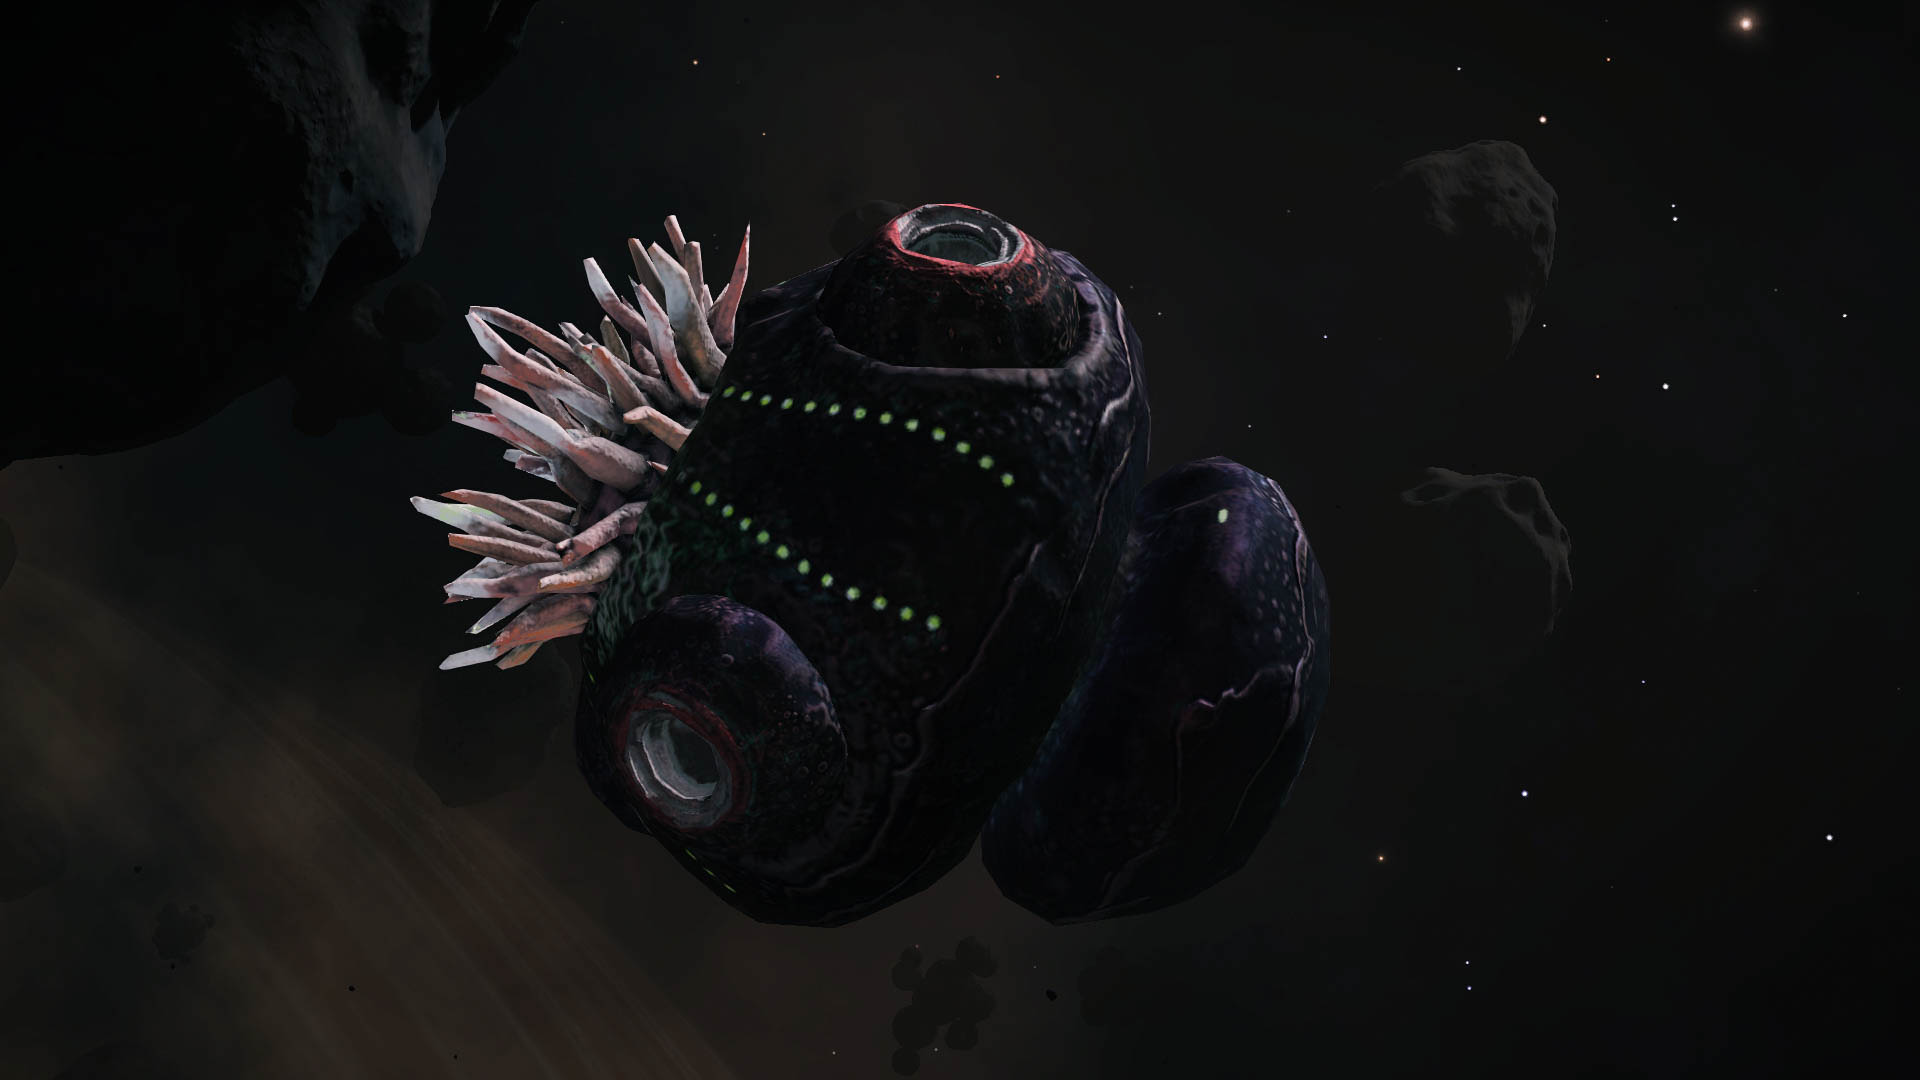
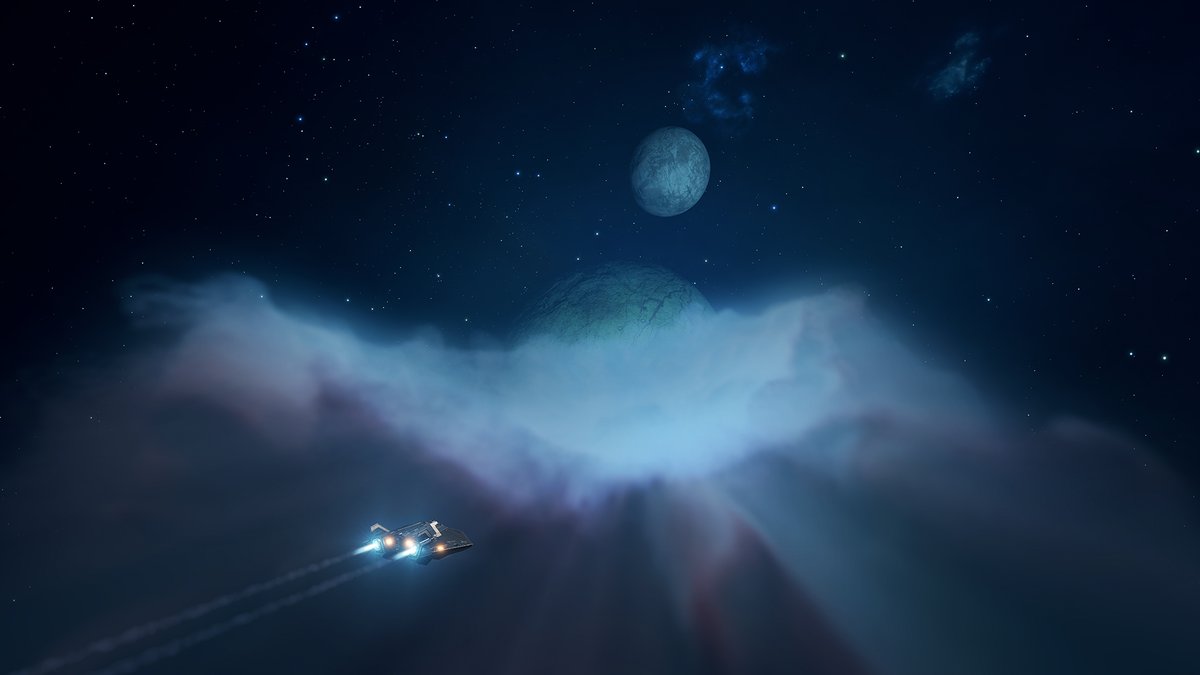
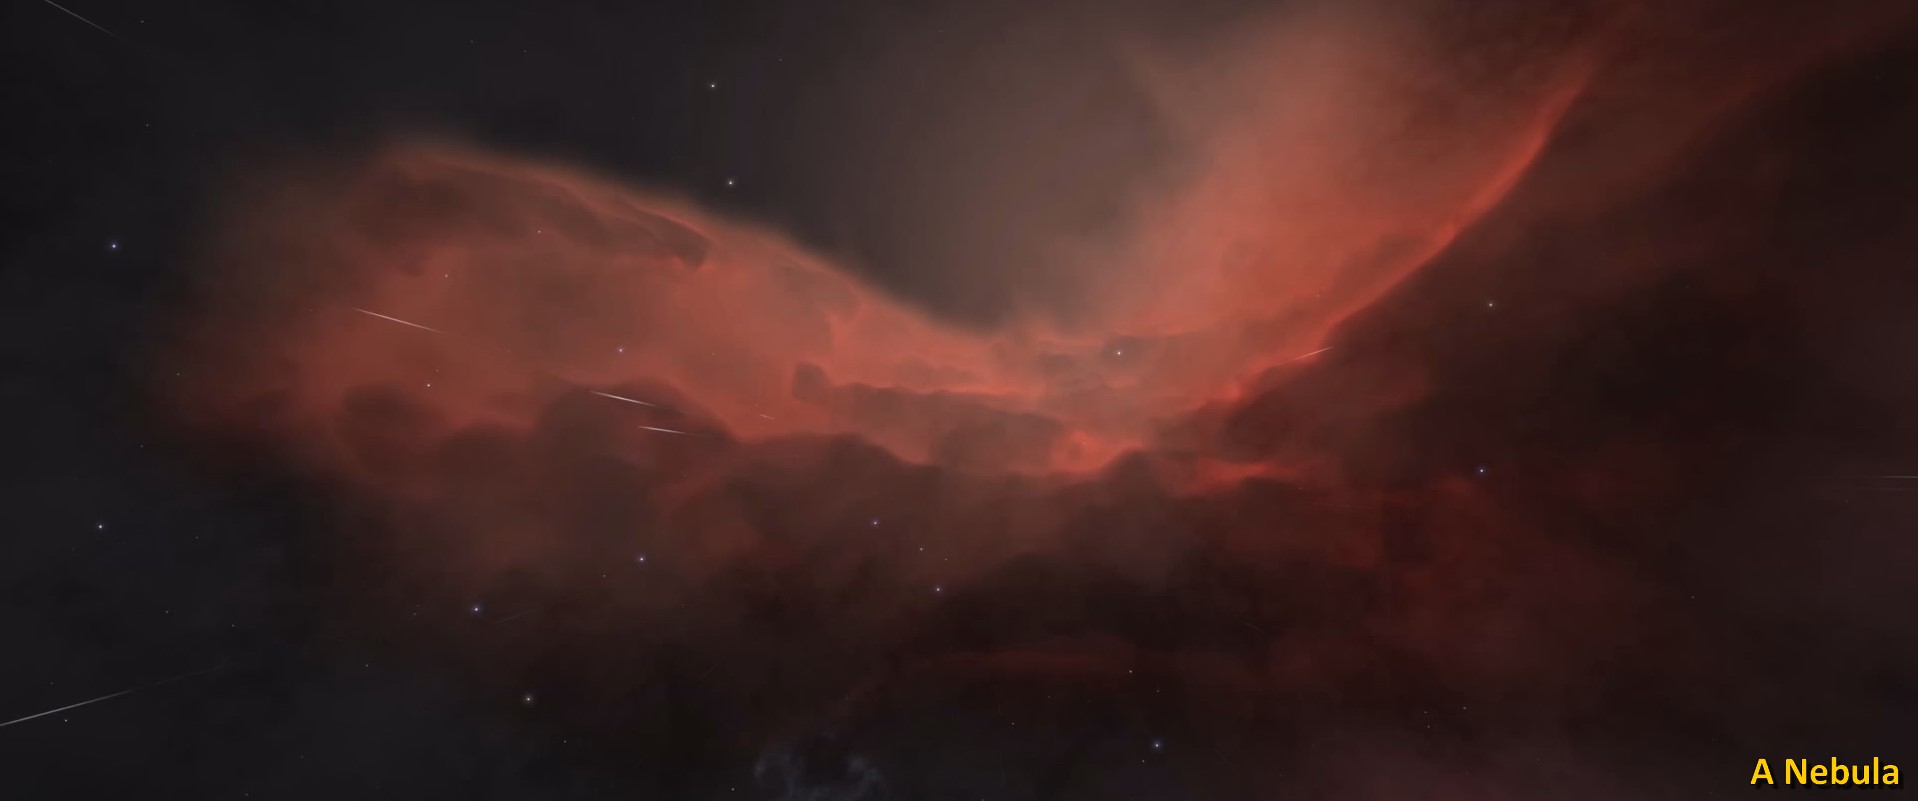
☼ I invite you to check out the Notable Stellar Phenomena in the wiki.

☼ Finally, the planets (and stars) emit sounds. Sometimes it will be difficult to identify the planet in visual terms; It must be identified by ear in order to learn more about it.
To do this, open your system map and target a planet with your cursor (click to align). A sound will pop a few seconds later (disable the ambient sound in system map via the sound parameters) and don’t hesitate to increase the volume to better hear it.
Note that the audio has been improved for exploration in 3.3 and in addition to being able to pre-analyze the signals and patterns, we will also be able to recognize the signals by their sounds.
Frontier Developments has partnered with The British Antarctic Survey to capture great realistic sounds. We could do that in the system map previously, but it’s now directly in-sys with improved audio.
- Icy: Blowing wind, feeling of cold.
- Metal Rich: A “viuuuuu”, sounding like an electric guitar. Some weak winds if there is an atmosphere.
- Water World: Low sound of boiling water.
- Jovian planets (giant): A wind blowing strong enough, depending on the class of jovian giant.
- Giant jovian with water-based life: A strong sound of continuous flowing water, like a river.
- Giant jovian with ammonia-based life: A low noise of bubbling and liquids.
- Giant Water: Like the Water World, with a roaring and more powerful noise.
- Earth Like World (ELW): Feeling of forest, hooting birds and even caw-caw echoes.
- Ammonia World: Hollow, echoing sound. Feels like objects hitting the insides of a very deep and large tunnel.
- Helium Rich Jovian: A strong sound of continuous flowing water, like a river, but the sounds decrease with time.
Note that, as you approach the planets and stars physically, they will also emit an ambient sound relative to their type. You might hear thunderstorms and intense noises of bumping rocks if you approach a planet atmosphere and its light atmosphere, while the latter has a ring of asteroids.
Analysis Mode, FSS and Cartography
Every ships have a Combat Mode and an Analysis Mode.
The latter allows the pilots to explore the systems, without limit of range, thanks to the FSS: Full Spectrum System.
Start the FSS to scan the surroundings.
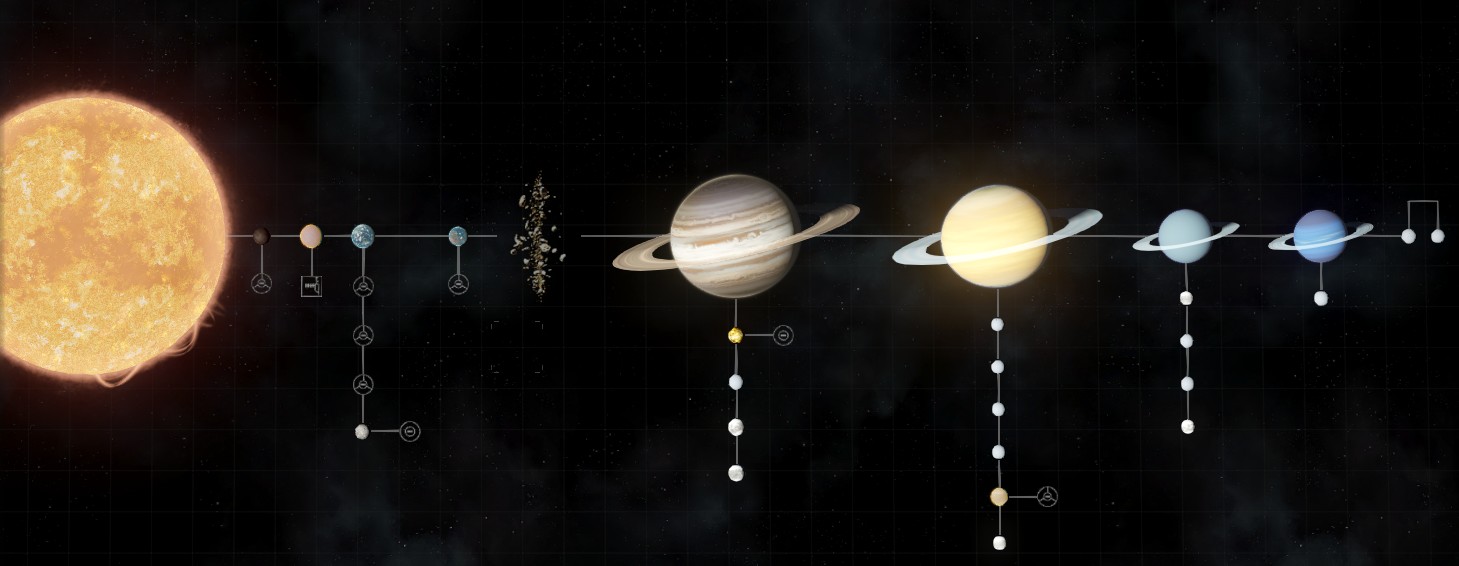
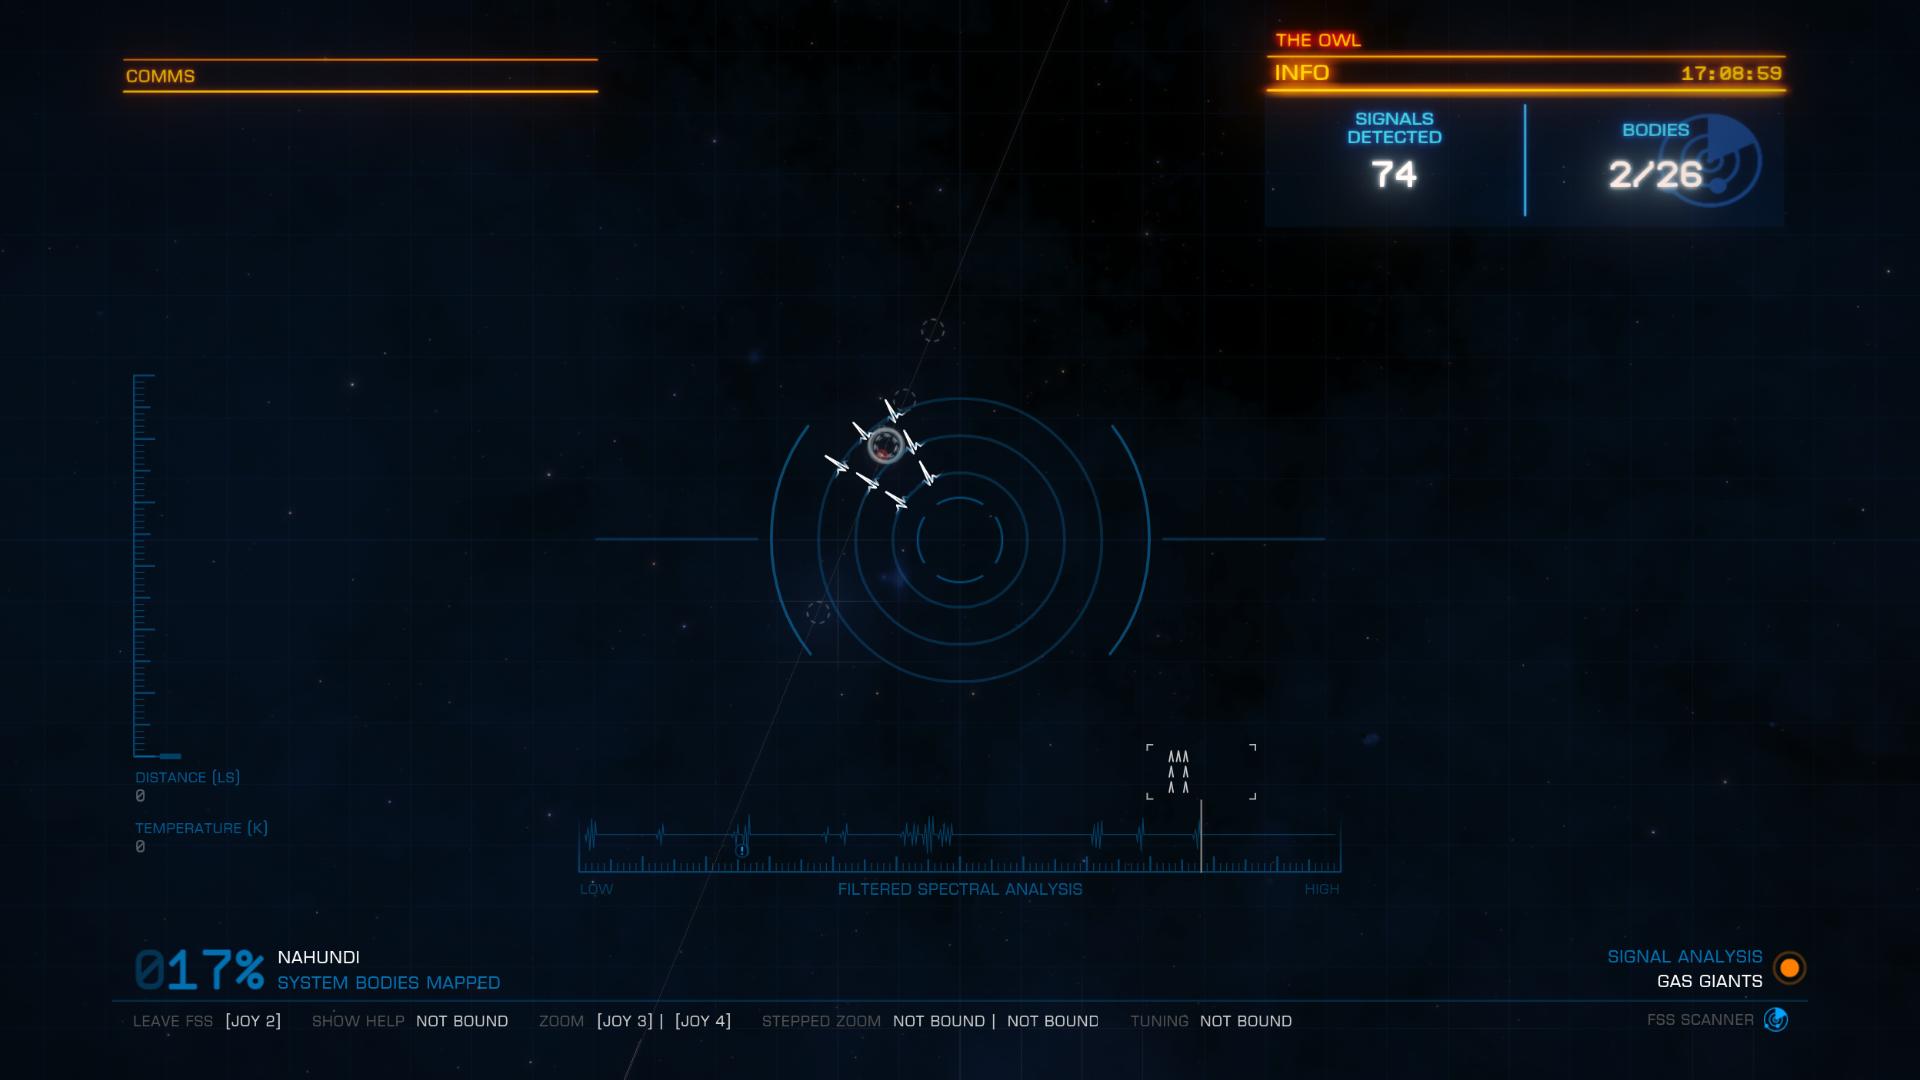
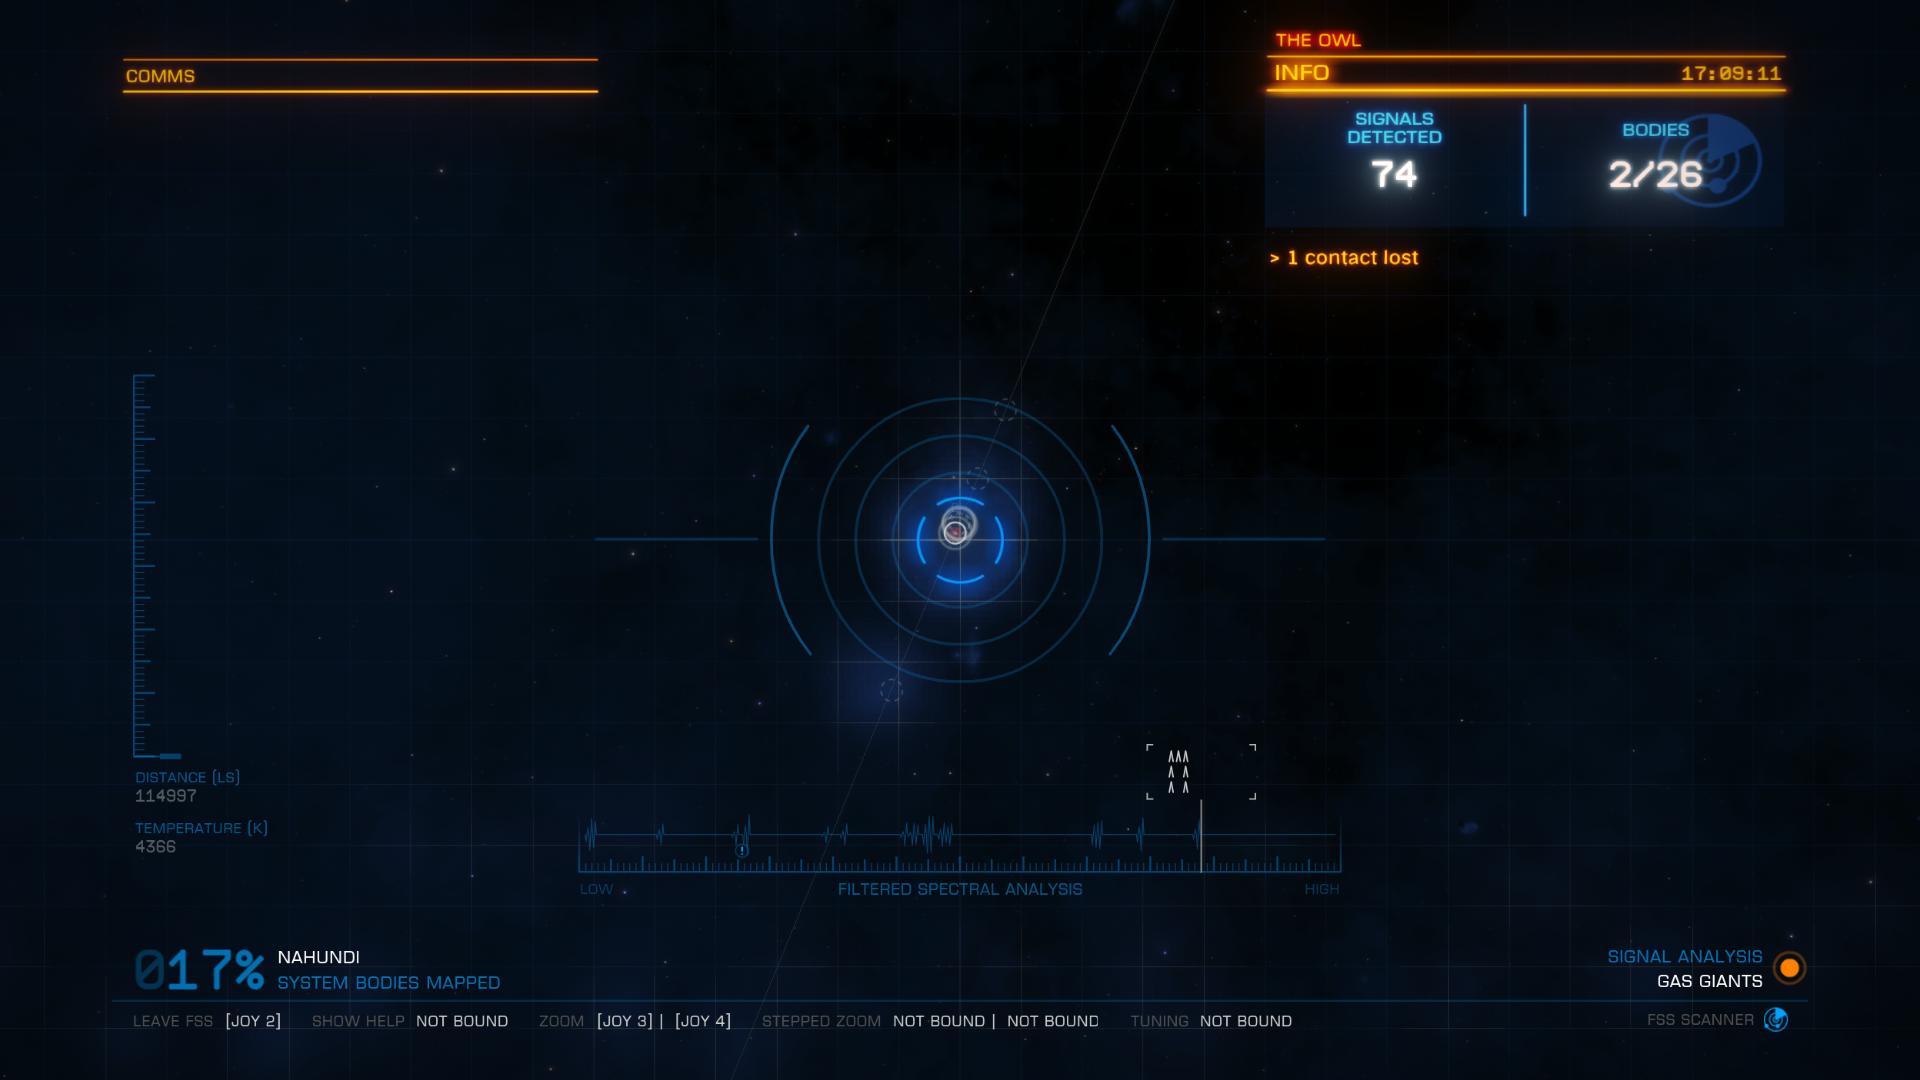
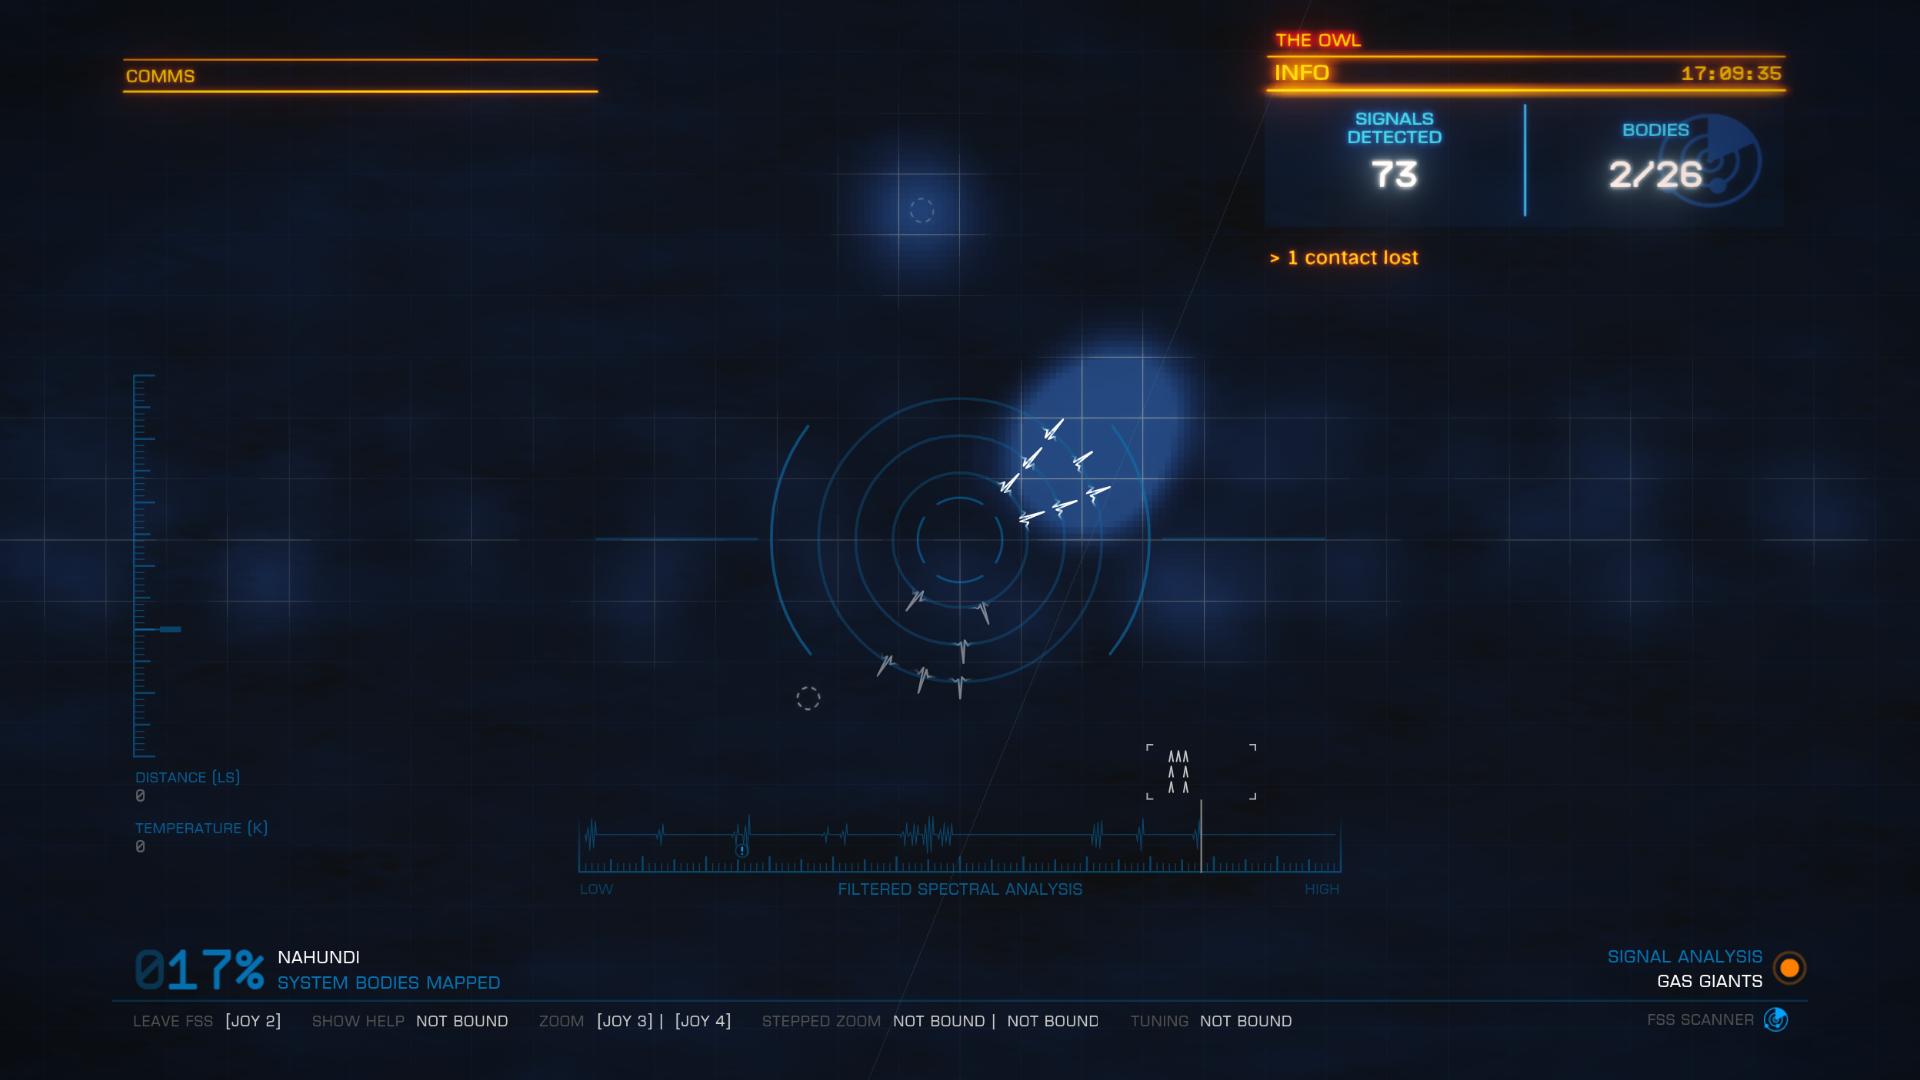
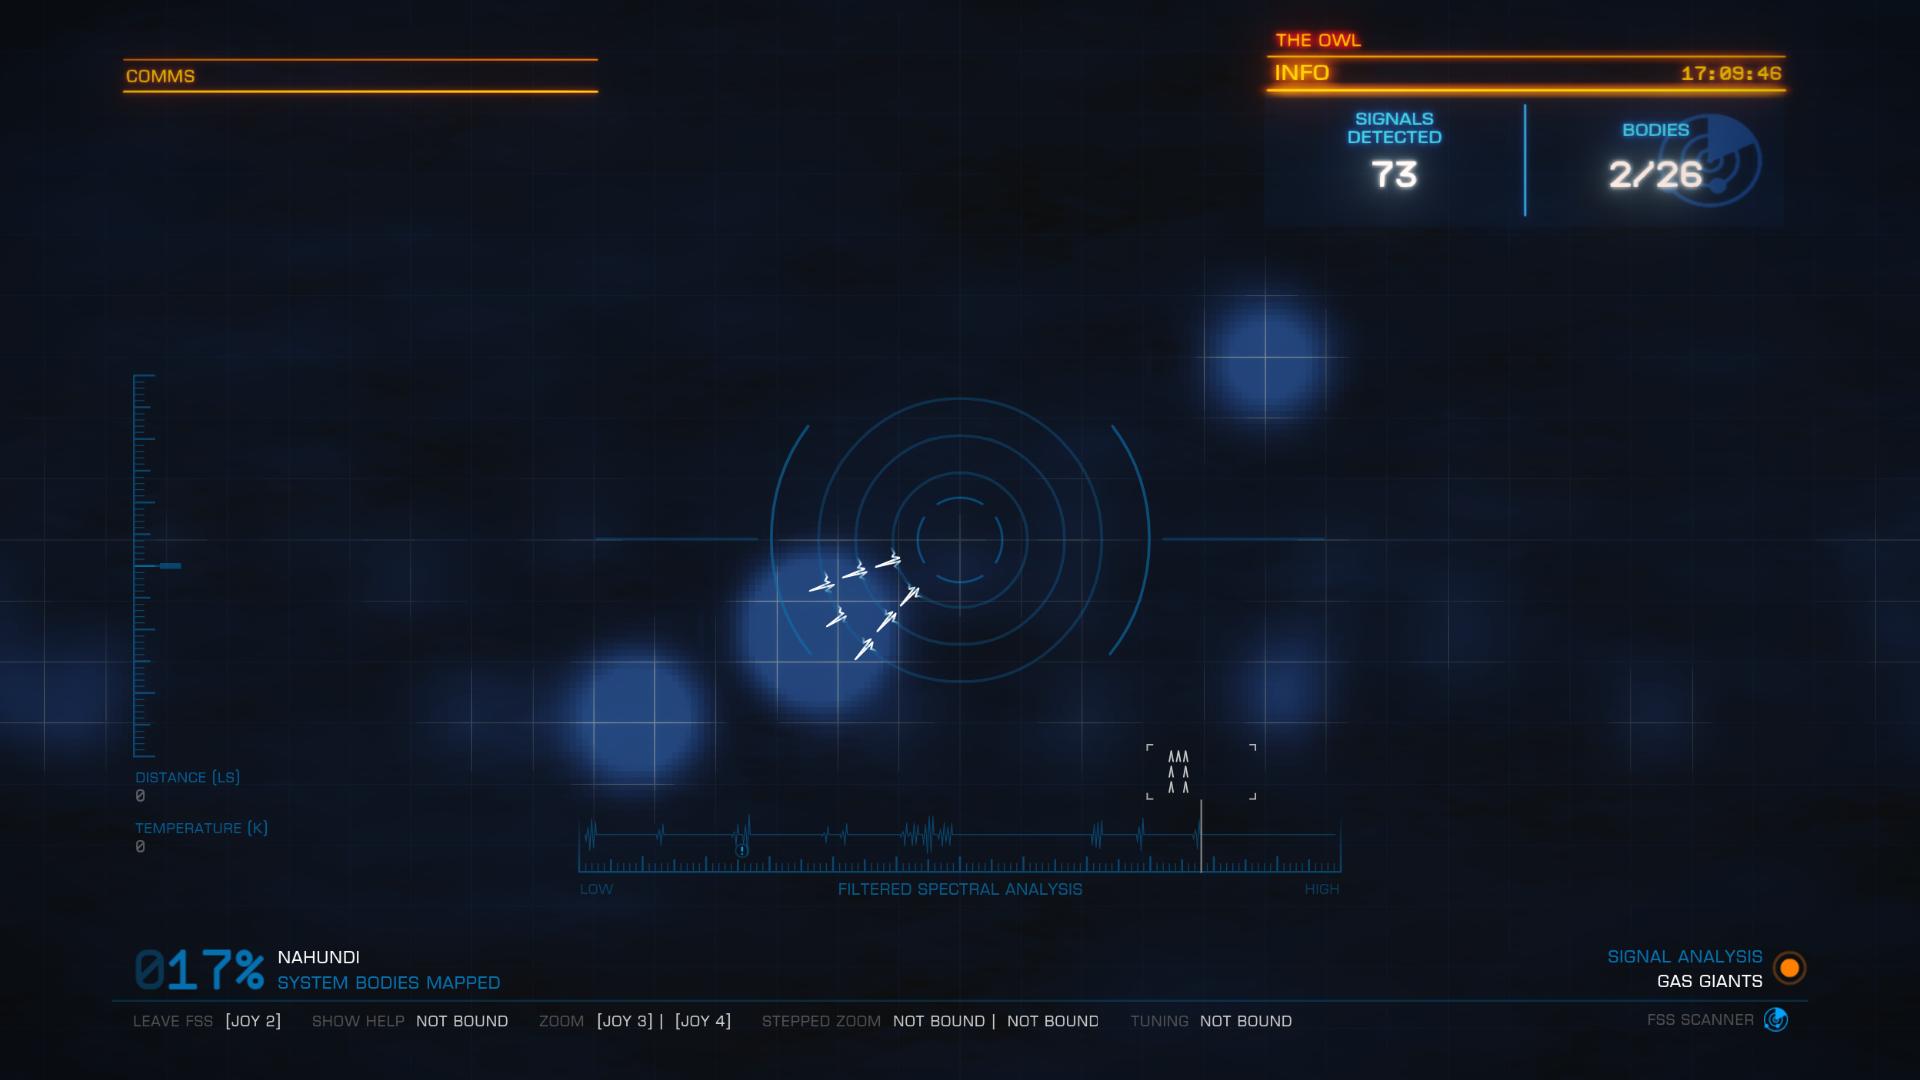
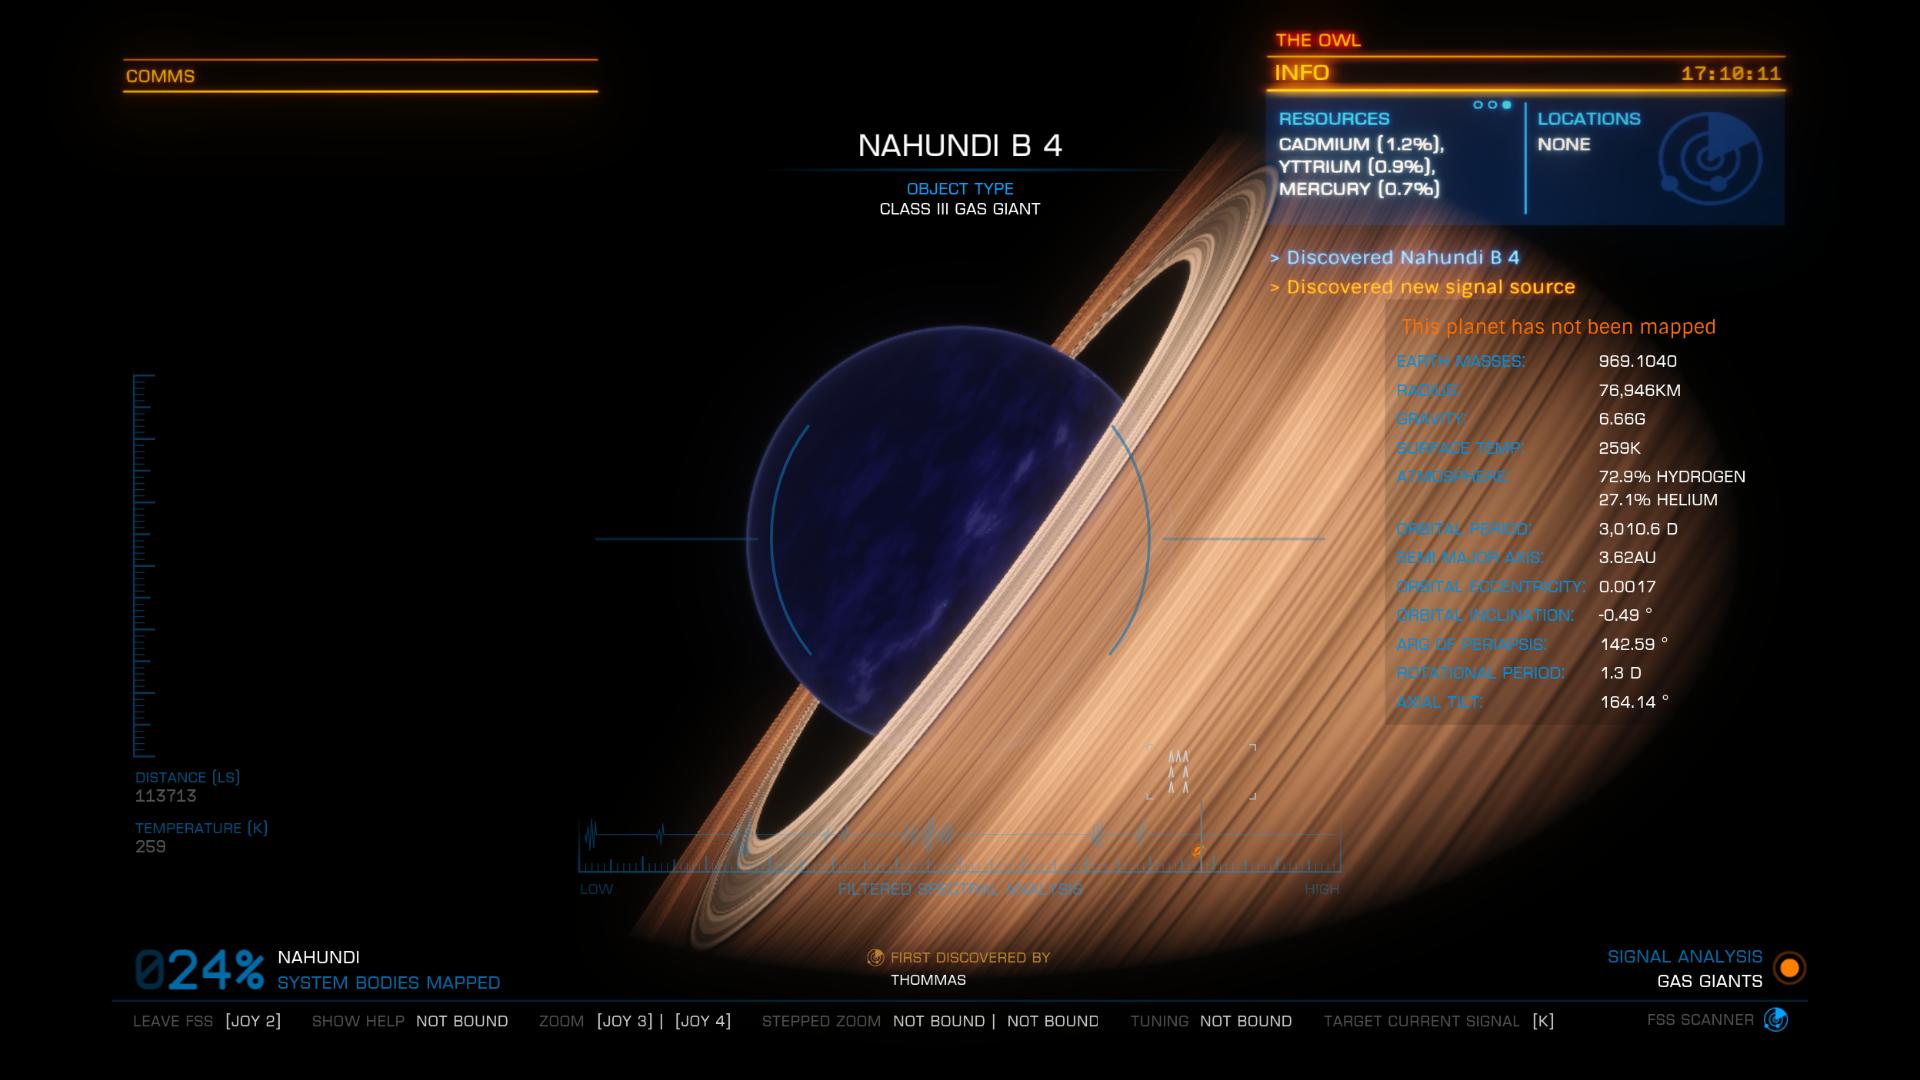
☼ FSS Discovery process:
You will be able to scan a whole system thanks to the FSS, in order to discover points of interest, planets, gaseous giants, signals, scenarios, …
First with the Discovery Scanner to get the orbital plan, and then by navigating in the new UI to discover stellar bodies and signals.
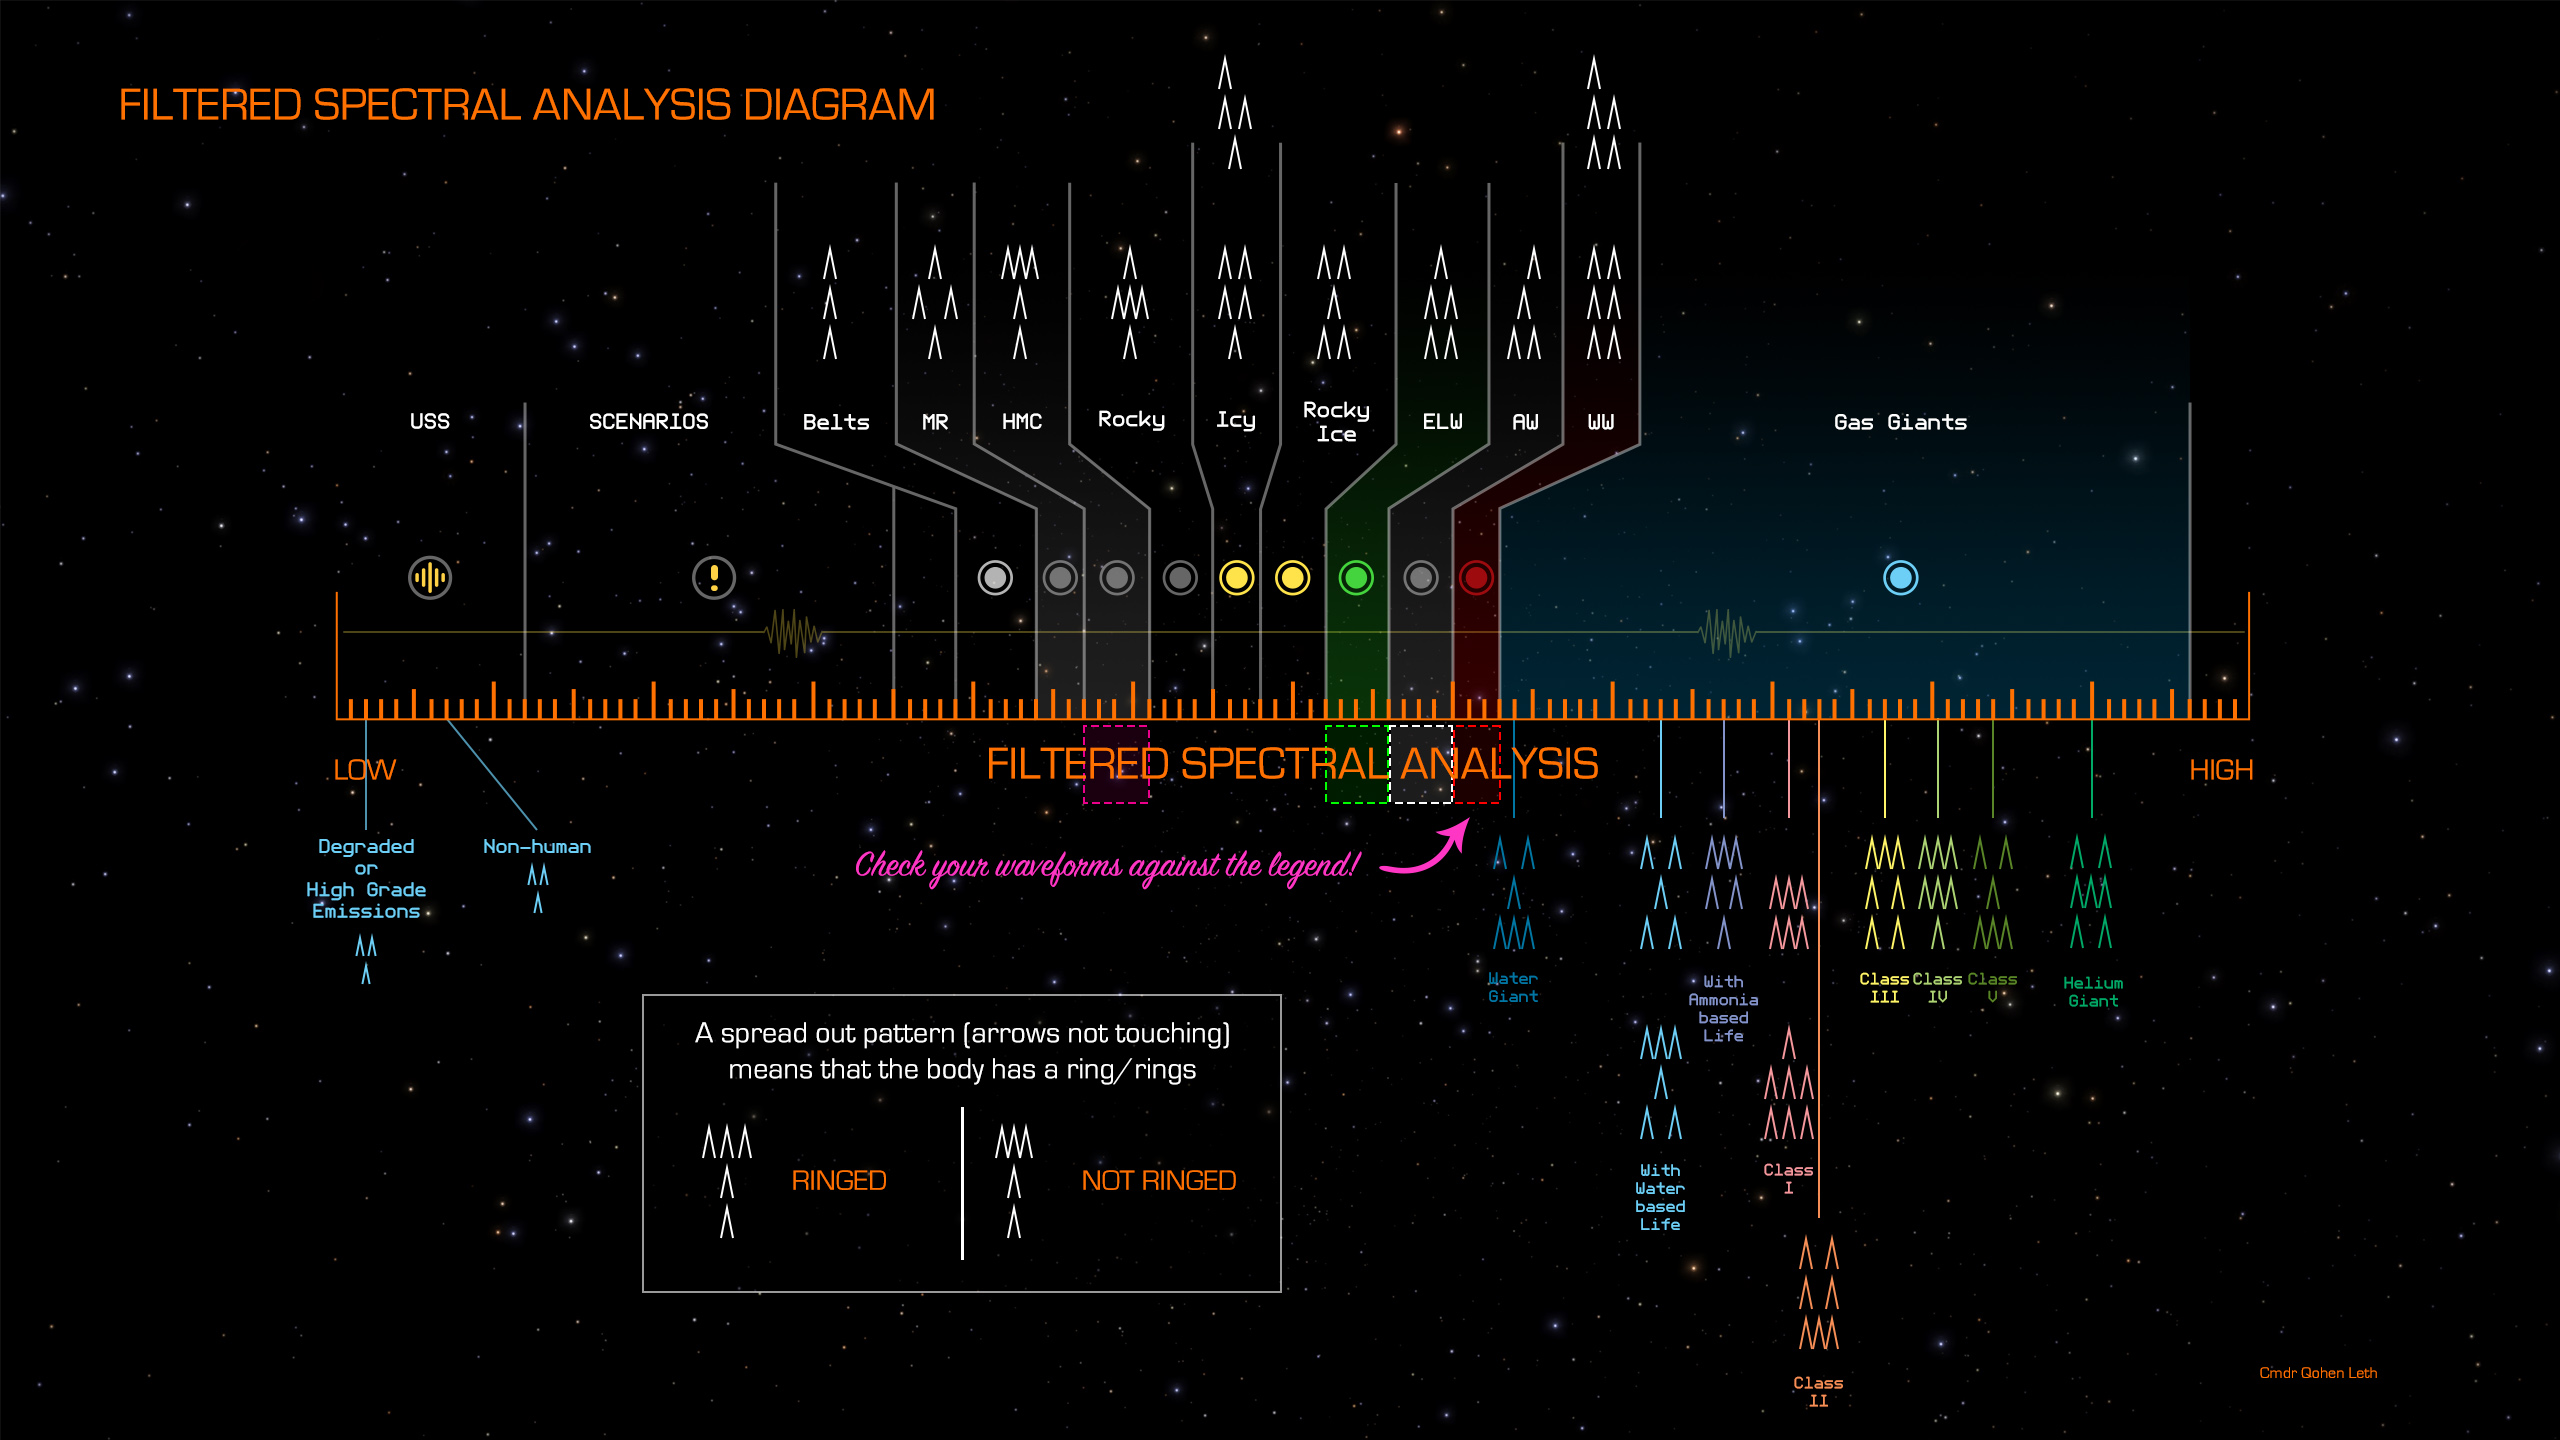
Once processed, these signals are added to the filtered signal analysis bar at the bottom of the screen.
- The FSS scans the analysis mode and regularly displays highlighted locations where signals or stellar bodies can be found.
- Approach your reticle to the ○ marker, a pattern will be displayed.
- Adjust the filtered signals (at the bottom of the UI) to match the similar patterns.
- Once these patterns match, you can directly target the marker with your central reticle.
- Zoom in and continue until you find a signal or a stellar body.
- You may have to zoom several times if several things are in the same place to isolate the signal.
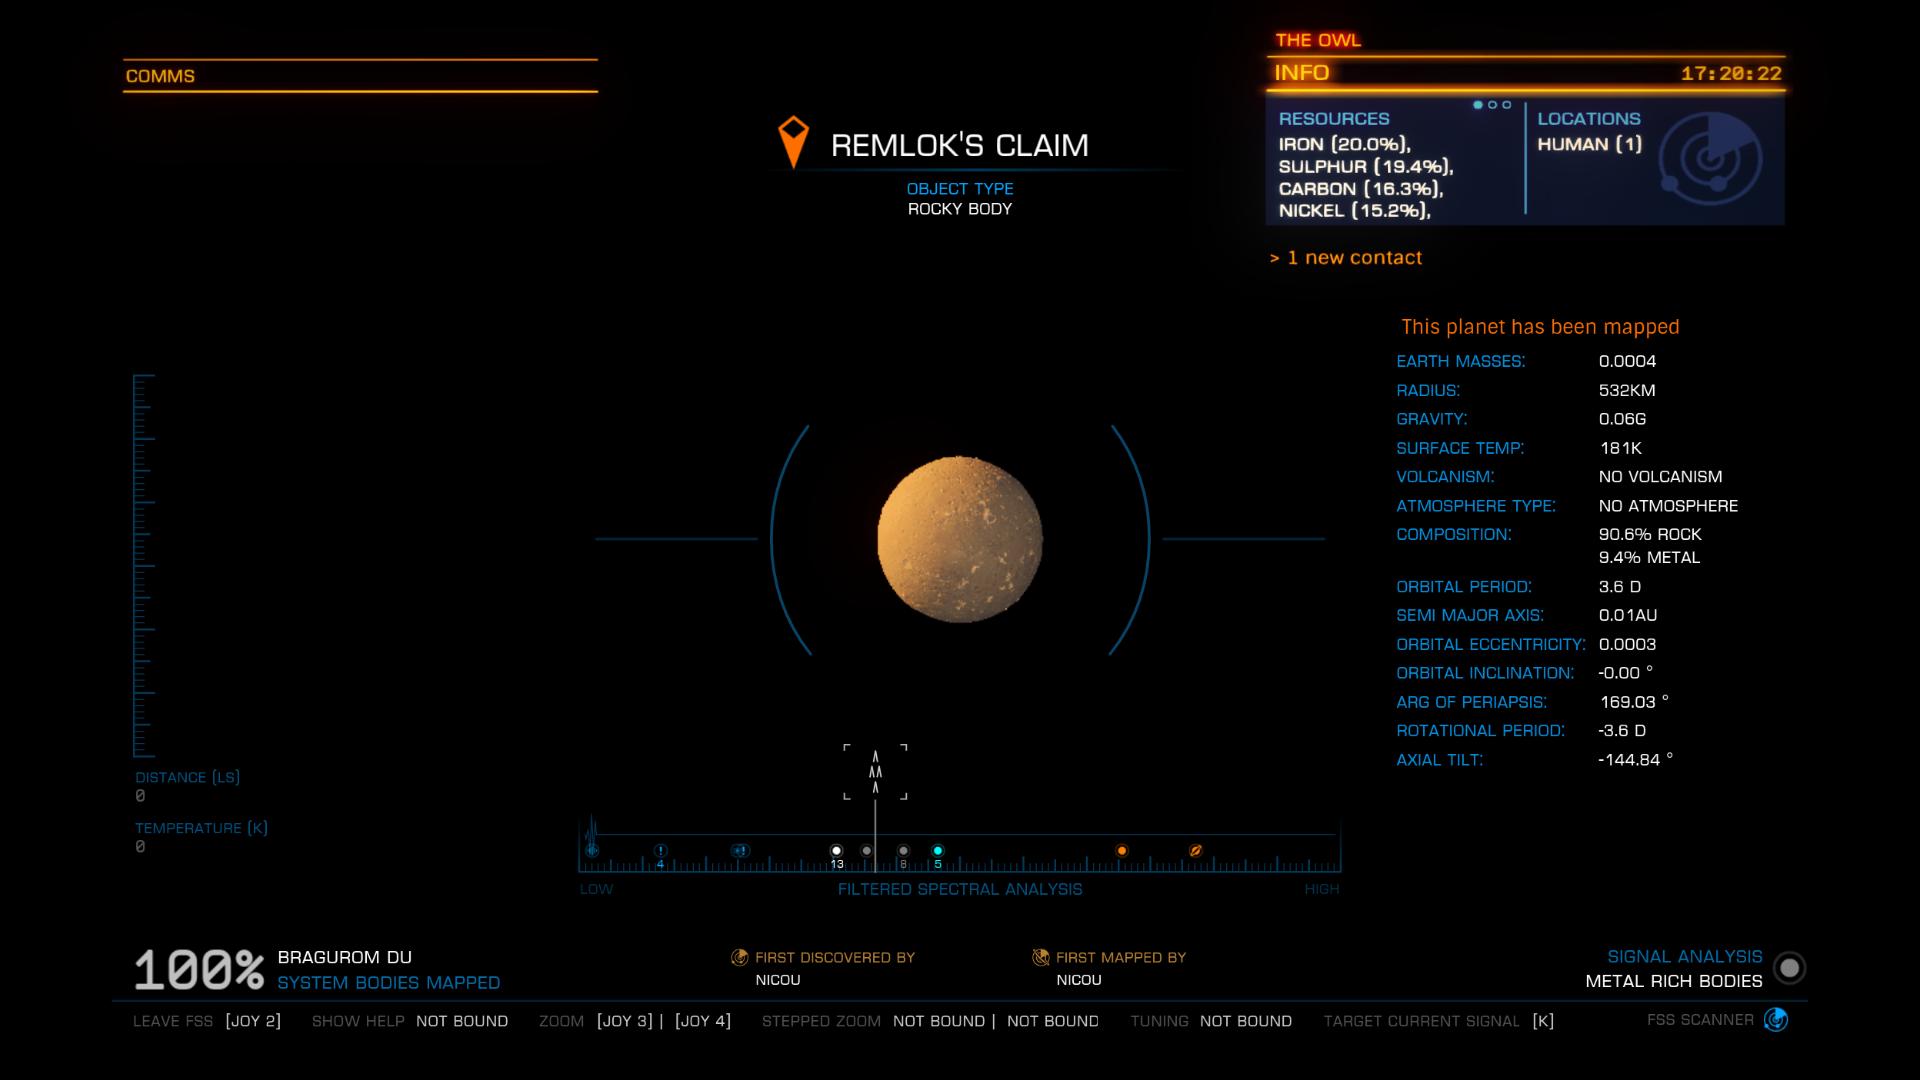
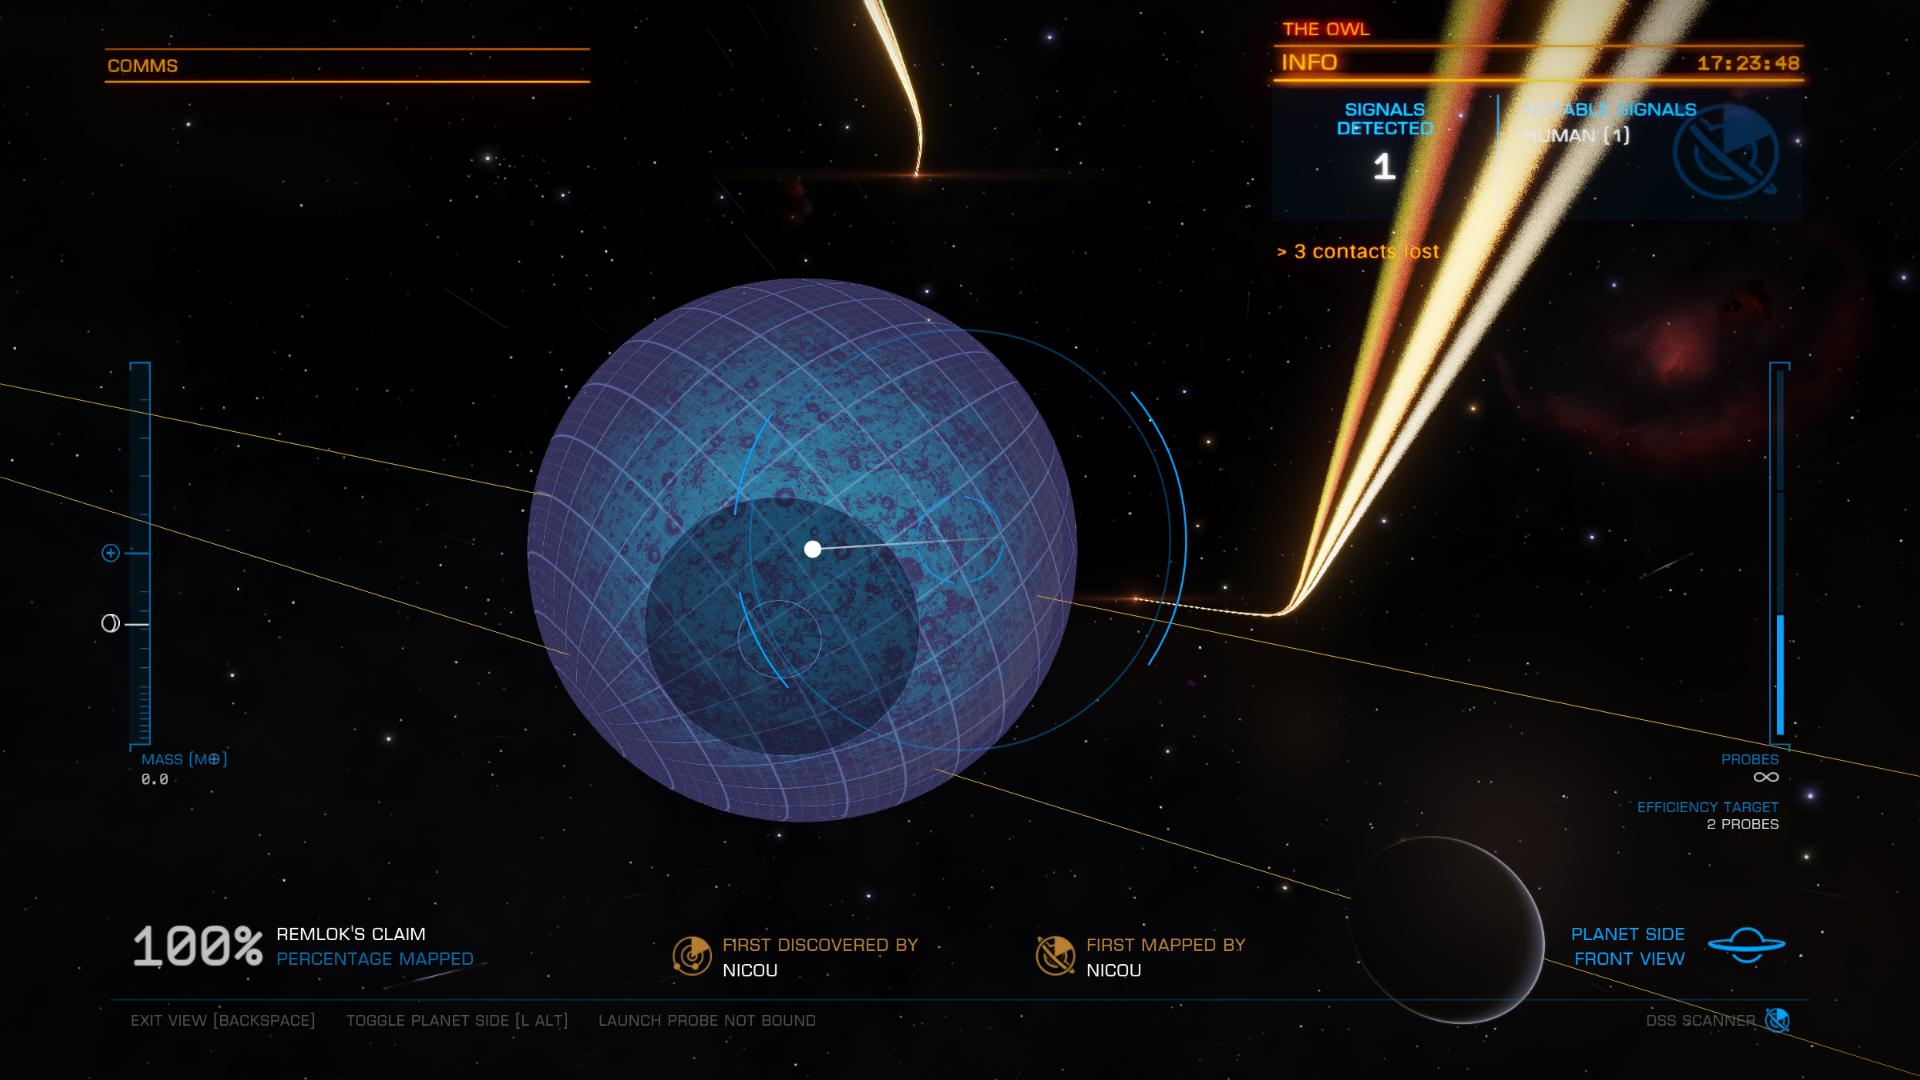
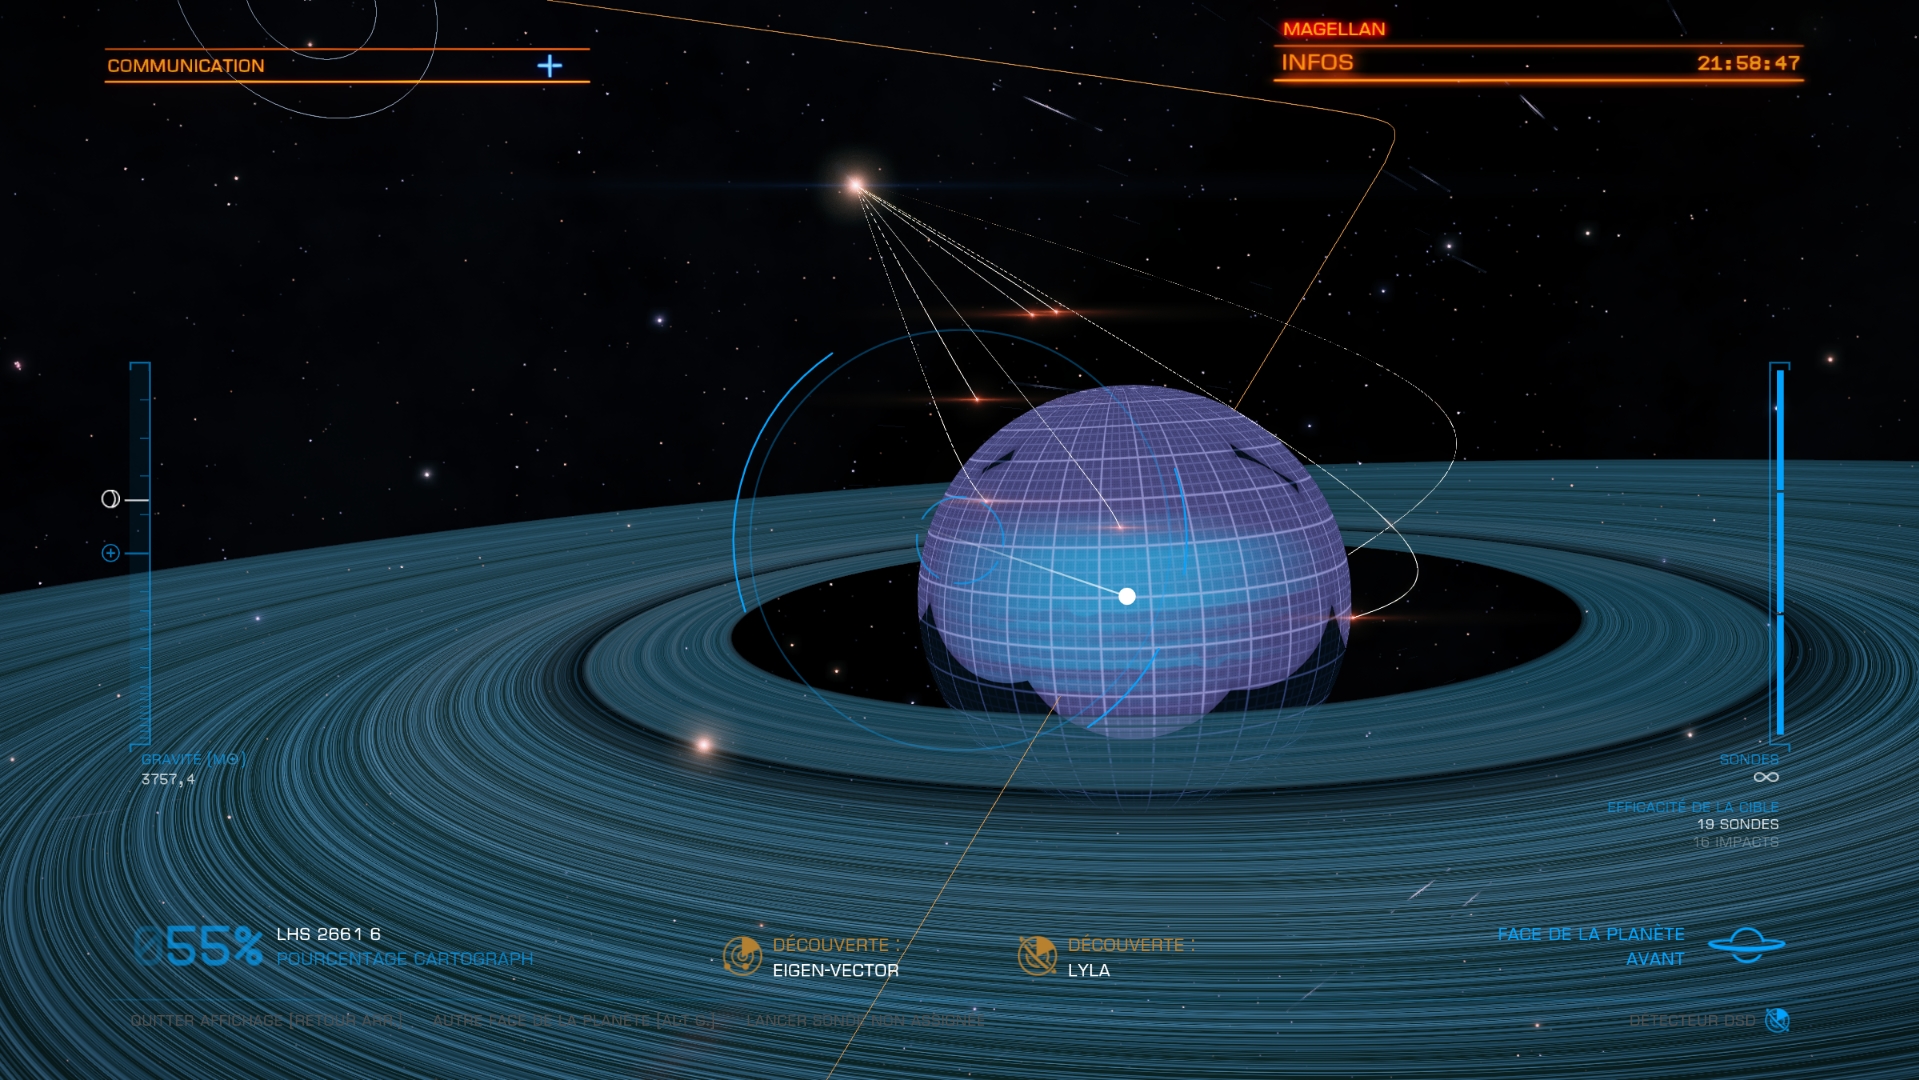
☼ Cartography process
Cartography allows you to launch satellite-probes to stellar bodies to study its surface and composition.
You will discover its points of interest, materials and other intriguing details.
A module “Detailed Surface Scanner” is mandatory because it is the latter that sens probes to your target.
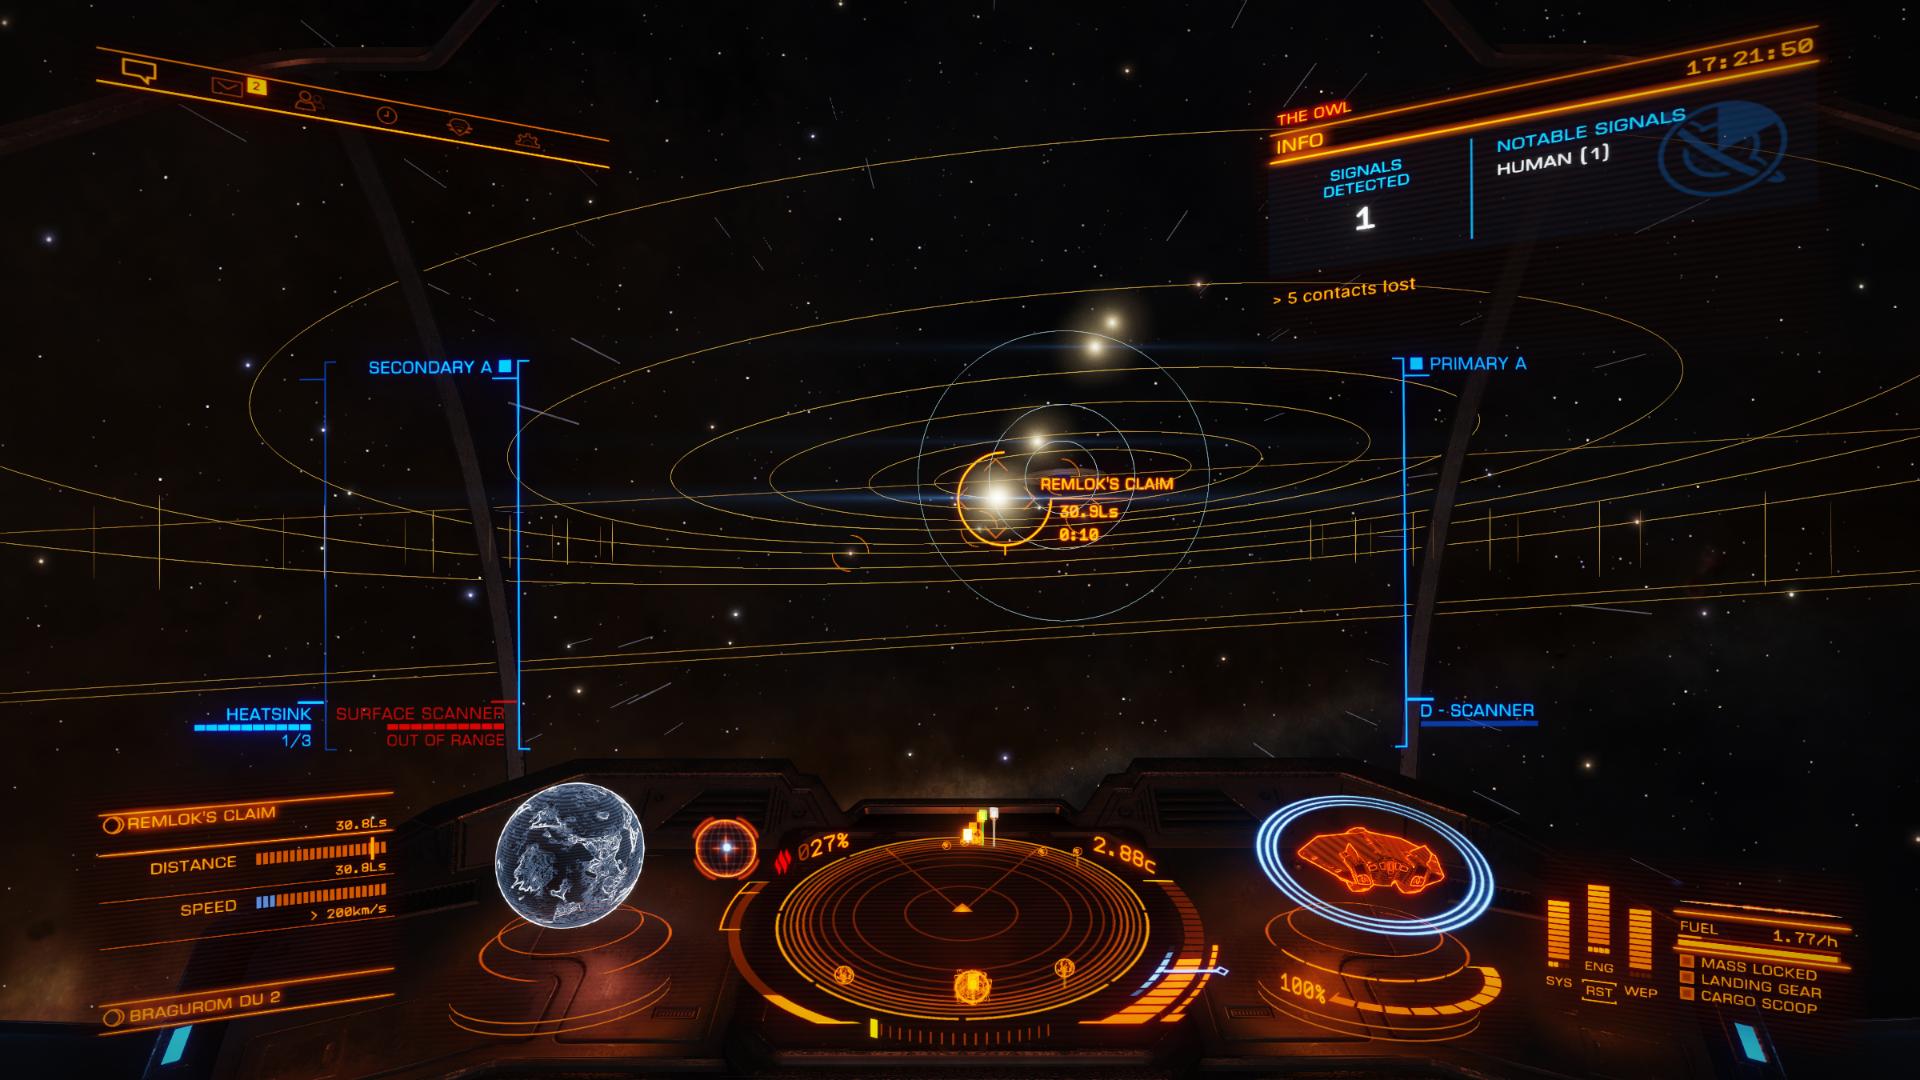
- Approach the selected star body and slow your speed down .
- Start the Detailed Surface Analysis Mode to get the Probe Launch Interface
- Launch your probes around and towards the stellar body so that the probes deploy in satellites and cover the surface on a hundred kilometers. It will take several probes to get the 90% needed to map a stellar body.
- Note that you can get a credit bonus if you map your target in x probes, noted at the bottom right of your interface.
☼ FSS & Cartography Values:
- A simple scan with the Discovery Scanner earns you a value V
- A scan with the FSS earns you 3x V
- A cartography with probes earns you 4x the previous value with the FSS: 12x V
- If you hit the efficiency while scanning with the DSS & probes, pit is 5 times the value from the FSS: 15x V.

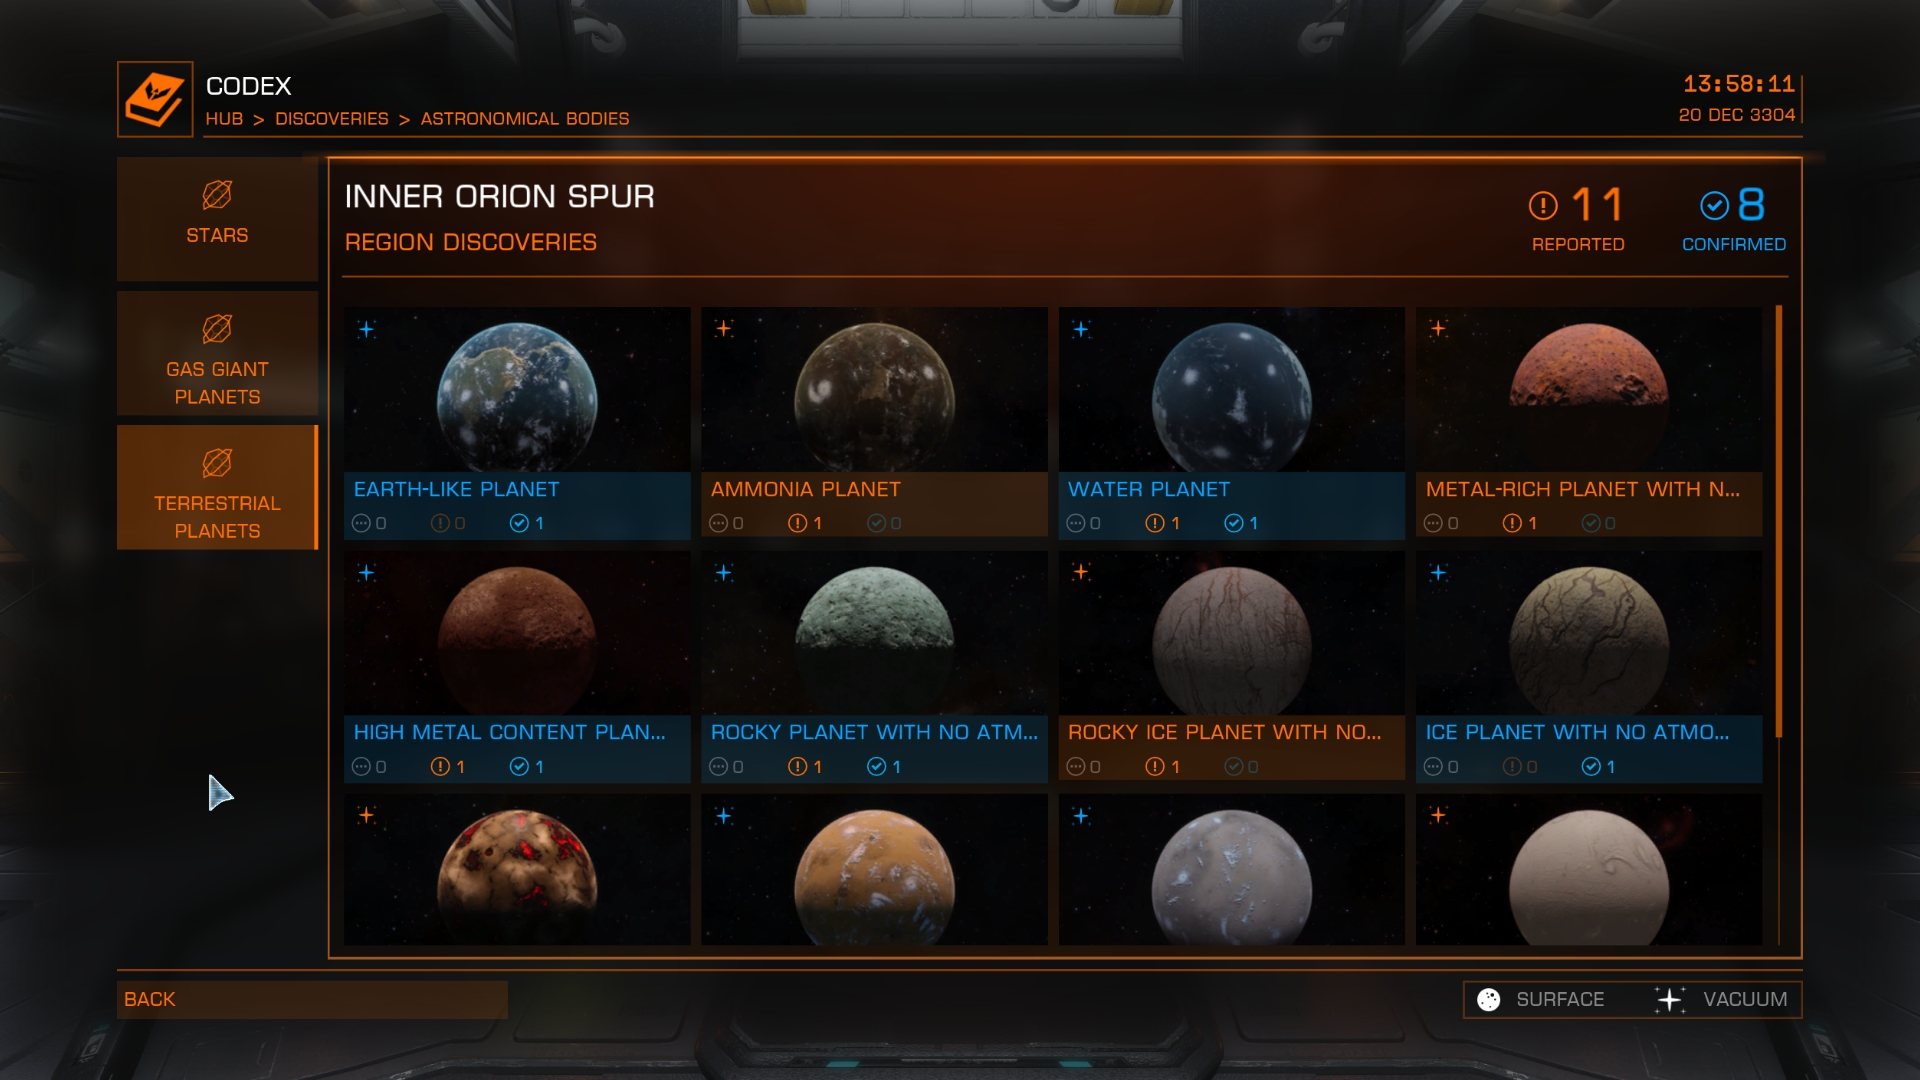
The Codex
The Codex is a way to record your discoveries and progress in the Elite: Dangerous galaxy, and also serves to keep you informed of the latest stories in-game.
There are three categories, but here only one is meaningful to this guide: the Discoveries.
In the Discoveries tab, the galaxy has been broken down into 42 regions. Each region contains detailed information on astronomical bodies, geological/biological features, and the civilizations they contain. They are categorized as “Rumour”, “Reported” by other players and “Discovered” by yourself.
Within each of these regions, you will be able to find a list of things discovered: a Type and its Sub-Types; That is to say for example an Earth-Like World [Type] with as [Sub-Types] larger, smaller, colder, greater gravity, …
Notes:
- For these discoveries to appear in the Codex, you must have scanned them with your FSS or with a Composition Scanner (Ship or SRV).
- Rumours are added automatically by Frontier or triggered by proximity to the source.
- Making a Discovery first earns a bonus of 150,000 credits, otherwise it’s 50,00 credits for a Type entry in your Codex. Then 2,500 credits for a Sub-Type entry.
Quick Exploration
Requires: Integrated Discovery Scanner
Your goal here is mainly to scan around the human bubble if you are still a beginner, or to go in a straight line and honk your scanner in each system before coming back to sell your data.
To do so, place a point on a system ~500 light years away in economical mode. Enter system → Scan → Check if the planets are interesting and if you have a detailed surface scan (Aquatic Worlds, Ammonia, Telluric / Giant / Metallic Terraformable above 10,000 credits) → Next system. Repeat. Profit.
If a planet is interesting, you will have to open your system map and then select the astral body. The scanning range is more or less depending on the size of the planets and stars.
☼ Mainly, you quickly jump from system to system in order to do a quick scan, the famous “HONNNNK” from your scanner, and then change system.
Just don’t forget to check the system before your jump, in the case something great is hiding here. If there is something, cartography. If not. Jump.

Long Exploration
Requires: Outfit described in the ships and modules chapter.
You will fly as far as possible, probably to Nebulae or other interesting places. Note that in order to prepare your expedition, you will have to split the journey into several parts of about 20.000 LY using fast navigation or 1.000 LY in Economy mode.
These routes are also the more known, so you might get less rewards from it. Point to a system, far, and go for it.
Just like the Quick Exploration, honk your scanner in a system to learn more about it → carefully select the interesting astral bodies via your system map and the FSS → Get closer to your targets if necessary → Next system. The difference with the Quick Exploration is that in Long Exploration, one takes her/his time to fully scan the system with the FSS it in order to conclude whether it will be interesting or not. For example the terraformable metal rich and metallic planets take longer to understand. It takes more time and is generally more rewarding if you do it well. With time and experience, this process can be done very quickly.
☼ Mainly, one tries to learn more about the systems by carefully scanning the planets. The data will surely serve later as human space expands. In any case, you earn more credits with long exploration!
Don’t loose your time scanning small unnecessary planets such as icy and rocky planets.
Focus on the worlds, terraformable, and high value credits 100,000Cr.
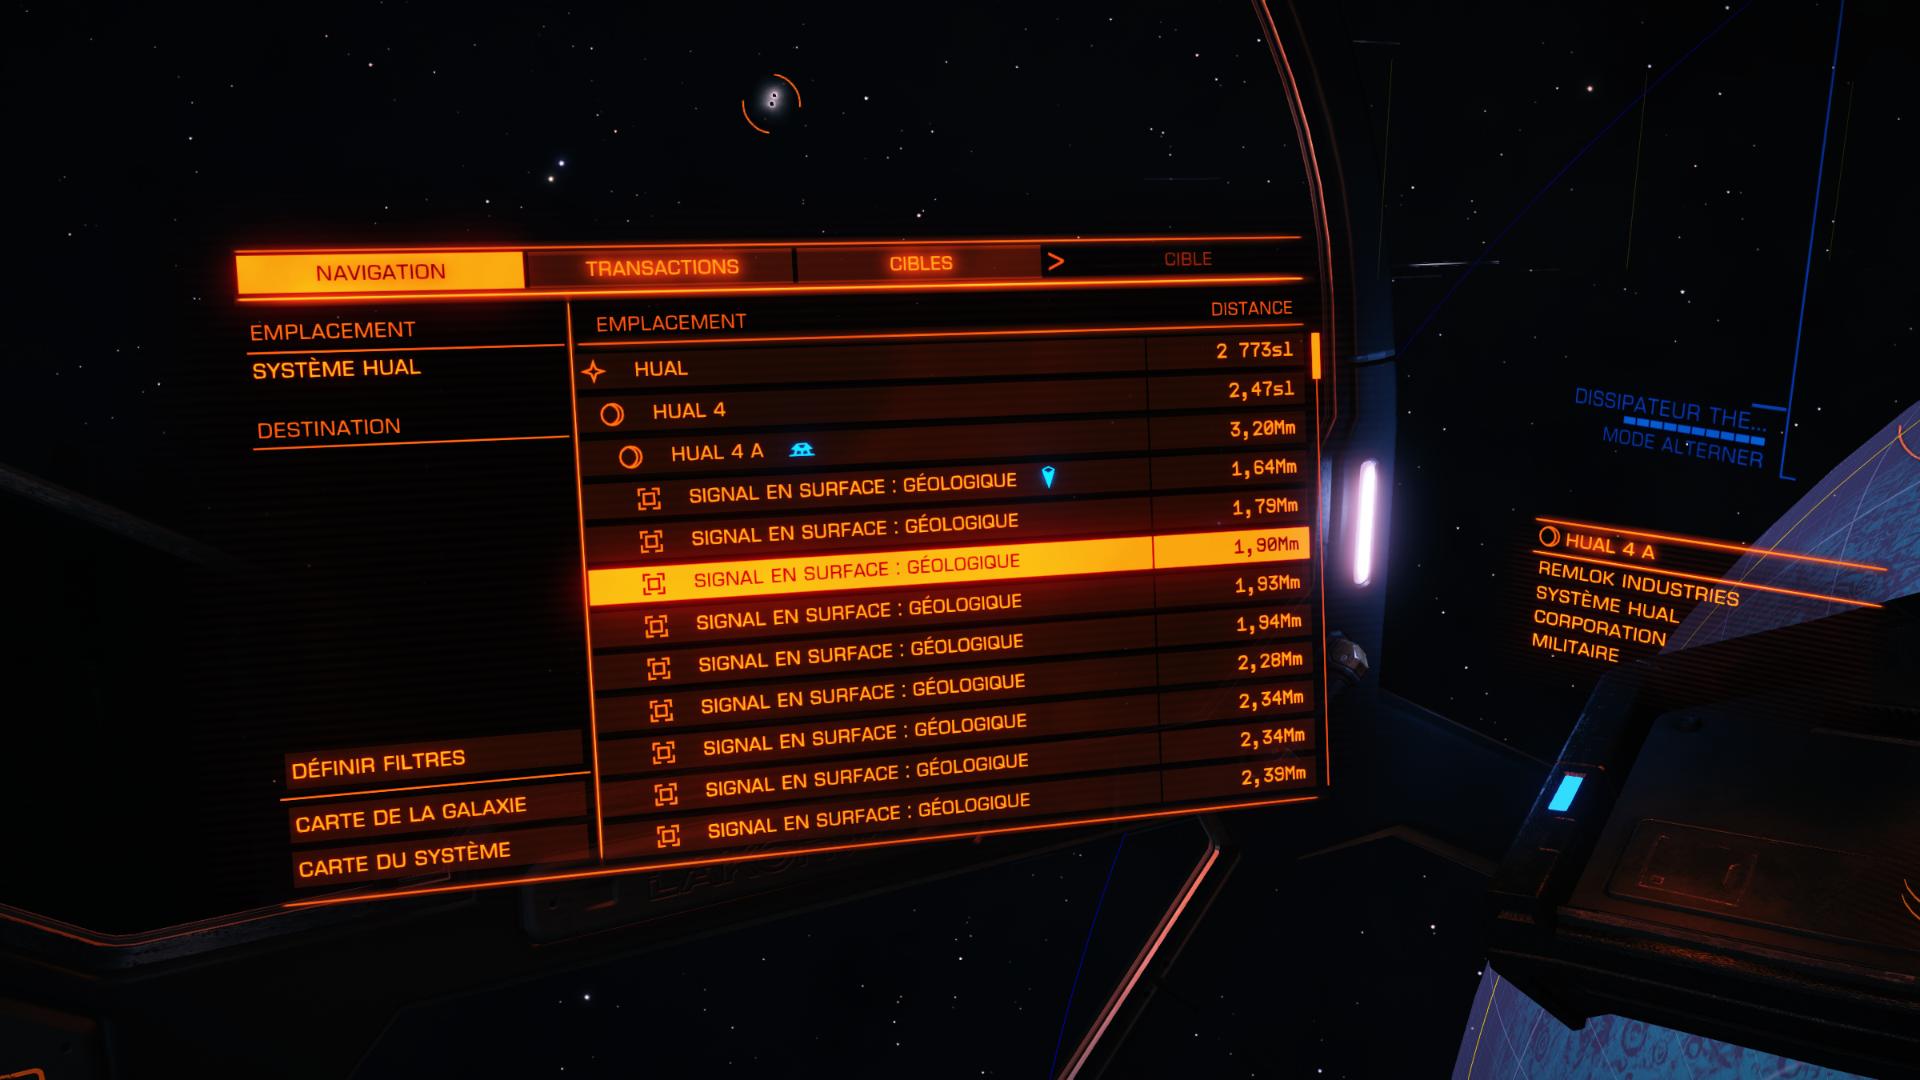
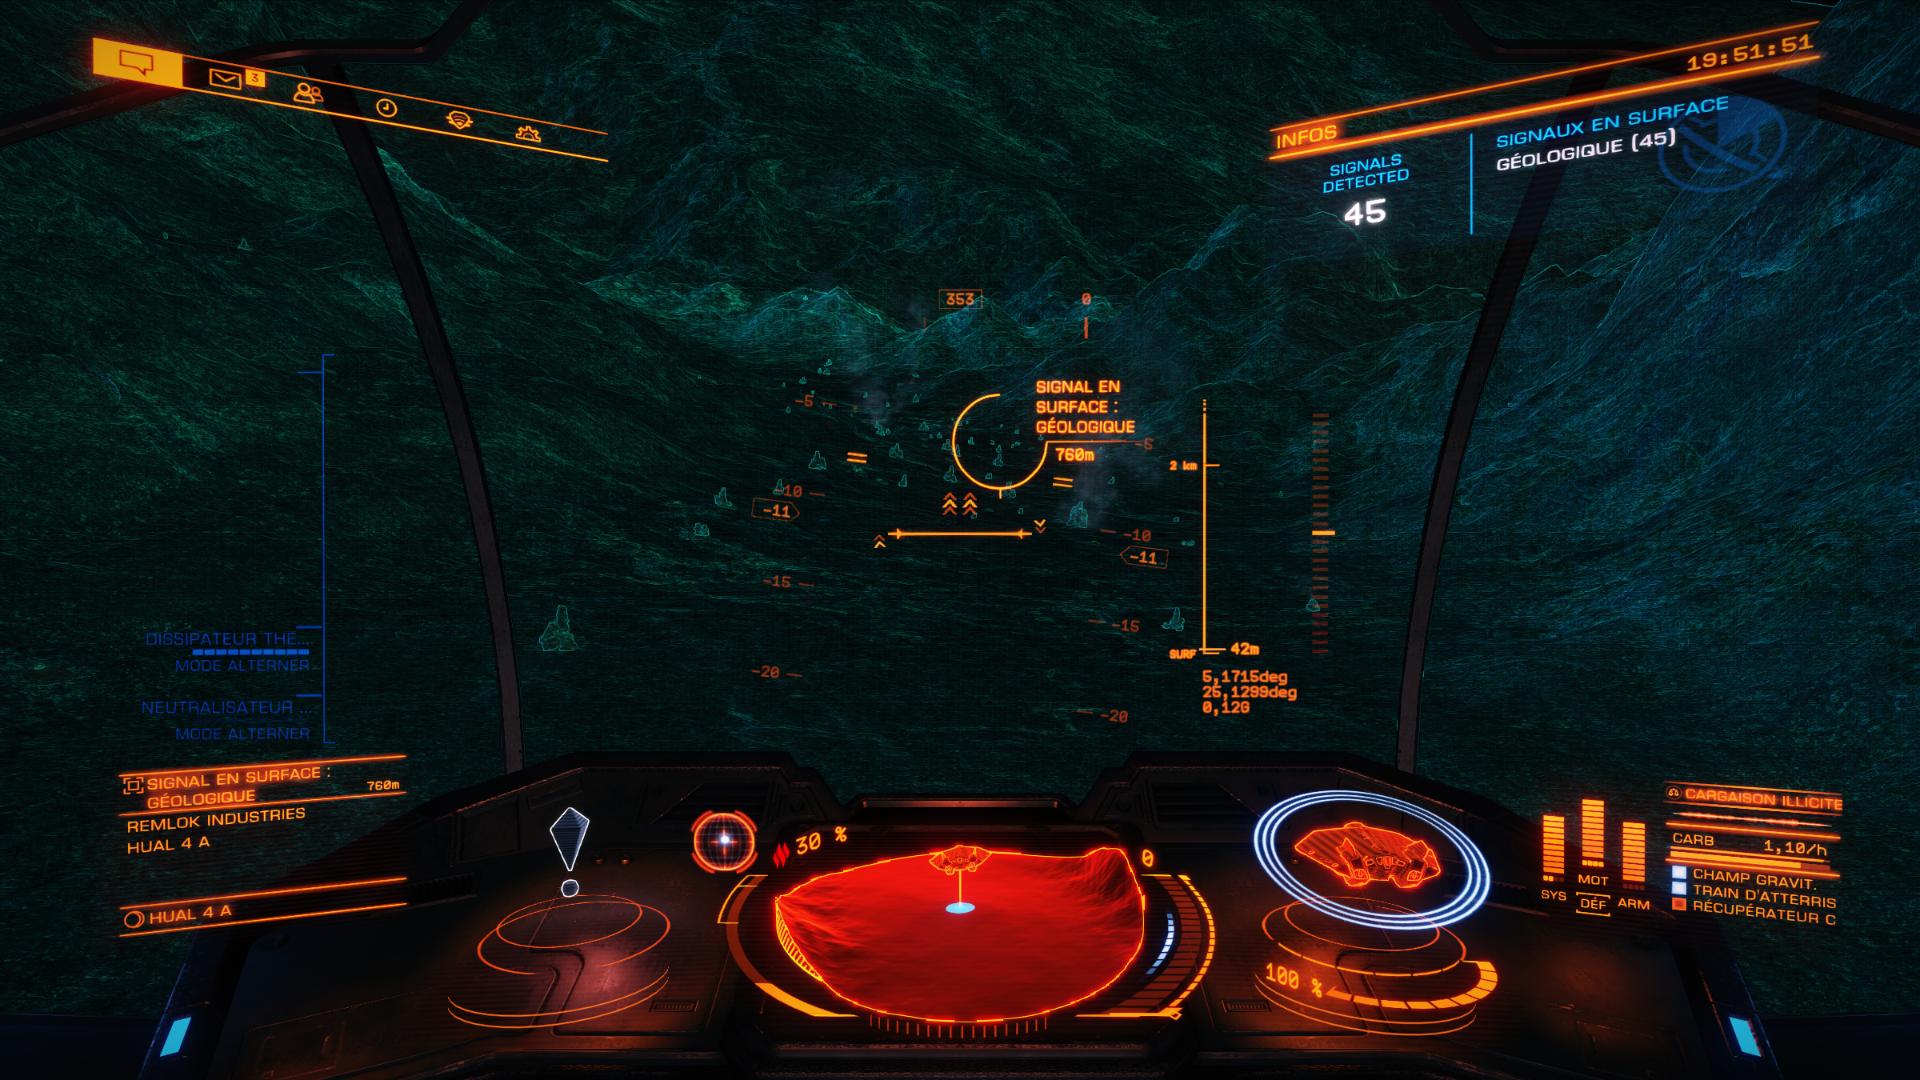
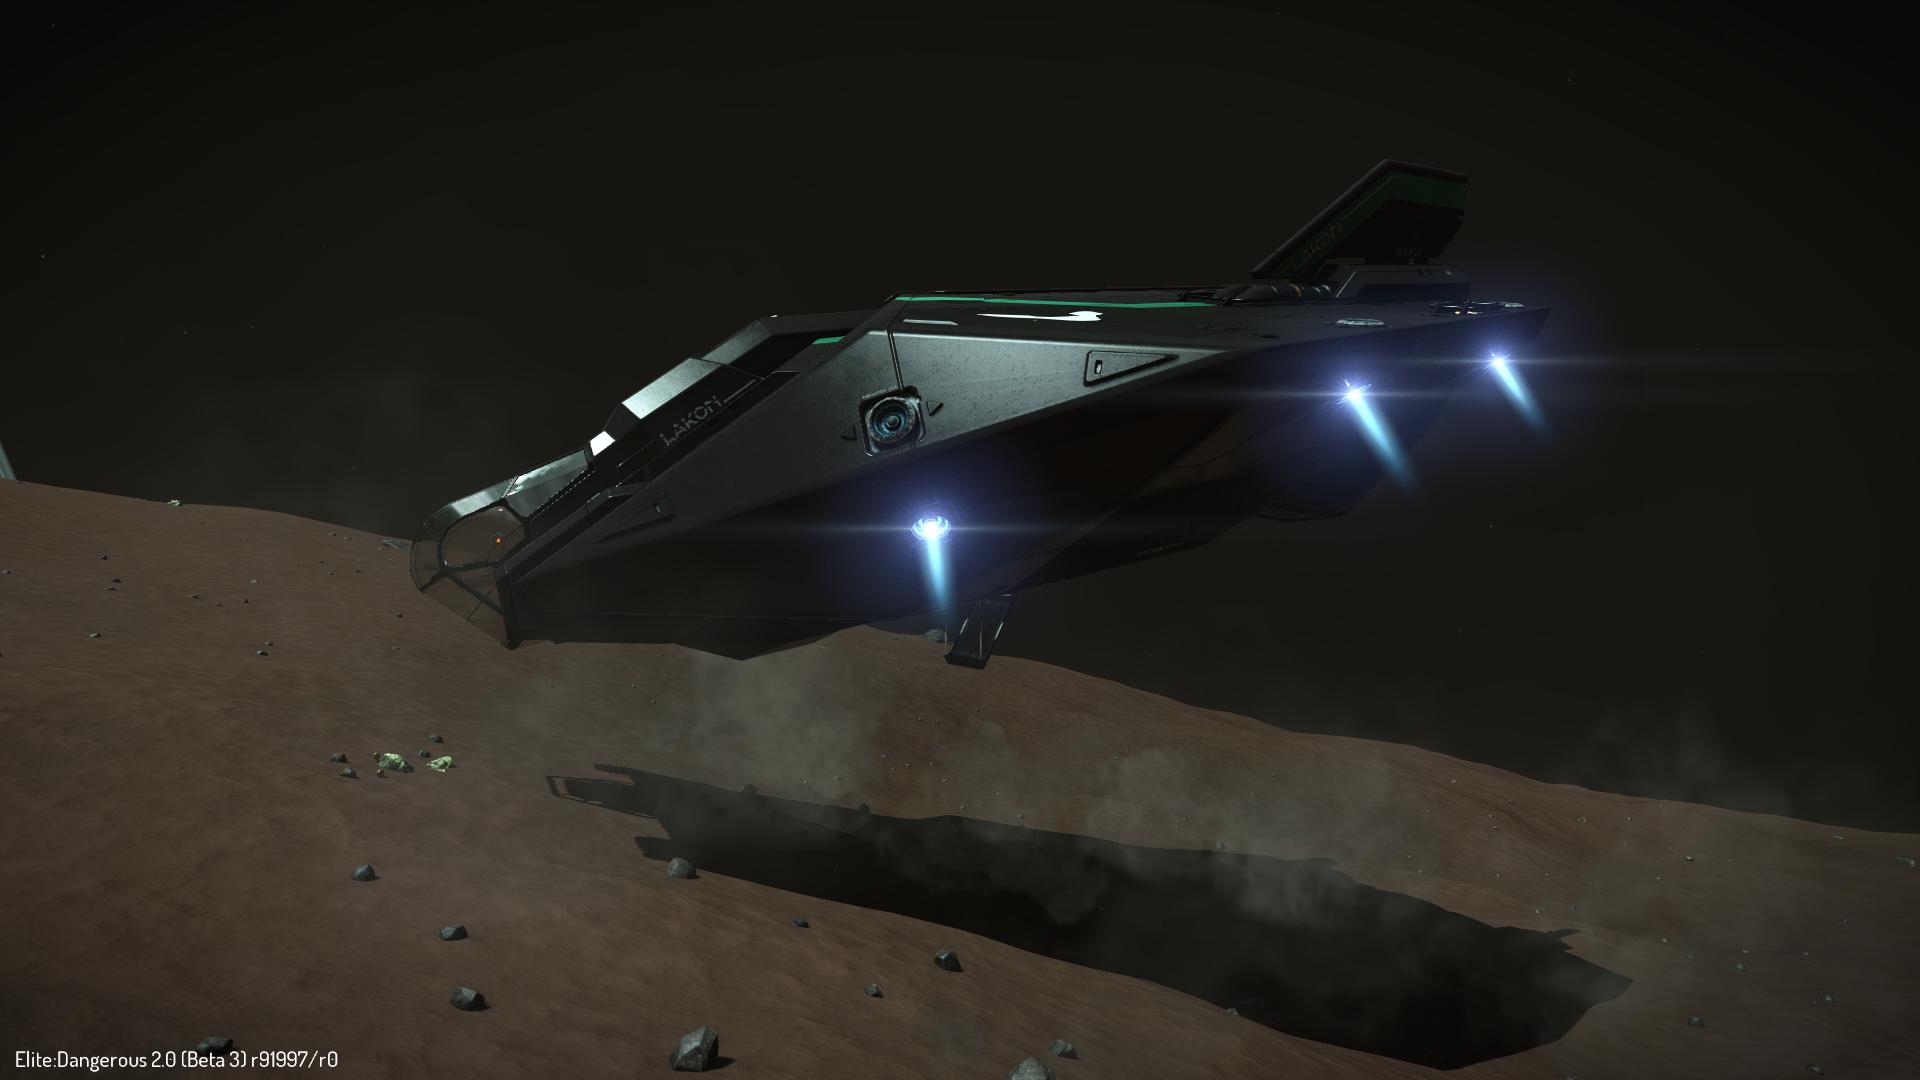
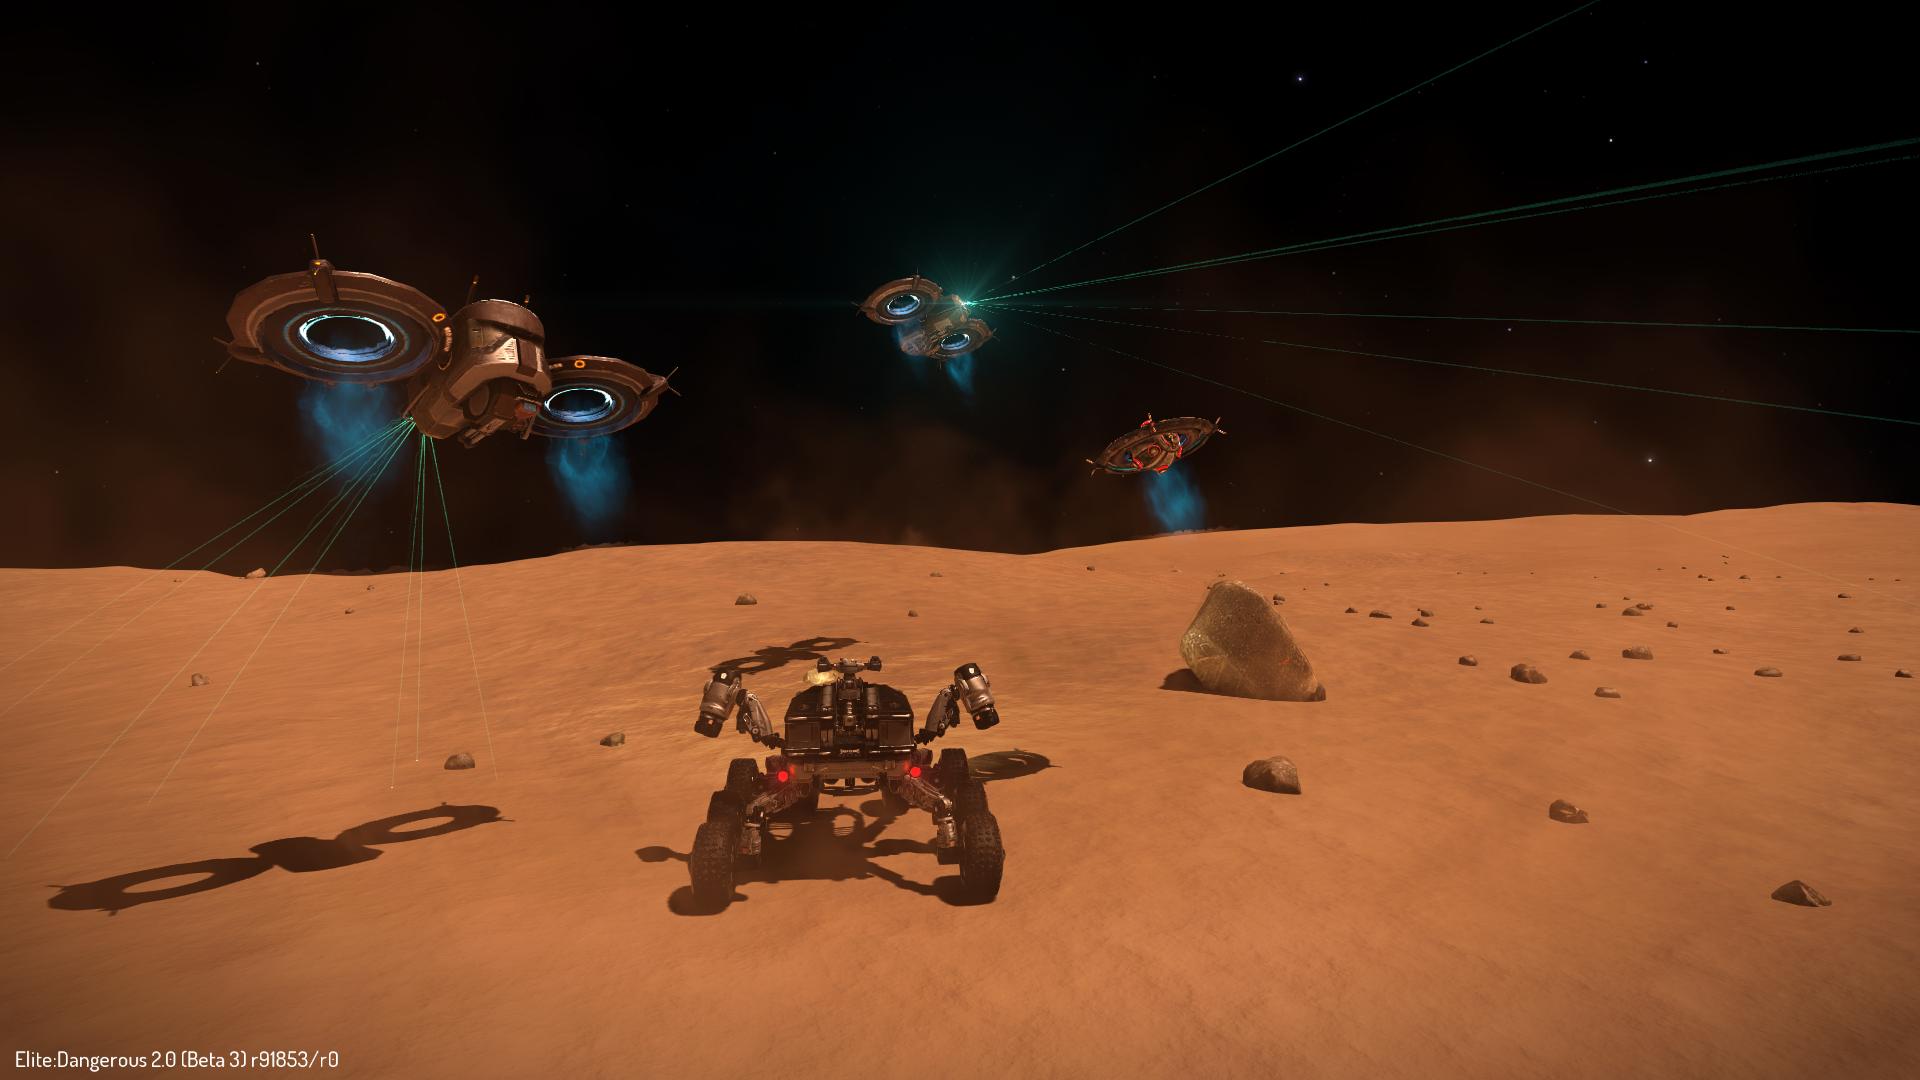
Surface Exploration
Requires: Outfit described in the ships and modules chapter.
Your goal will be to search for interesting planets without atmospheres in order to land and explore the various surface biomes (mountains, trenches, lowlands, highlands, craters, …). You will discover materials, resources and also possible enemies. The explorer on the surface is probably the most sturdy explorer of the three exploration types, and it requires a good control of his ship in high gravity as it can be from 0.01G to 9G! Starting from 2G, it can already be difficult to handle his ship.
Take some cargo, and obviously, a SRV hangar. Powerful thrusters are important to counter the gravity, and Power distributor are good to improve your boosts.
Materials don’t take any slot in your cargo and are stored in your account.
Discover many points of interest, scan the surroundings with your SRV, get materials, resources, earn XP in exploration rank and more!
► The Materials, Surface Mining Guide ◄
Tips and tricks
1) One can obtain gigantic jumps distances by buying FSD Class A and Class D for the other modules: the lightest ones. You can even downgrade your modules, for example maximum thrusters is 6A? You might be able to take 4D to be lighter, at cost of speed and maneuverability.
2) The A rated Power plants have the best ratio on mass/performance. They also better dissipate the heat during fuel scoops.
3) If you need weapons, take the kinetic ones as they draw less energy. Mod them Thermal.
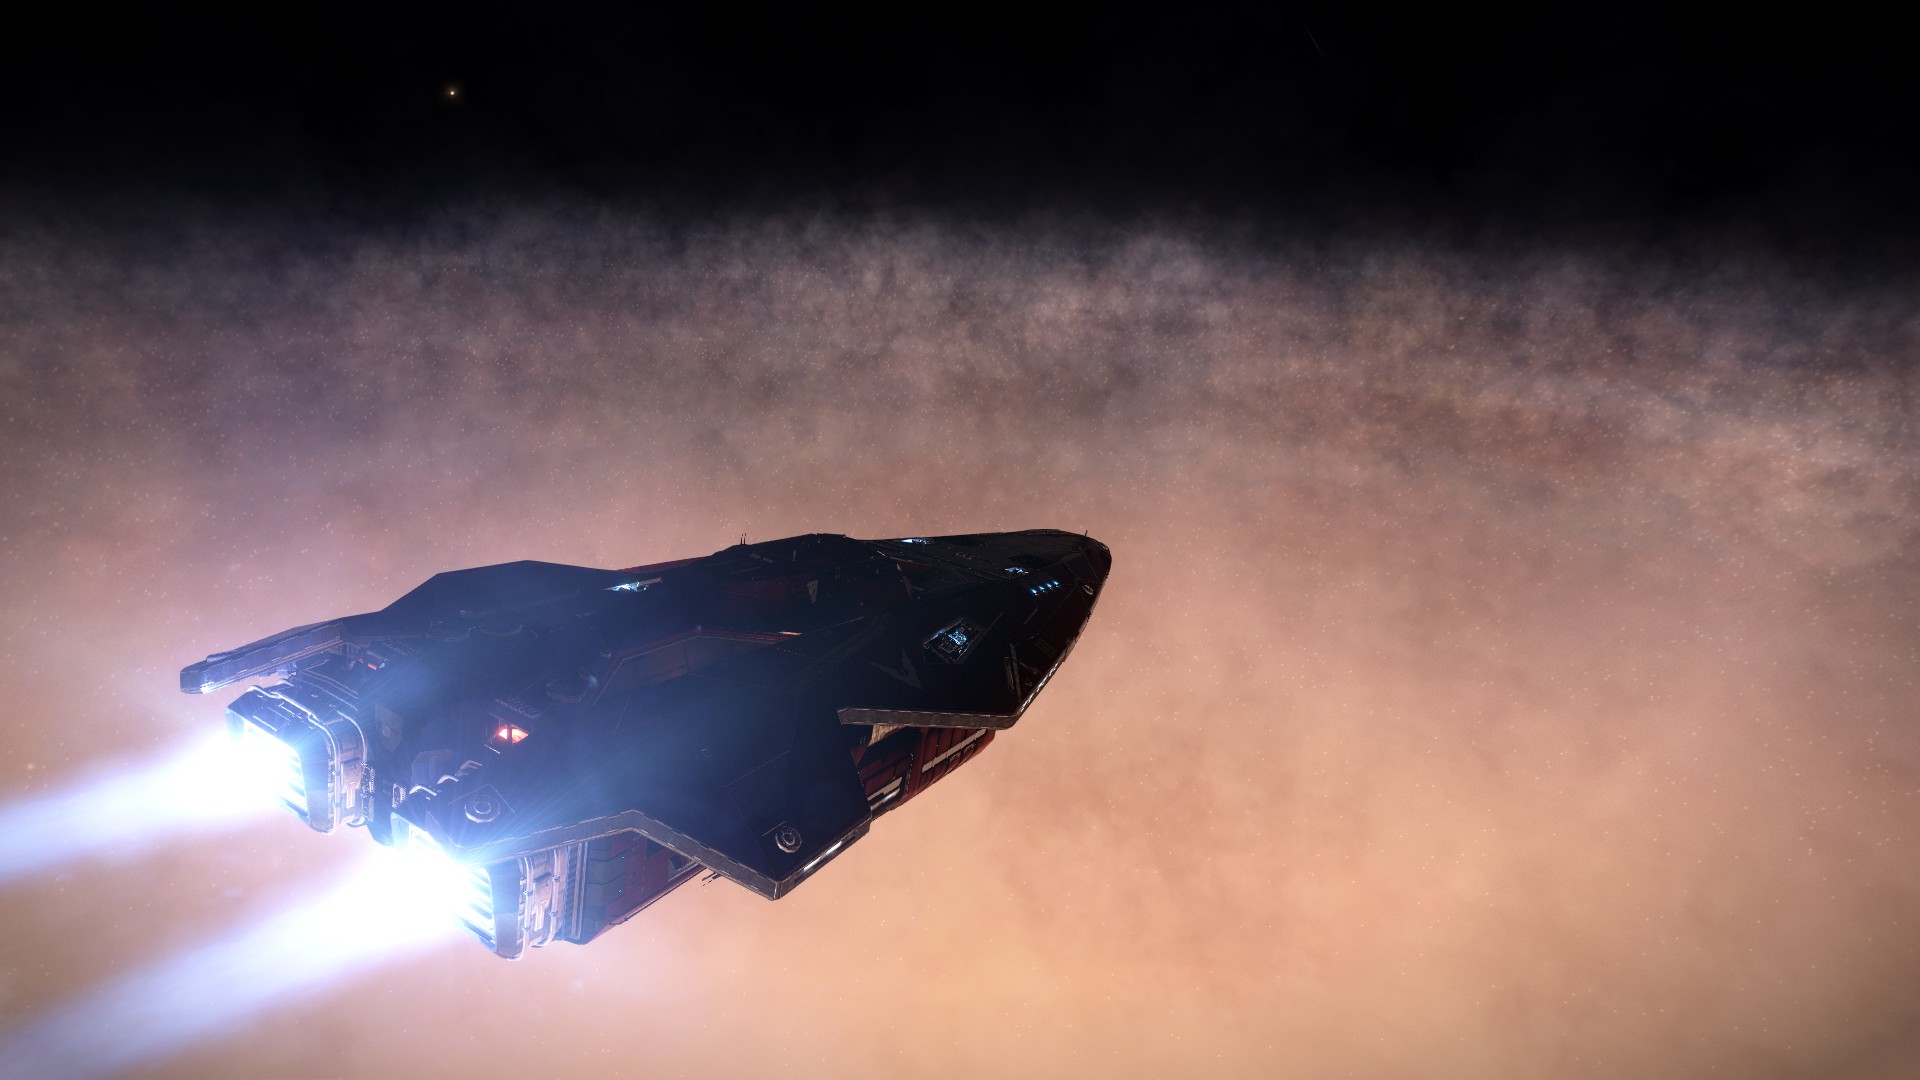
Jurema, above the galaxy
4) In terms of Defenses, I only take Heat Sinks. I can sit near stars and black holes with no problems. This also allows you to switch to stealth mode effectively if your shields are broken and an enemy tries to target you.
5) Always disable your cargo hatch in the list of your modules to save energy and better dissipate heat.
6) Quick links for the most important info: Visual + Planets + Values
Enter the system, scanner while moving towards the next system, once the scan is finished: check whether a planet is interesting in the system map. Scan things, or not, then jump.
7) For best results “speed/credits“, you should only scan the ELW/Aquatic/Ammonia worlds and Metallics in liveable areas of the systems: those that are terraformable. To recognize the terraformable metallics, it’s simple, you need to find the balance between the hot & cold point in the system.
- Pay attention to the type of star, whether it is hot or not;
- Do the planets of the system look hot? Cold? Where is the middle course with bearable temperatures?
- Can giants protect some planets from asteroids with their strong gravity?
- Does an asteroid belt filter the sun and absorb some of the heat?
- Are there visually habitable planets in the system?
- Their distances from the star? 1,000ls = 1 minute // 50,000sl = 5 minutes // 1,000,000ls = 20 minutes


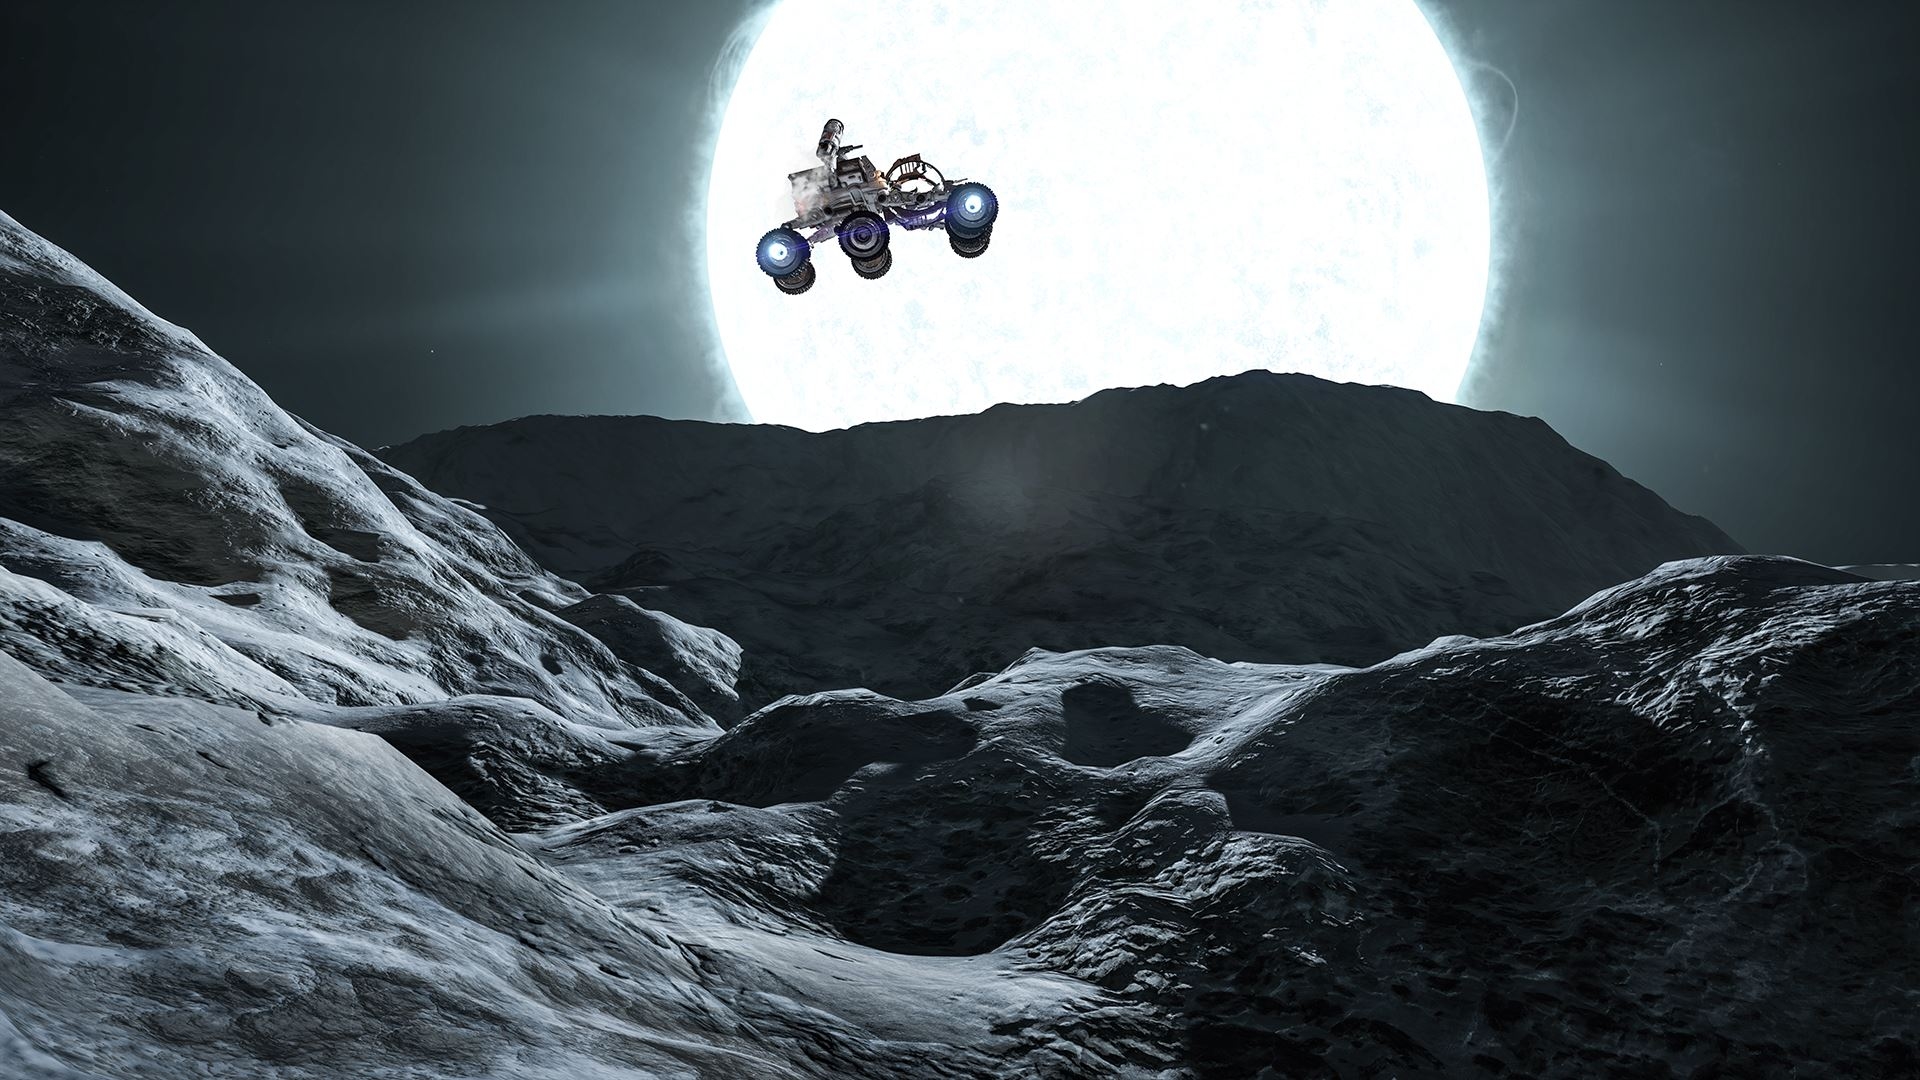
8) You can supercharge your ship by staying a little bit in the Dwarf stars or Neutron stars cones.
They respectively increase your jump range for 50% Dwarf and 300% Neutron for one jump.
If you ever try to boost your FSD on a neutron star or a white star… and you “fall” into the ejection cone:
- Don’t panic!
- Thrusters to 0, you can’t fight this powerful strain.
- If you have a repair module AFMU, immediately starts repairing your cockpit.
- Once your FSD is ready, charge it and try to align your ship away from the star. The latter should be behind you. Maximum boost to try the alignment, it is not an easy thing.
- Use your heat sinks to counter the damages.
- If you are still in the cone, hold tight! Try again by charging your FSD, and align toward the end of the cone.


9) It is not useful to always fly with 100% fuel. Don’t forget that fuel increase your mass, and decrease your jump range. Check this out:
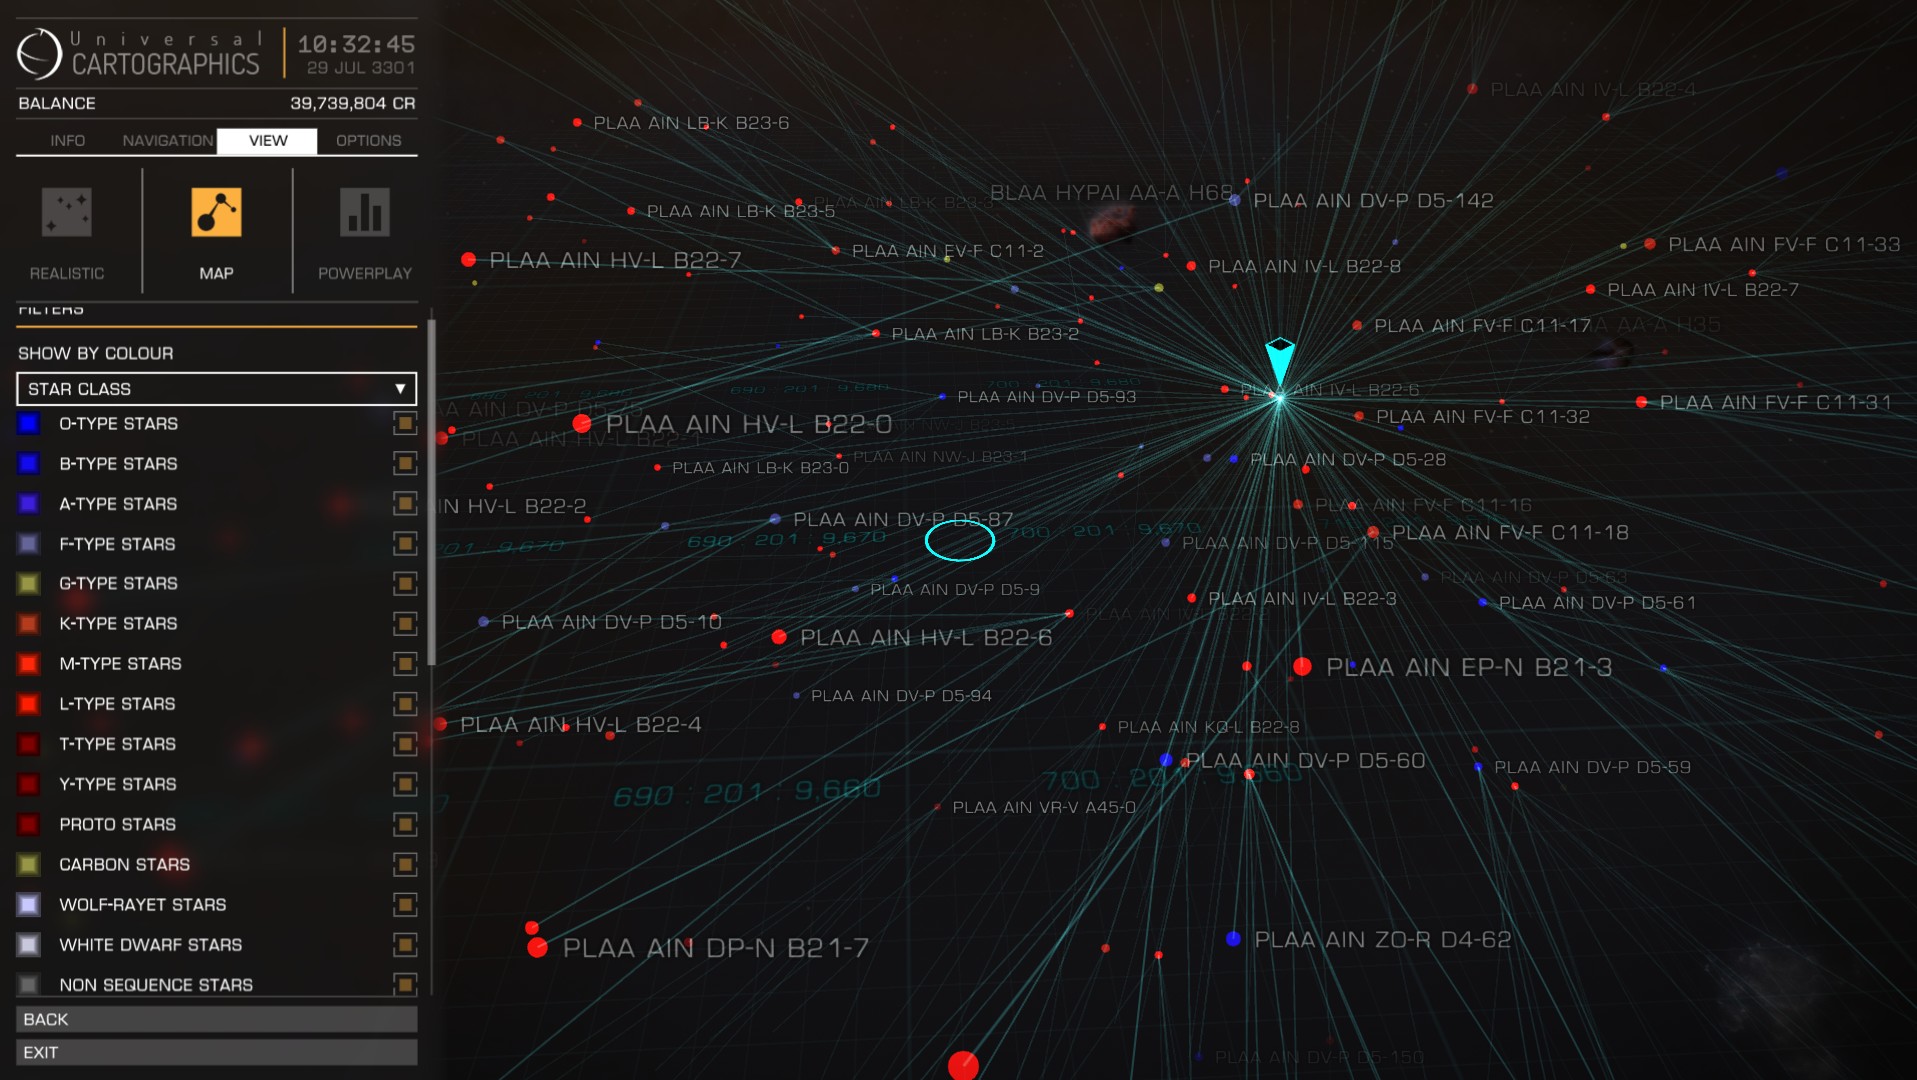
10) To search for specific stars, open your galaxy map, View, then Maps. Here you can sort the states, governments, … and also Spectral types. It is even possible to calculate the jumps only with the chosen types of stars! ABFOGKM for example 🙂
11) After the hyperspace travel, you arrived near a star. The latter will be displayed in red on your sensors (radar in the center). Do not try to jump to another star if this is red, you will heat up too much! Wait until it passes orange and keep the same vector before charging your FSD for a new jump. Doing so will no overheat your ship.
12) Interdicted by another player? No panic:
- Submit to the interdiction
- About-turn and boost past your opponent
- Select a nearby system, not the last one on the list because it is easy to track
- Jump, and once you arrived, quickly disengage supercruise. Wait there a moment.


13) You could always add a Repair Limpet Controller to repair your ship’s armour, but you will also need a Cargo Rack for the limpets. You will decrease your Jump Range.
14) A few more tips:
- EDSM – Elite: Dangerous Star Map
- Spansh – Road to Riches & Neutron Plotter
- A Road to Riches Route to increase your Exploration Rank and earn a lot of Credits
Any comment on these tips or directly the Explorer guide? Please share them with us! 🙂