This post is also available in: Français (French)
WARNING, this guide isn’t up to date, read it [here] in English!
Updated on 19/02/2020
![]()
Welcome to the Mining Guide!
Are you fond of Minerals and Metals? Have a seat, and learn the ropes of the real Miners with our Complete Miner Guide!
You will learn how to understand the values of what you’ve mined, how to best outfit your ship, how to find better asteroids fields and how to make profit out of it.
Other guides: Explorer | Trader | Pirate | Fighter | Liner | AX Combat
Summary:
The role: Miner
Why should you become a miner? Mining means Netprofit while you directly mine the metals, minerals (and materials) that can be found in the giant asteroids fields floating around large stellar objects. You also have some unique outfitting opportunities that makes the role feels unique: Deploy drones to prospect and collect, mine these big rocks into chunks, process your gathering, and refine them with your refinery!
You will then be able to sell these metals and minerals to diverse starports depending on their economies in order to get the most credit our of your mined items. The materials you found out there will also be really helpful for your Synthesis and Engineers schematics.
The basics :
- Equip the appropriate outfit: Prospector and Collector modules, Refinery, one or multiple Mining Lasers, as much cargo as possible, powerful lights, your Nightvision, Detailed Surface Scanner, Wave Scanner, Abrasive Blaster, Displacement Missiles and Seismic Charges.
- Have a large freighter in order to stock your drones and mined items. Materials don’t take any space in your cargo and are stored separately, you will not lose them if your ship were about to explode.
- Discern the Metals, Minerals and Materials that you will gather in the asteroids fields. You will gain time, and credits.
- Don’t spend all of your credits and time in upgrading your FSD. However, the farthest your will jump, the better (~15 to 20 LY is great already).
- Focus your efforts on mining speed, collection speed and a Refinery suited to your miner’s gameplay.
- Weapons to defend yourself against pirates if you want to. Turrets on slow ships and guided weapons or quicker ones. Keep in mind that pirates can kill you pretty easily.
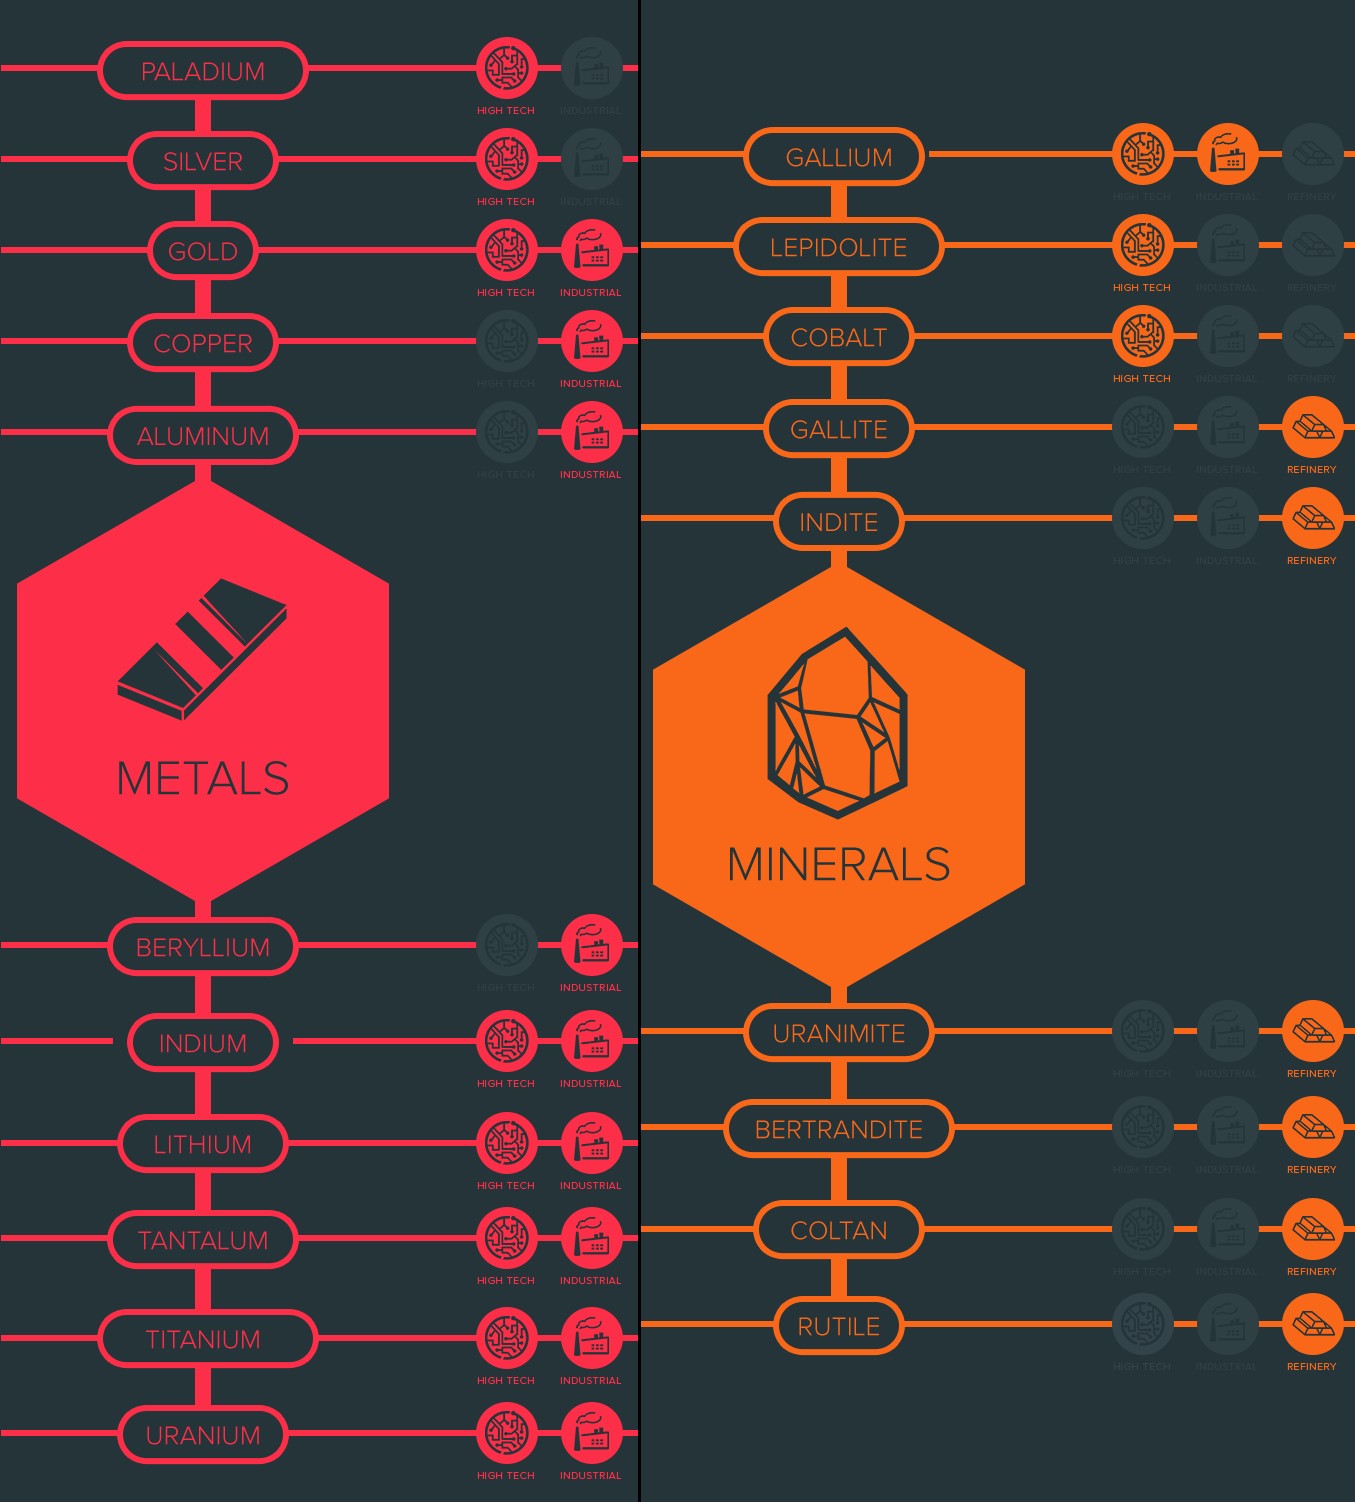
Ships and Modules
Of course you can mine with any ship, however some ships are better at mining than others thanks to their modules sizes and space. With a proper and outfitted mining ship, you will be able to make more profit out of these great asteroids fields with a minimum effort.
► The first important mod to have is the Enhanced FSD Drive to jump farther, thanks Mrs and Mrs Engineers!
→ The goal is to have the longest jump range, to be as light as possible with your toolset and to keep in mind your security.
The ships are built differently depending on your play-style, the distance to your preferred mining/selling area, the items that you want to mine.
There is three distinct styles that we will detail in the next chapter.
◘ An outfit suited for a Miner:
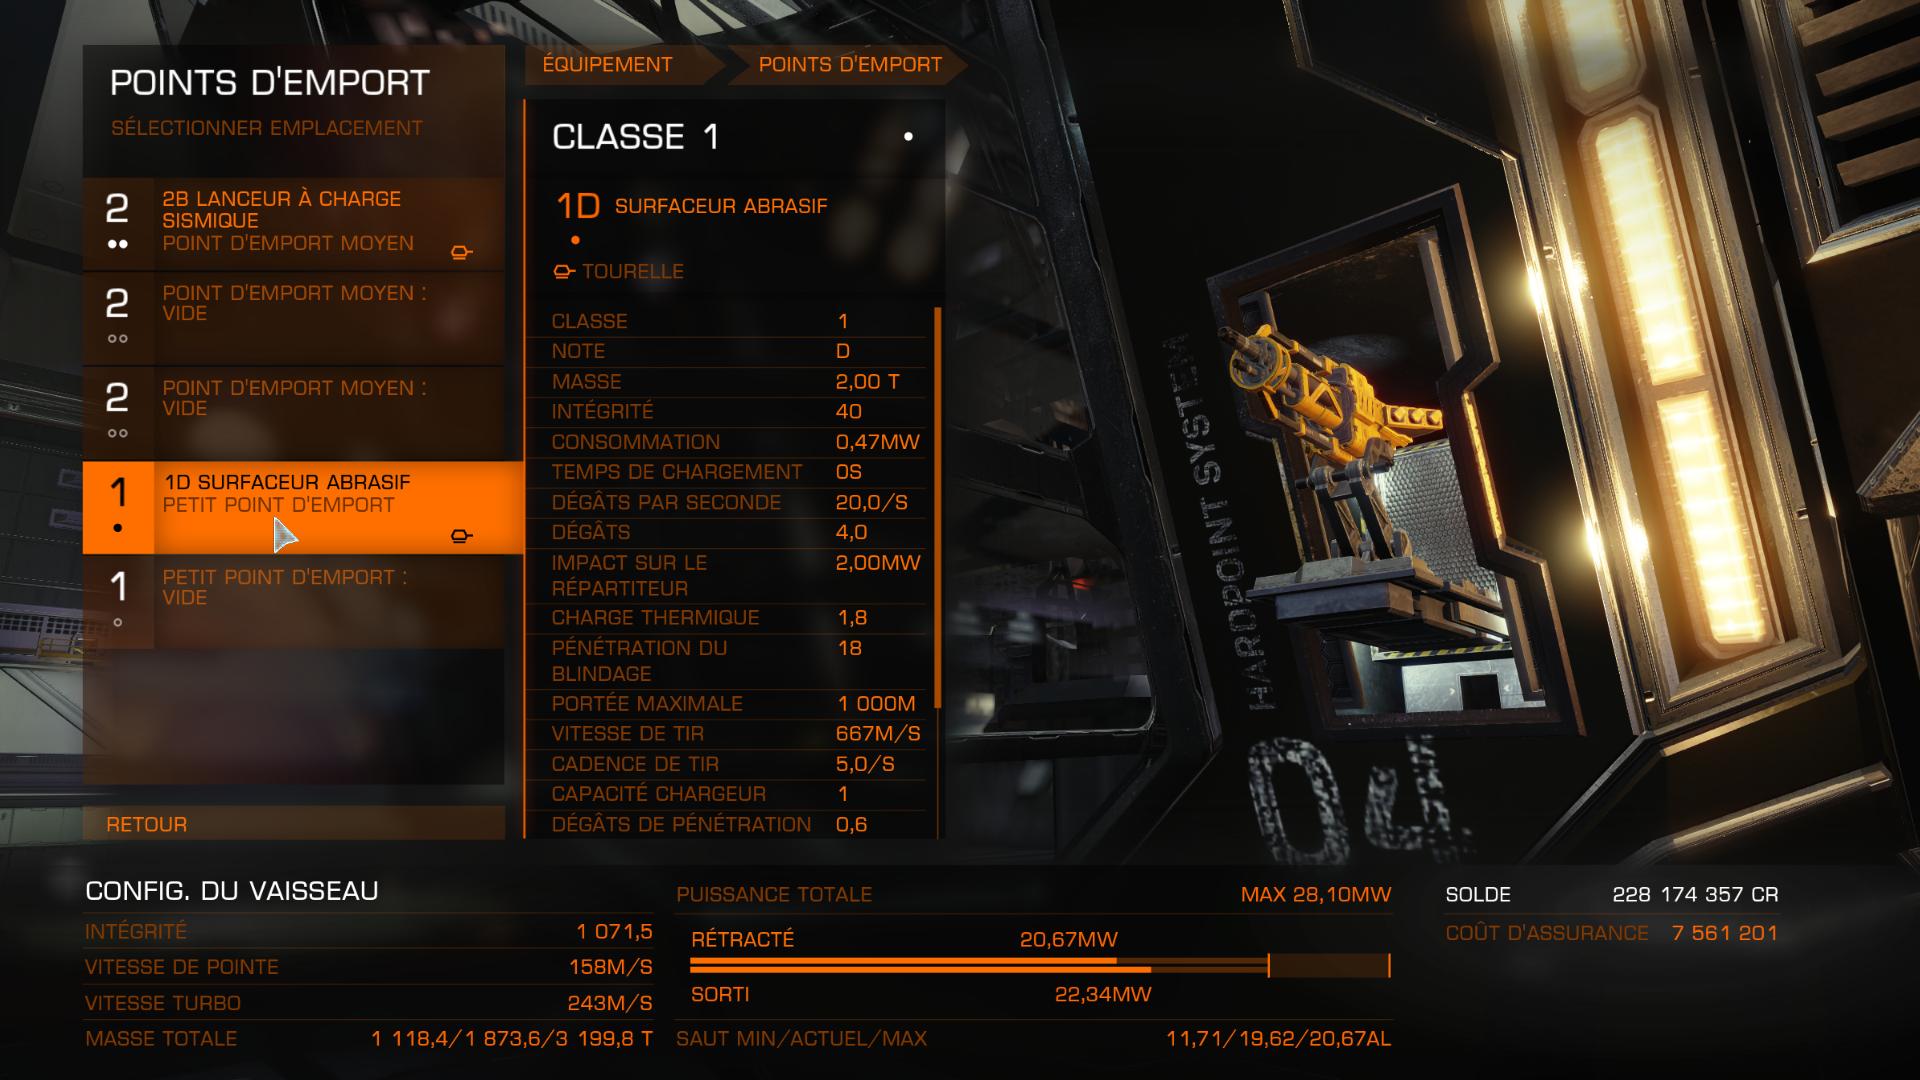
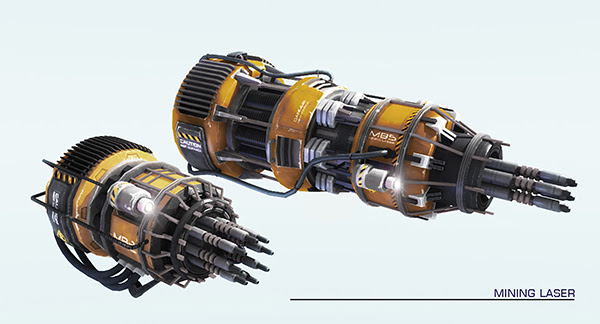
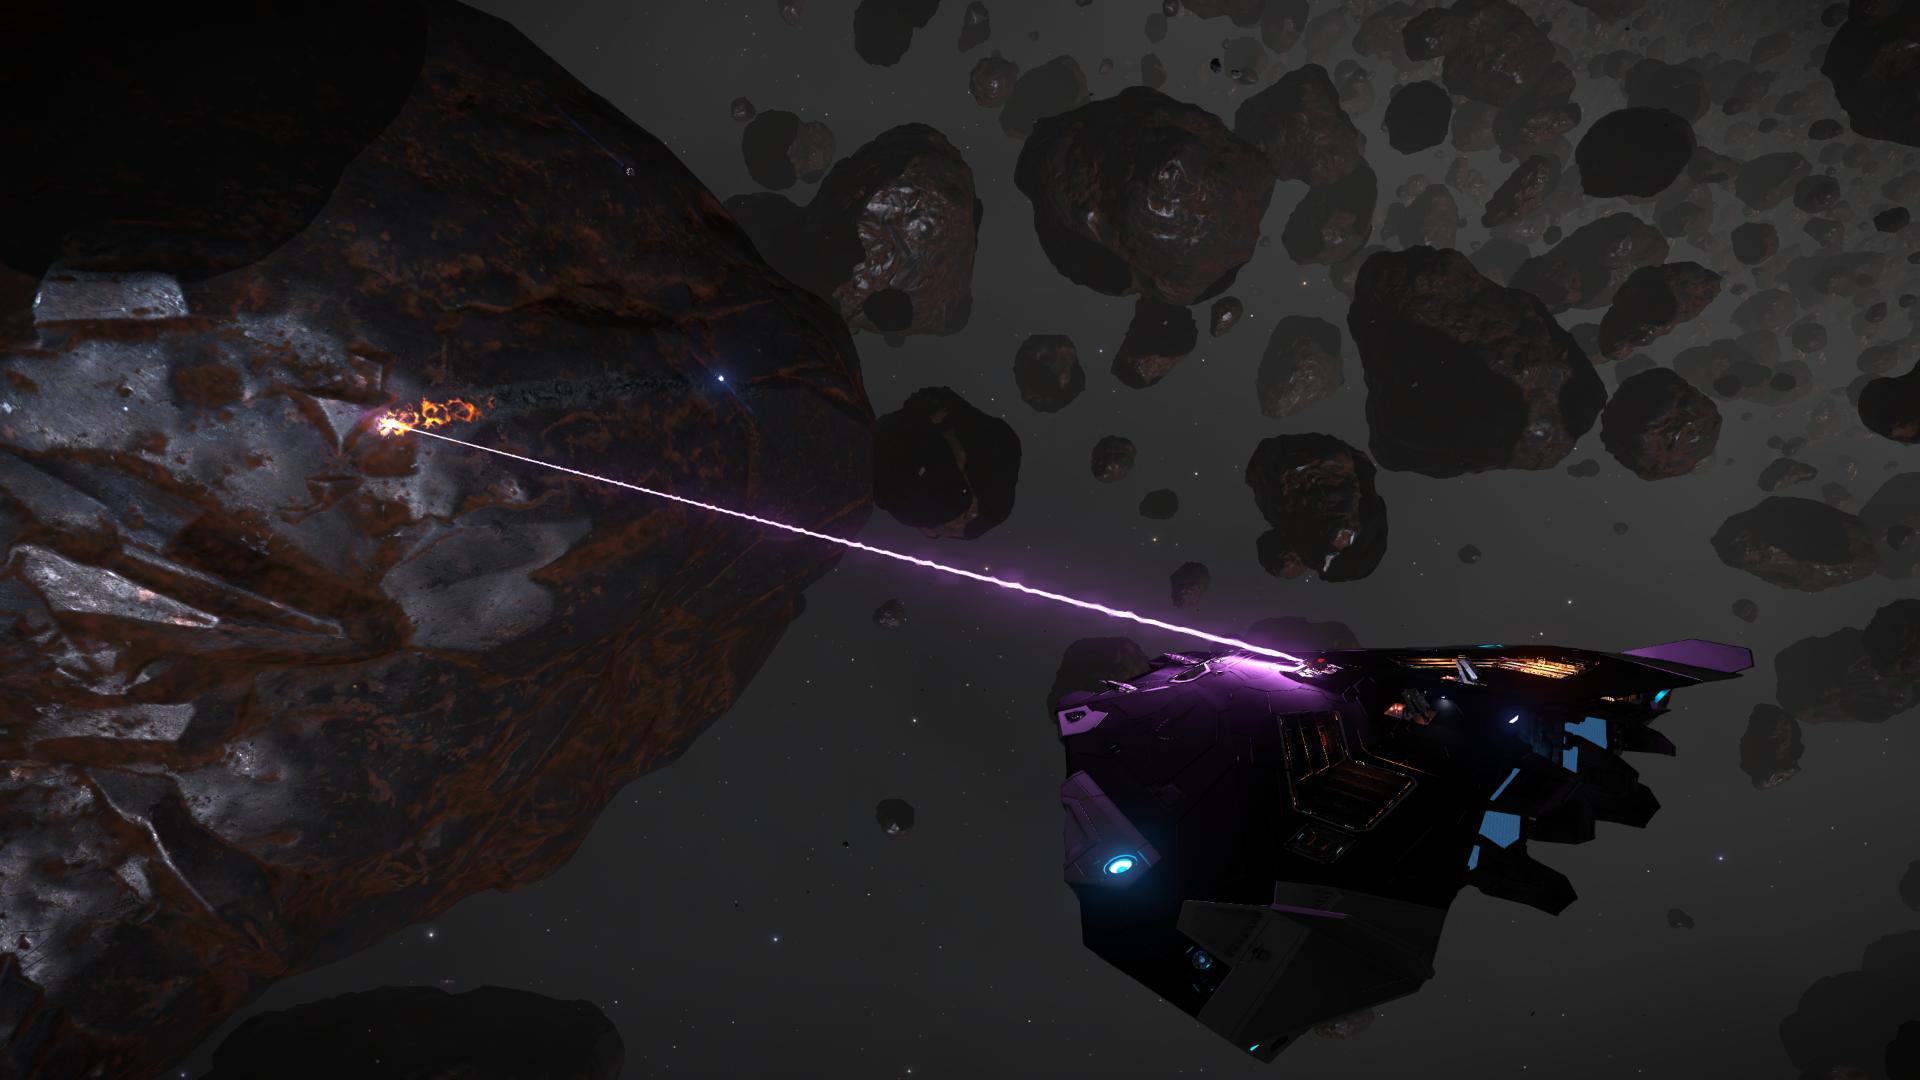
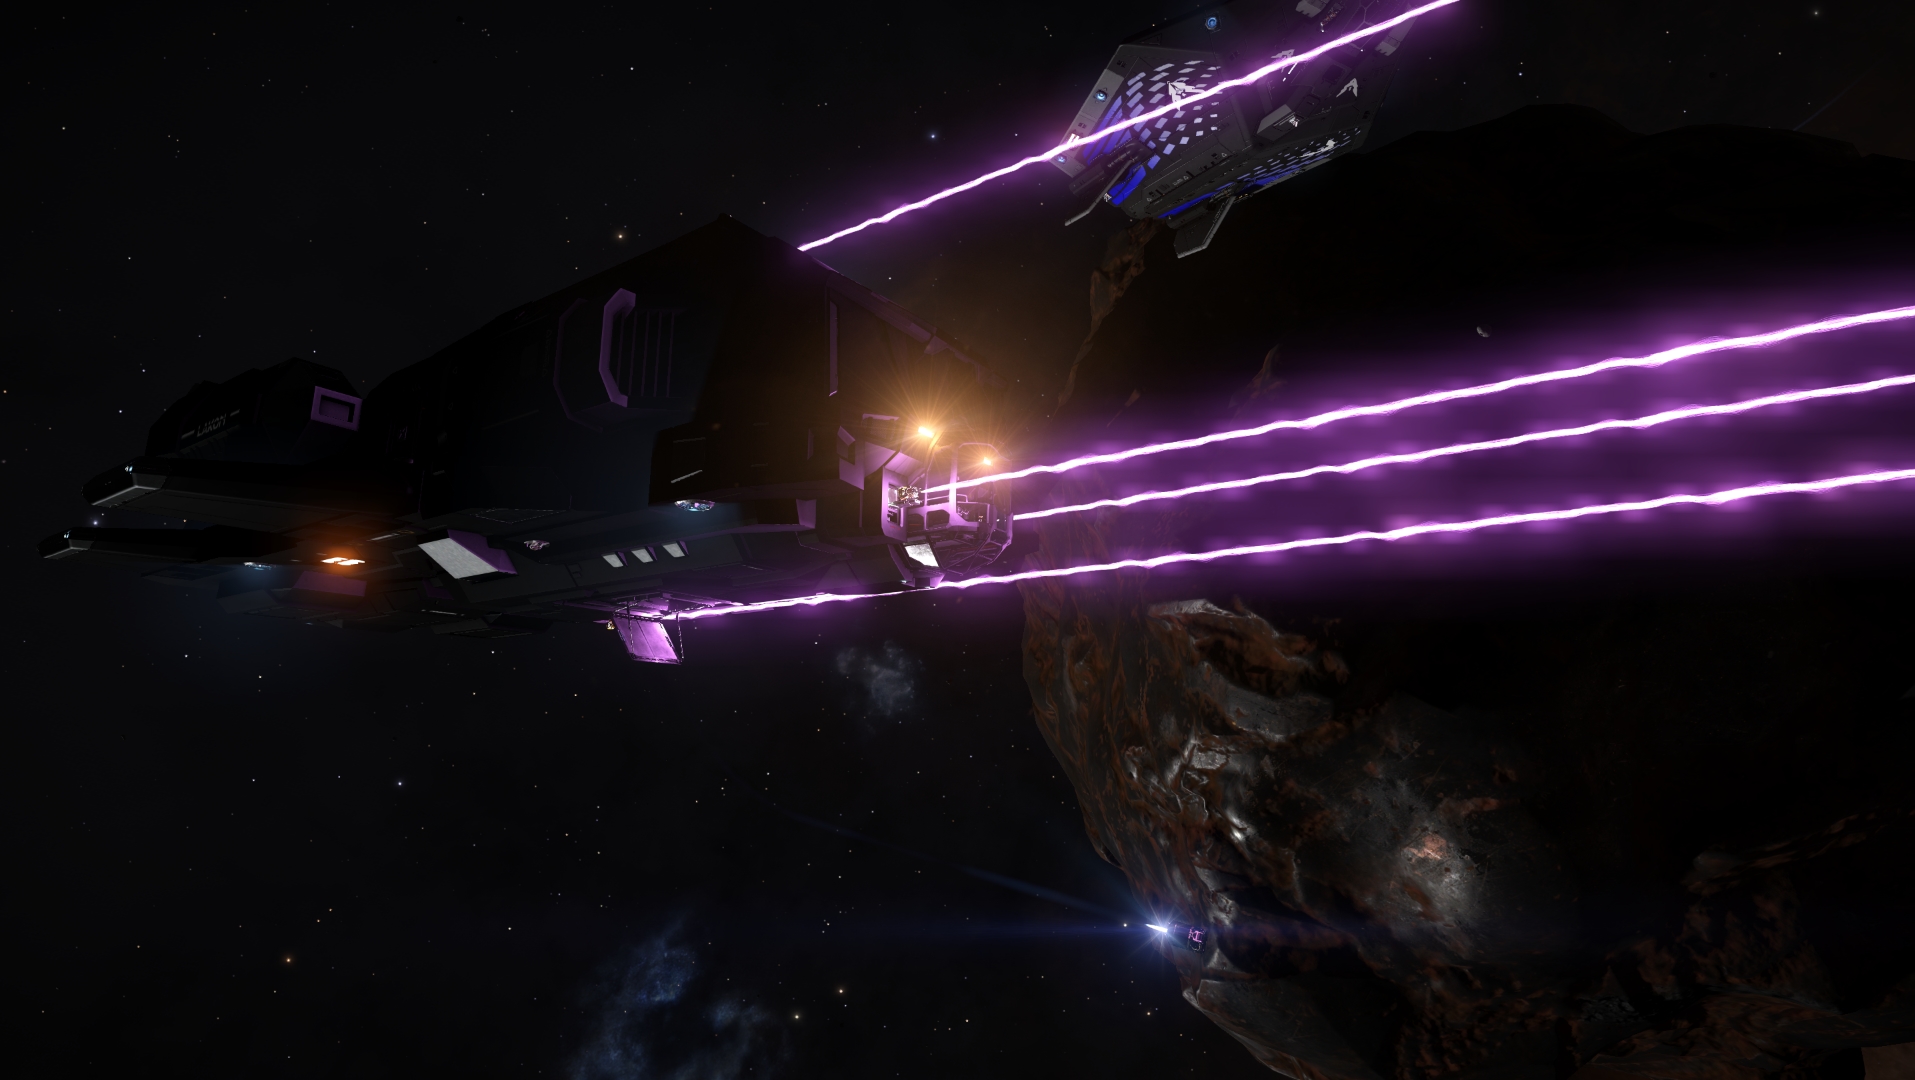
- Mining Laser – [Surface Mining] A very useful laser tool allowing you to scrap items from the asteroids’ surfaces. You can’t use it to fight enemies. These modules exist in two classes: Class 1 allows a slow mining with minimum power required, and Class 2 allows you to mine faster, however it requires more power from your power plant & distributor. You can equip as much Mining laser as you want in order to increase your mining speed, but keep in mind that you need to collect the mined items quickly as they will decay in space. Balance your ship for a fast mining speed / collector speed. For example, my Type 9 has 5 Mining laser (3C2 and 2C1) and at least 15 Collector limpets simultaneously.
- Abrasion Blaster – [Surface Mining] A hardpoint module that you must charge before shooting at Surface Deposits, breaking them off for collection. If you succeed, the chunk will detach from the asteroid and you will be able to collect it.
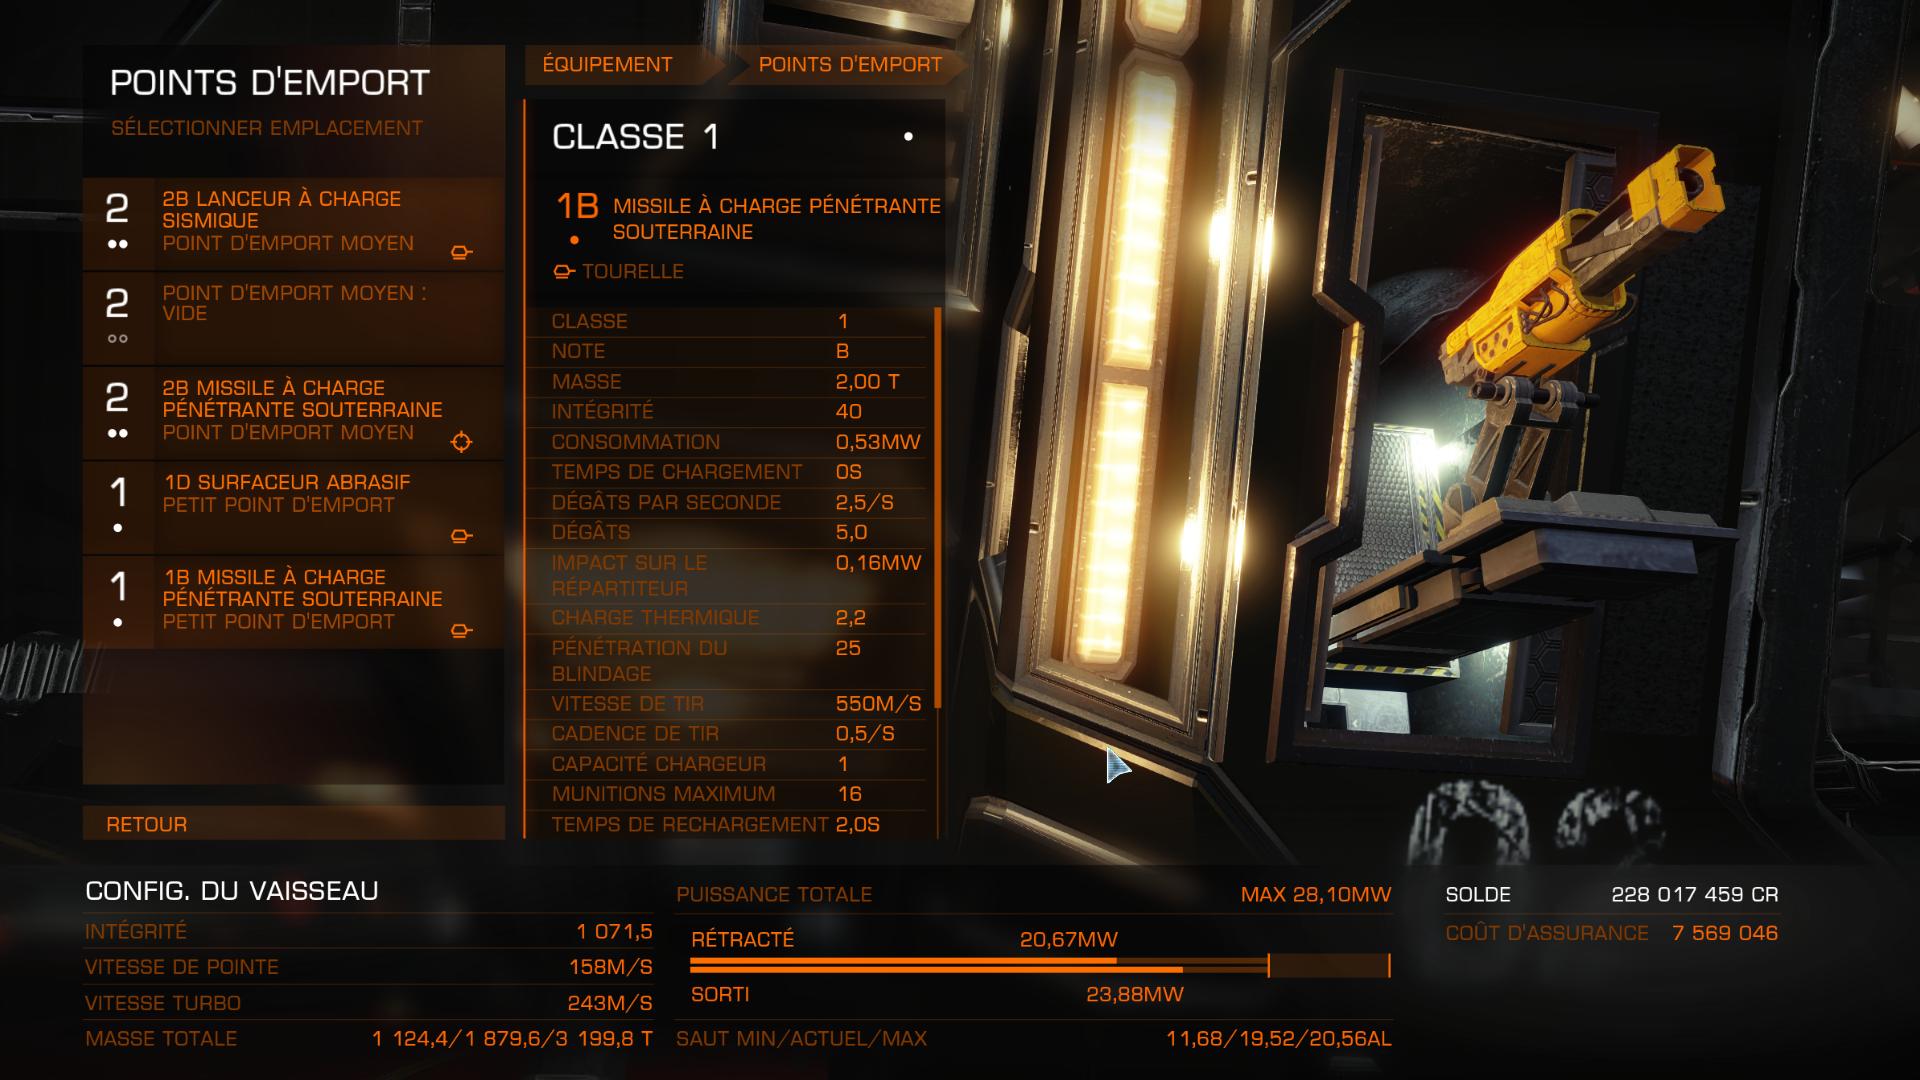
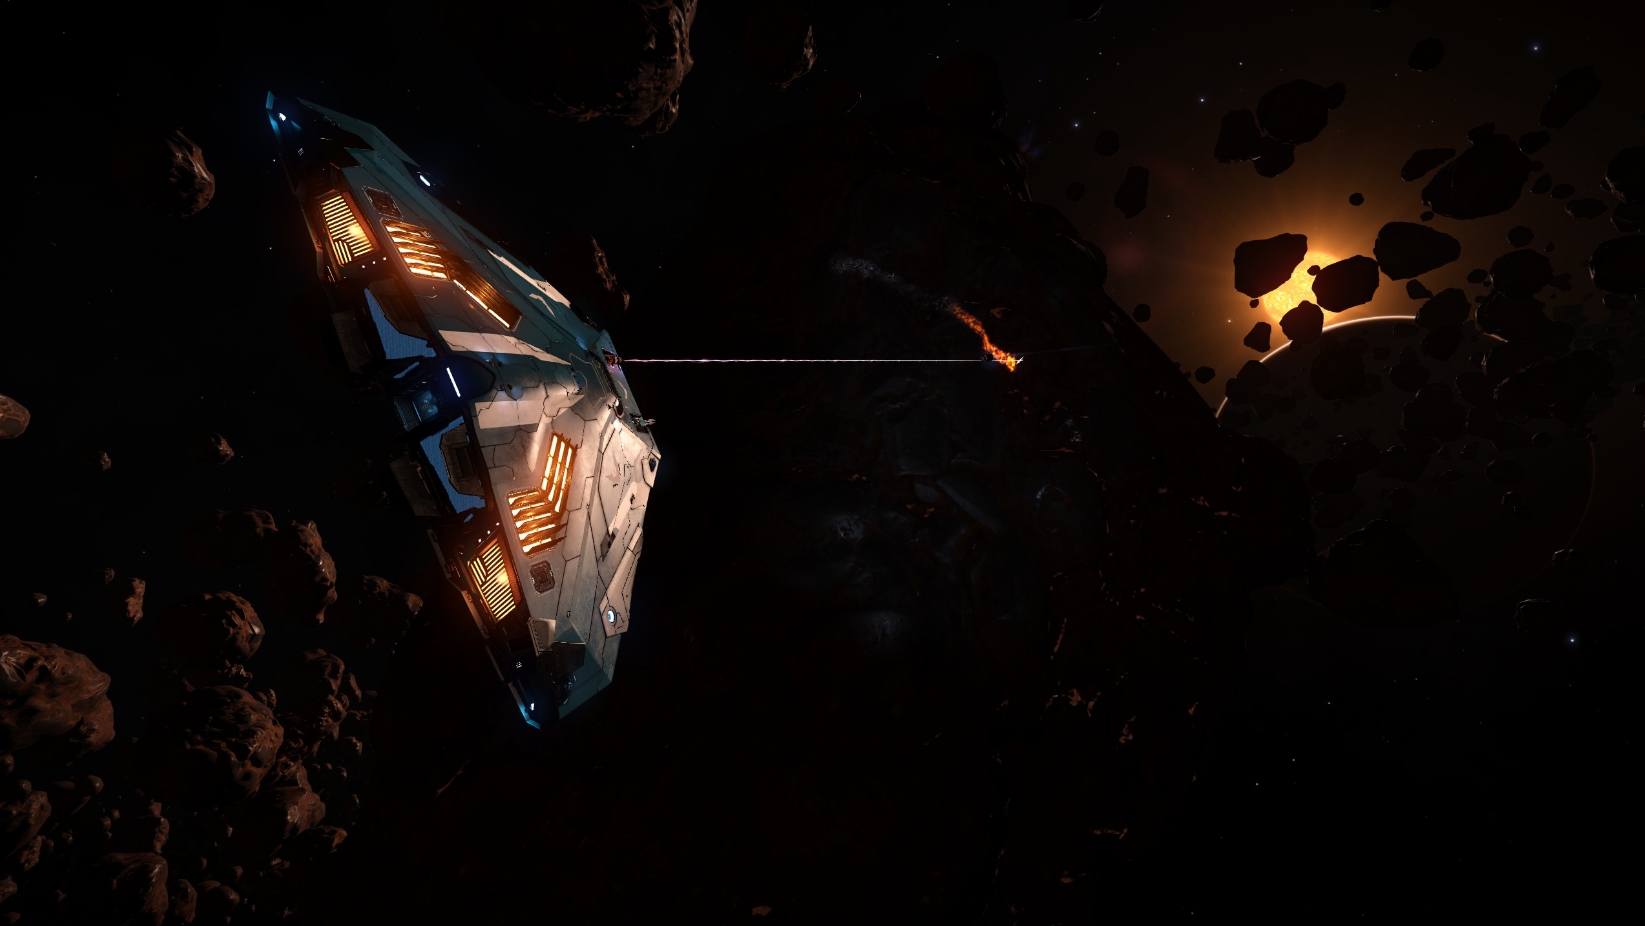
- Sub-surface Displacement Missile – [Sub-Surface Mining] This hardpoint module is used for harvesting Sub-surface Deposits. Described as a ‘drill on the end of a missile’, this digs into the rock at the point of impact. The cockpit’s UI will then show the displacement missile travelling through the rock. Holding down the trigger and releasing at a the optimal time displayed by the interface will allow you to recover valuable sub-surface minerals or metals.
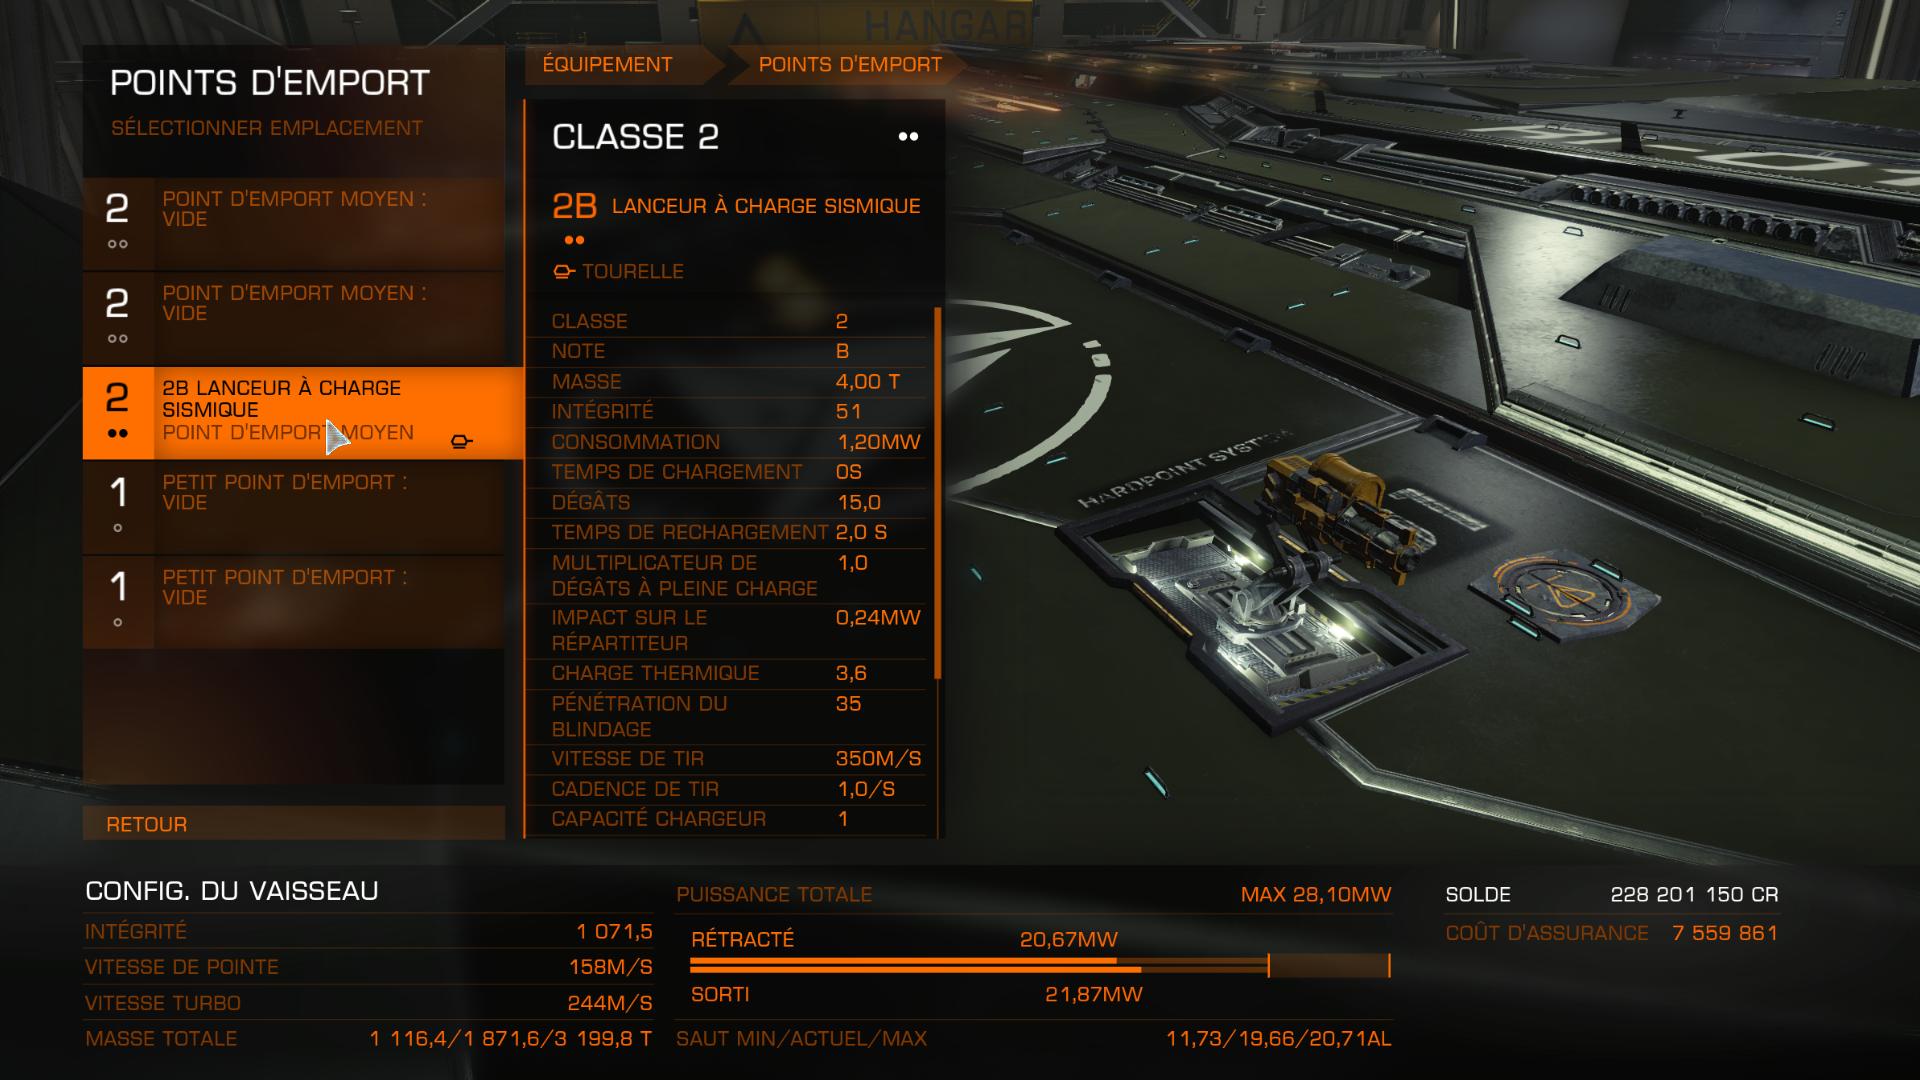
- Seismic Charge Warheads – [Deep Core Mining] Certain asteroids, identified by the fissures on their surface, can be completely broken apart to reveal a large amount of metals/minerals. Pilots will have to place seismic charges in these fissures at a particular charge level before detonating them to crack the asteroid open. The charges can be charged on three levels from low to high while holding more or less the trigger. There are three types of fissures, from weak to strong. The weakest fissures require a less powerful charge to have an impact on the core.
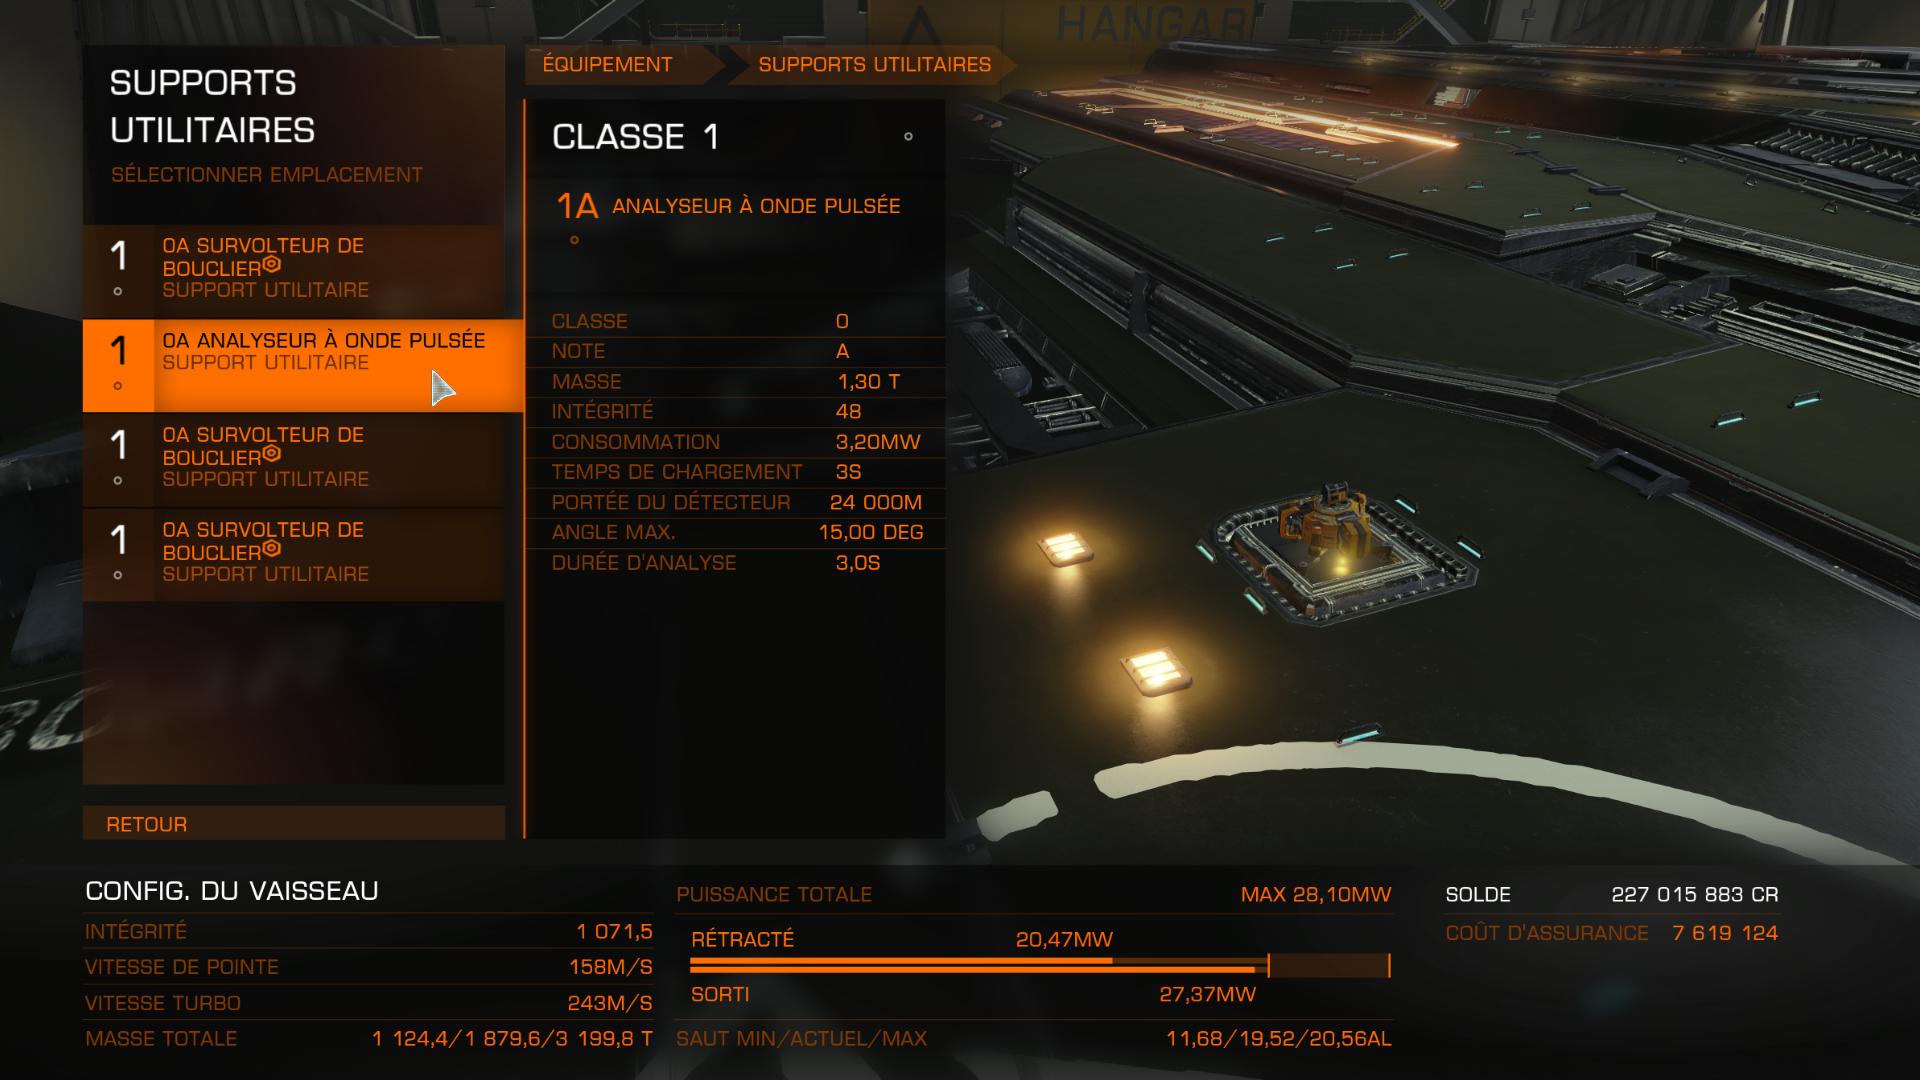
- Pulse Wave Analyser – Using this module will send out a pulse of energy that will highlight the best asteroids around you. Useless if you only do Surface Mining with Mining Laser. The PWA helps you find asteroids with deposits on the asteroids surfaces, subsurfaces or in the asteroids core.
- Refinery – This module exists in four sizes, C1 to C4, and it is also mandatory to refine your mined items into units of metals and minerals. Gathering chunks of a Metal/Minerals out of an asteroid will increase the % refined of this Metal/Minerals. When it reached 100%, you will be granted with 1 unit of this Metal/Minerals // The higher Class is your Refinery, the more bins you will have in order to store the chunks of elements before refining them (A>B>C>D>E). If you mine everything, it is better to buy a large refinery. However if you only target certain elements, it is wise to buy a smaller Refinery.
- Prospector drones – This module will configure your limpets so they can prospect asteroids and return some information upon acquisition (when the drone attach to the asteroid). You will know the % of metals and minerals into the asteroid you’ve prospected as long as their affluence in materials. Note that prospecting an asteroid before processing mining on it will double the amount of Metal/Minerals that you can collect from the latter.
- Collector drones – This module will configure your limpets so they can collect the chunks of asteroids that you’ve mined. They will directly haul the Metal/Minerals to your cargo bay, don’t forget to open your cargo hatch so the drones can put these Metal/Minerals into your Refinery.
- Of course, you need as much free space in Cargo as possible !
- Don’t forget to buy limpets thanks to the Advanced Maintenance panel in the adequate stations. They will be added to your Cargo. Generally, you can fill you cargo with 2/3 of limpets.
- Feel free to buy a Shield Generator, a Fuel Scoop and a Detailed Scanner or even weapons depending on your playstyle.
- The Shields will let you tank damage from the asteroids debris… or the asteroids themselves
- The Fuel Scoop can help you on long routes when you want to reach your mining area and your selling point.
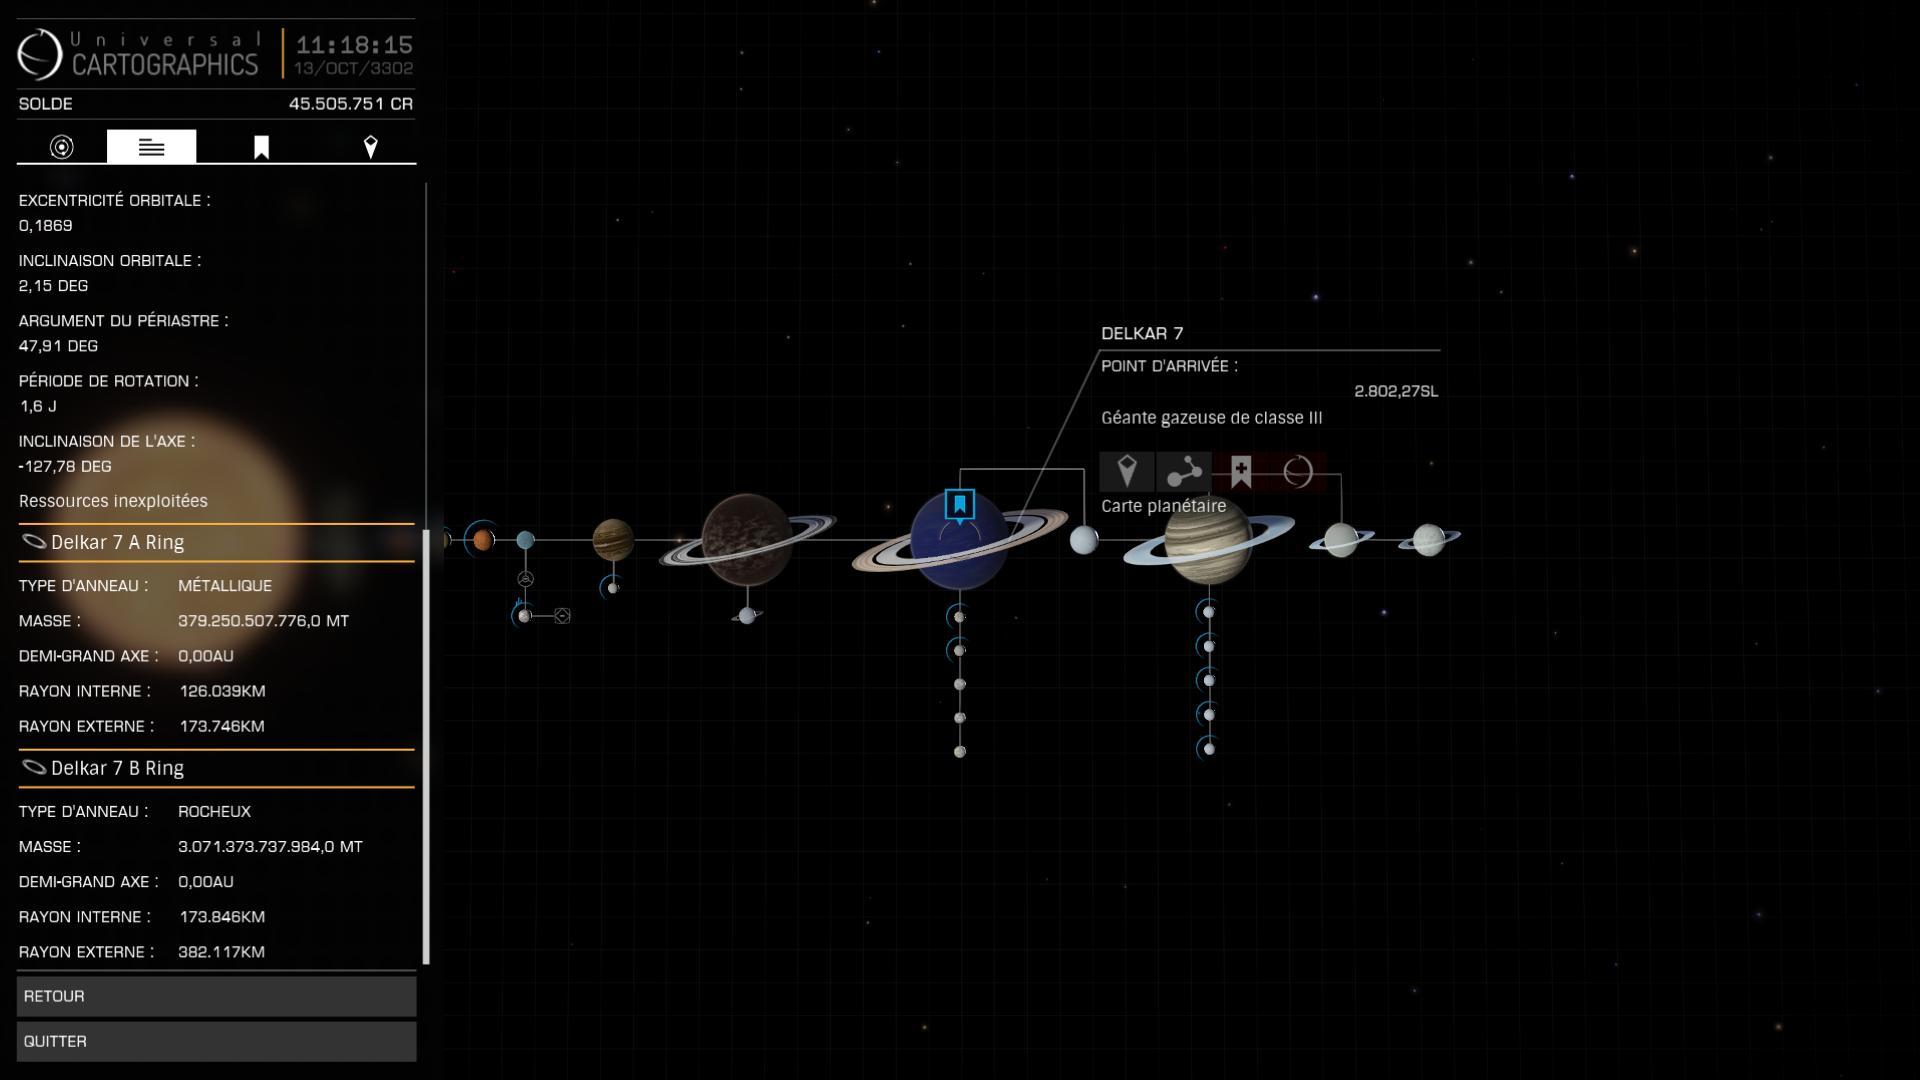
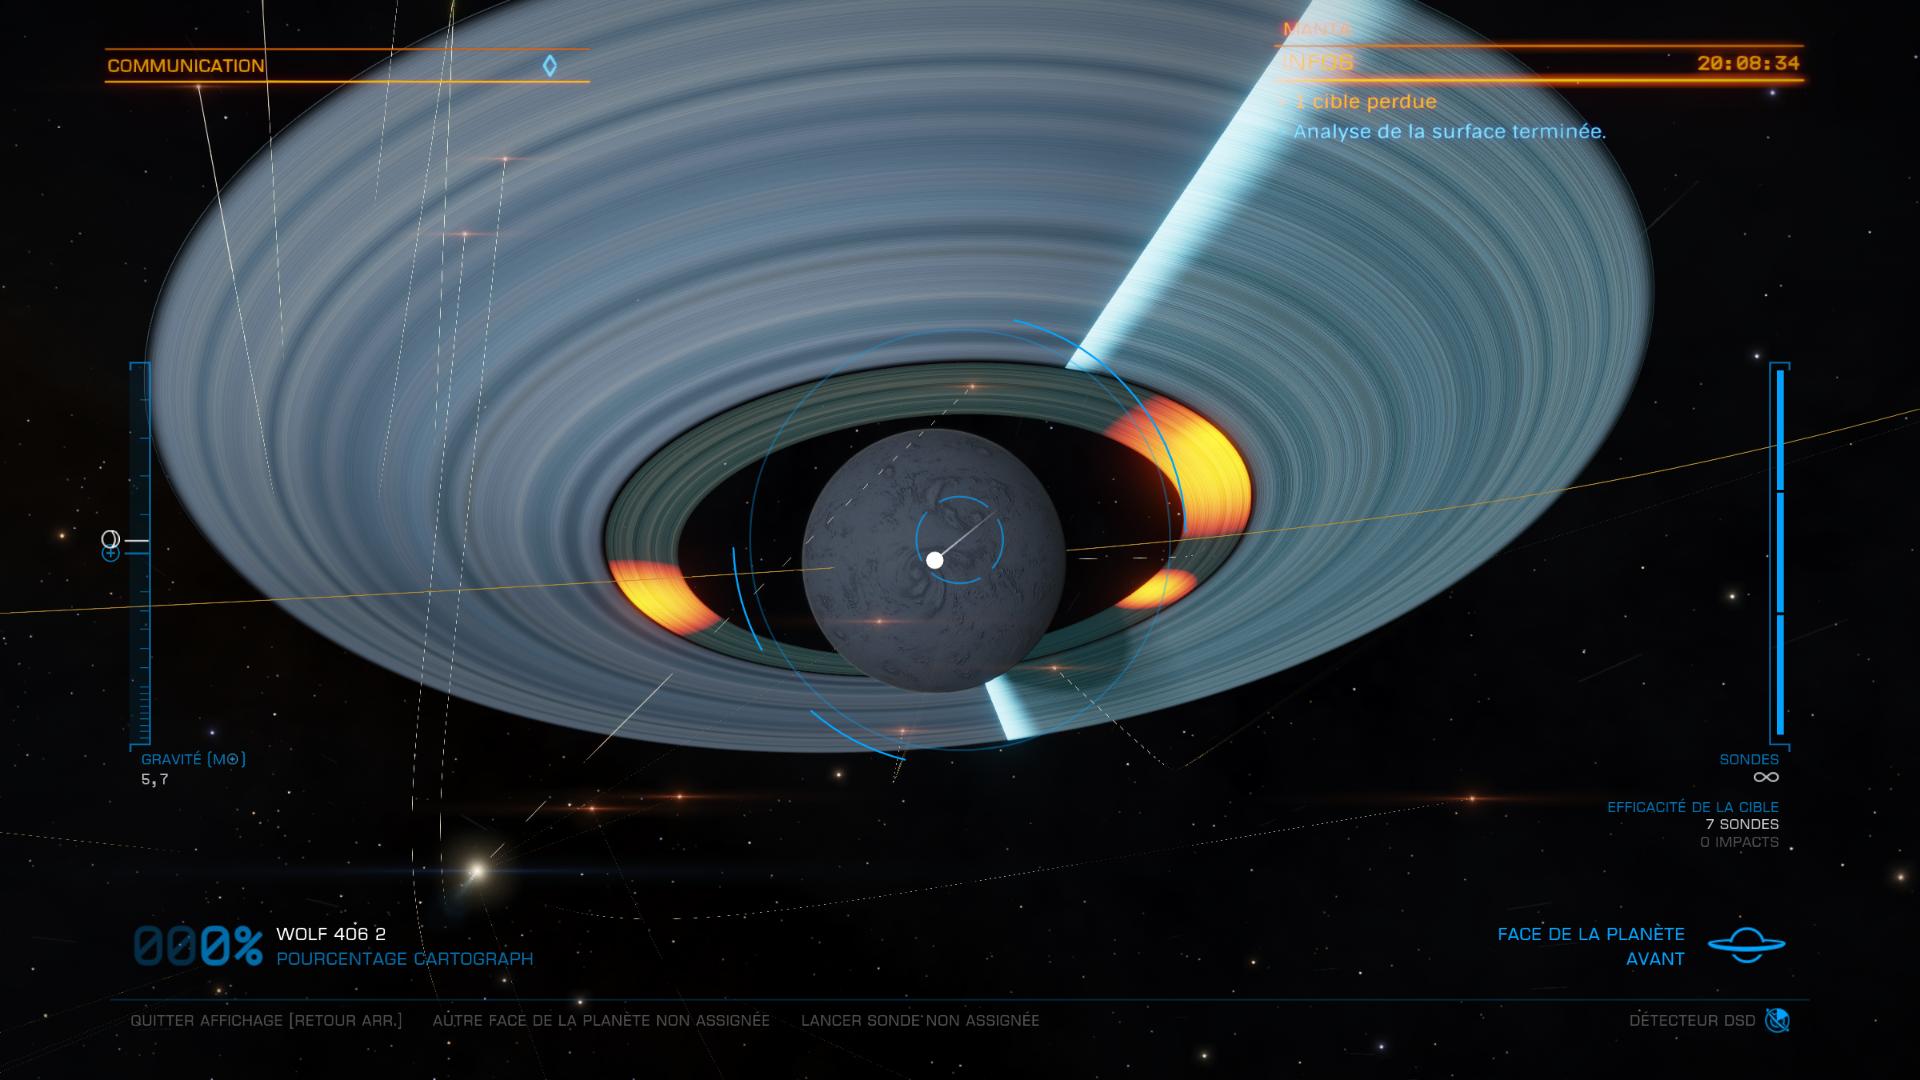
- The Detailed Scanner is important coupled with the FSS in order to cartography the planets and their rings. By launching probes at the rings, the hotspots will be displayed so you can easily find the best places to mine in the rings.
◘ Here are some builds examples and explanations articulated around the “Deep Core” or “Surface” gameplay.
- Adder (26.34LY → 32.5LY, 18u) – 2M 479k credits, Size: Small // Surface
- With no shields and little cargo, your goal will be to use your Detailed Surface Scanner to find out exactly where to mine in an asteroid ring. Once you’re there, prospect the asteroids but don’t scatter around and focus, you only have 18u cargo. Generally at 15/20% of the metal/mineral sought we mine it, but in an Adder you better aim for the 10% minimum concentration. You can’t fly too far without a Fuel Scoop, be careful.
- Cobra MkIV (32.97LY → 37.51LY, 50u) – 12M 548k credits, Size: Small // Full
- Available only to players who pre-ordered Horizons, the Cobra MkIV can haul 50 cargo units and a complete set as the perfect versatile miner with a Fuel Scoop, FSD Guardian Booster, Cargo, Collector and Prospector, Detailed Surface Scanner and all the paraphernalia with your Abrasive Blaster, Displacement Missile, Seismic Charge and two Mining Lasers with your Pulsed Wave… yup, you can do a lot of things with that stuff. Mine exactly what you’re looking for, in the right place.
- Keelback ? Again, why not, but you will only haul 32u cargo if you want to use the Keelback for what it is, which means with a Ship Launched Fighter Bay and Shields.
- Type 6 (30.92LY → 42.8LY, 84u) – 9M 733k credits, Size: Medium // Surface
- Kind of a big Adder with the same gameplay: prospect for asteroids and mine with your mining laser all those that have the metals/minerals sought at 15% concentration minimum.
- Type 7 (27.26LY → 37.02LY, 192u) – 50M 244k credits, Size: Large // Surface
- Little used but effective for a large mining machine at a lower price. Be careful because the Type 7 tends to heat up. To counter that I added a Clean Mod on the Thrusters and an optionnal Low Emissions Mod Power Plant to help dissipate the heat. You also get 2 Modded Heatsinks to help you cool down and 5 Collector Drones. Consider modding your Power Distributor as well with Enhanced Charge or directly with a Weapons Focused to fire continuously without any breaks. Note that you increase your cargo up to 224u without Fuel Scoop.
- Python (26.46LY → 35.57LY, 192u) – 83M 169k credits, Size: Medium // Surface and Core
- A simple mining Python with the advantage of being able to land on a medium pad. You have 6 Collector Drones. Note that if you need a Fuel Scoop, you will decrease your total cargo to 128u. If you have the Credits for, buy a Python and skil the Type 7. It is made for Deep Core Mining, forr example Painite or Low Temperature Diamonds.
- Type 9
- Surface Mining (18.97LY → 26.17LY, 512u) – 177M 609k credits, Taille : Large
- Large, slow and fragile, but still the best Surface farming ship. With 16 drones and 5 mining laser, you will empty the asteroids in a blink of an eye. Prospect absolutely all the asteroids in your best mining spot and mine those that have a concentration at 15 or even 20% minimum. Before departure, add 500 drones in your cargo. And since we’re on pure farming, play in solo mode (oops!).
- Deep Core Mining (18.72AL → 28.72AL, 656u) – 191M 139k credits, Taille : Large
- Here no need for that much Collectors, but you still get 7 drones simultaneously in order to collect the metals/minerals extracted from the Asteroid Cores. The Refinery is a bit overkill, but there is no C4 Collector and nothing else interesting to replace. Mine those Cores!
- Surface Mining (18.97LY → 26.17LY, 512u) – 177M 609k credits, Taille : Large
- Anaconda? Take this template.
- Cutter? Yep, just take the Type 9 template and apply it to your ship. That said, you already have an easy 3h to 5h of gameplay to fill the Type 9, so the Cutter will be longer. Sometimes it is better to do less and be sure to sell all your goods rather than doing more to be blocked with the full cargo, or destroyed.
About Mining
There are two mining styles: the Surface Miner, the Deep Core Miner (and the Wing Miner)
- The Surface Miner mainly has a large number of Mining Lasers and Collector Drones. Its purpose is to prospect absolutely all the asteroids and to measure their concentrations in minerals/metals sought. Here we must collect all the high values items. Don’t think too much: Prospect, mine, harvest, next.
- The Core Miner is reserved for specialized ships with equipment such as Abrasive Blasters, Displacement Missiles (little used) and especially Seismic Charges. This is where your Pulsed Wave module will be used to show you which asteroids contain the best deposits. Look for bright yellow-orange with black lines for the best asteroids. Once found, prospect it and mine if necessary with your tools first, then open it by placing the right loads in the right fissures. Once the asteroid is cracked open: mine the inside with your Abrasive Surfacer.
- The Wing Miner is indeed for miners playing in squads :
- The miners – Equip your Mining tools & lasers + Prospector drones! Your goal is to extract as much Metal/Minerals from the asteroids near your cargo-ships. This is usually played by Sidewinder, Adder, Cobra, … Think about specialization, you need to complete the other miners.
- The gatherer – You need to focus on Collector drones but feel free to equip some Mining lasers if you’re able to. Leave the tools to the miners as they’re usually smaller ships than yours. You would rather go for the best turrets in order to protect your allies. It is indeed better if you have some security guards with you. Obviously, you have a Refinery Class 4 rated A. This is usually played by Anaconda, Type 9, Cutter, …
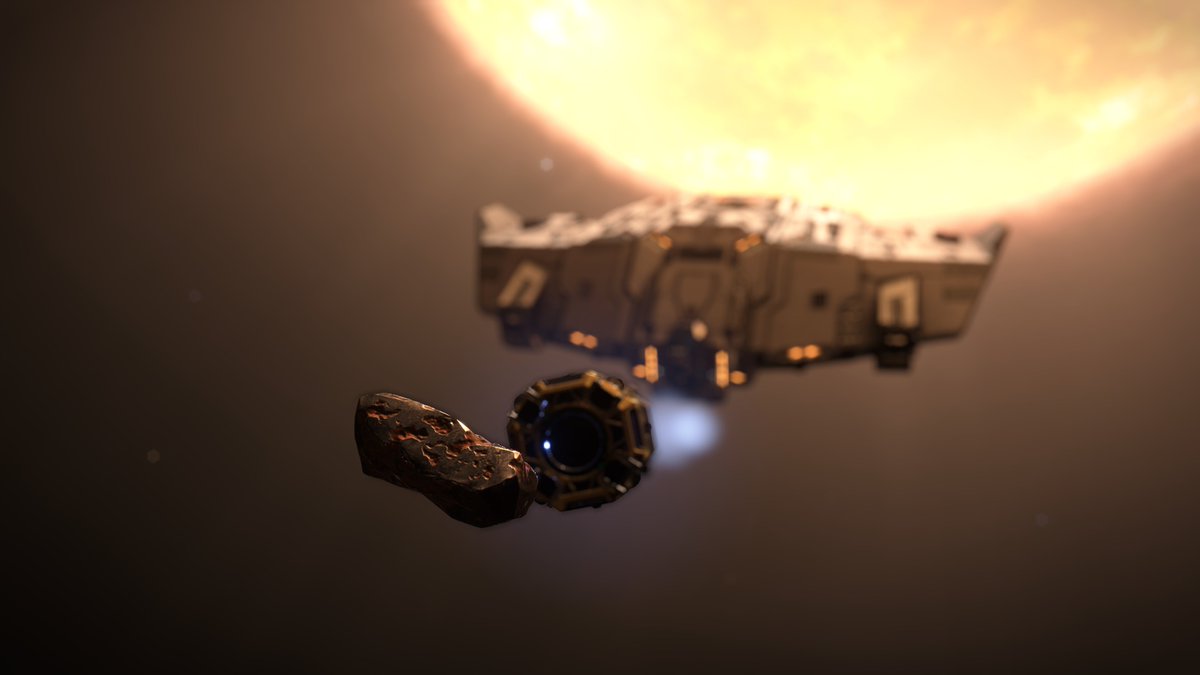
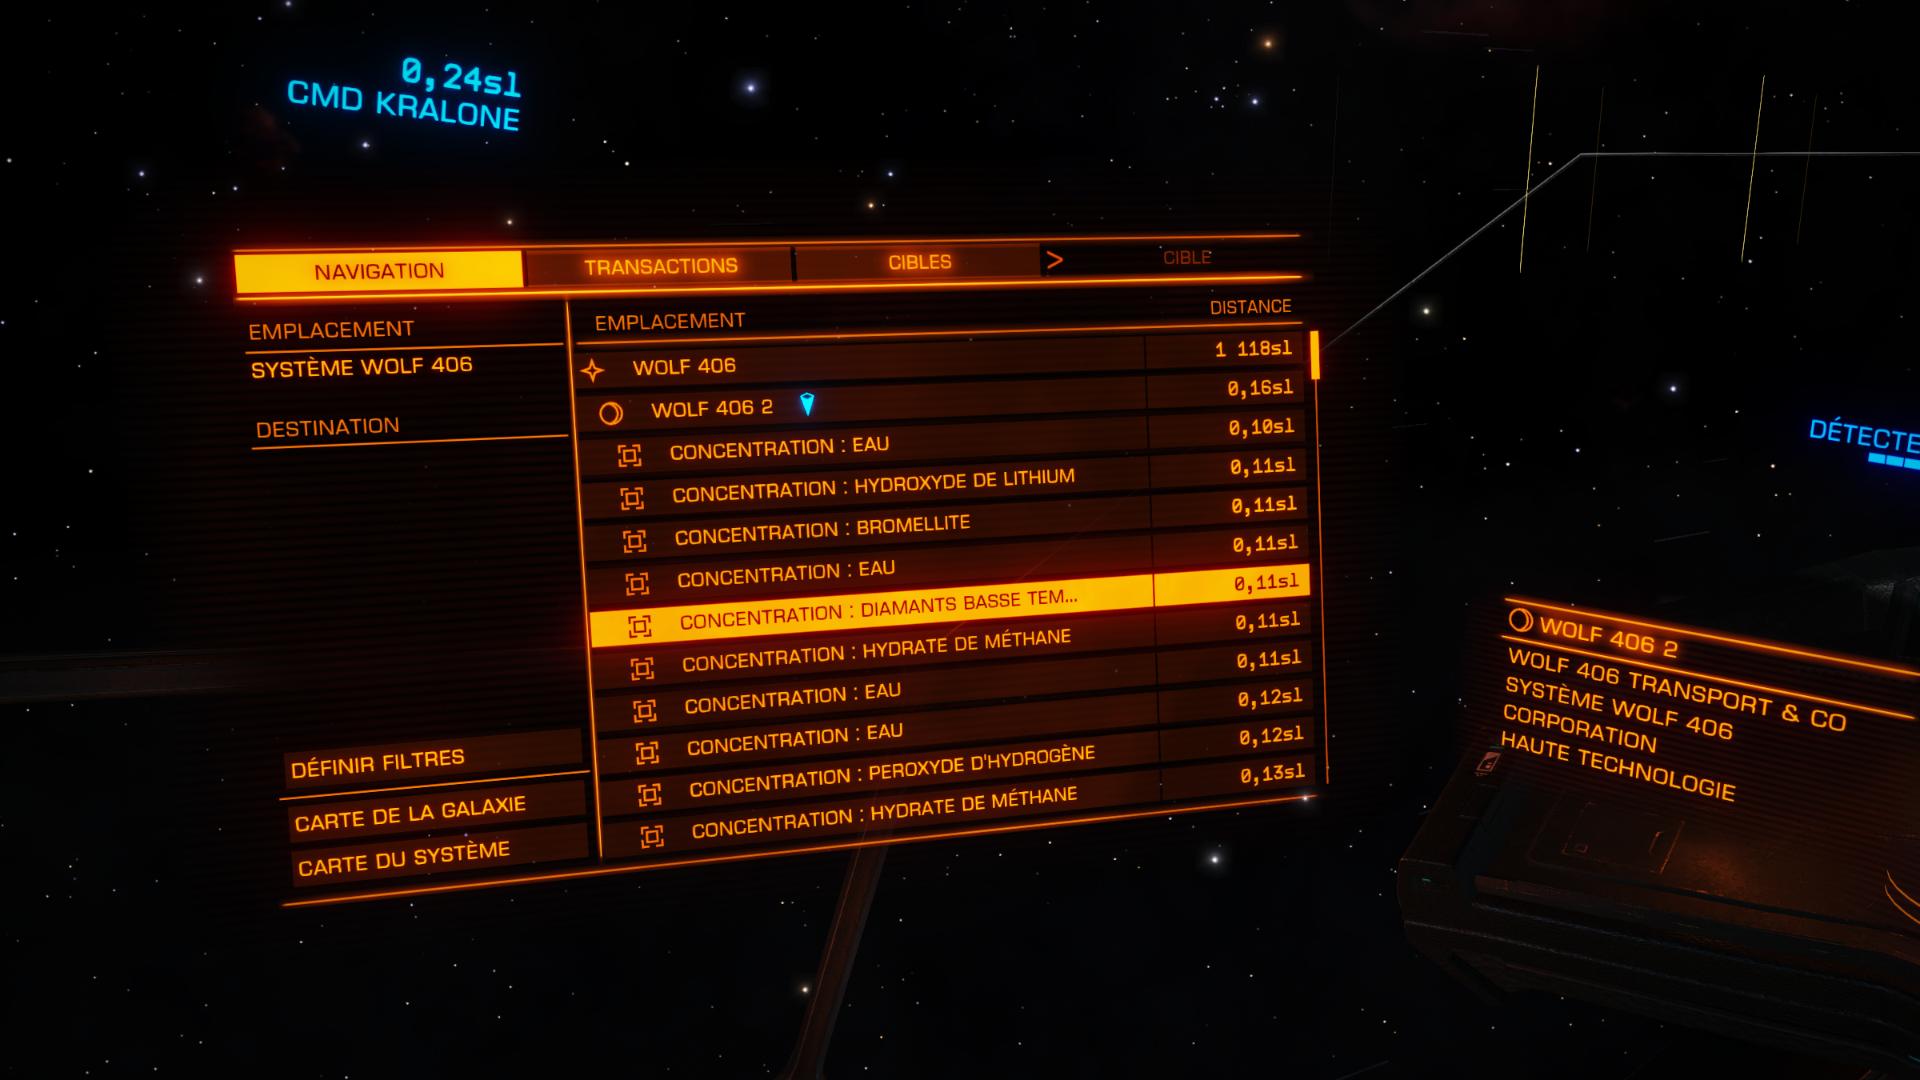
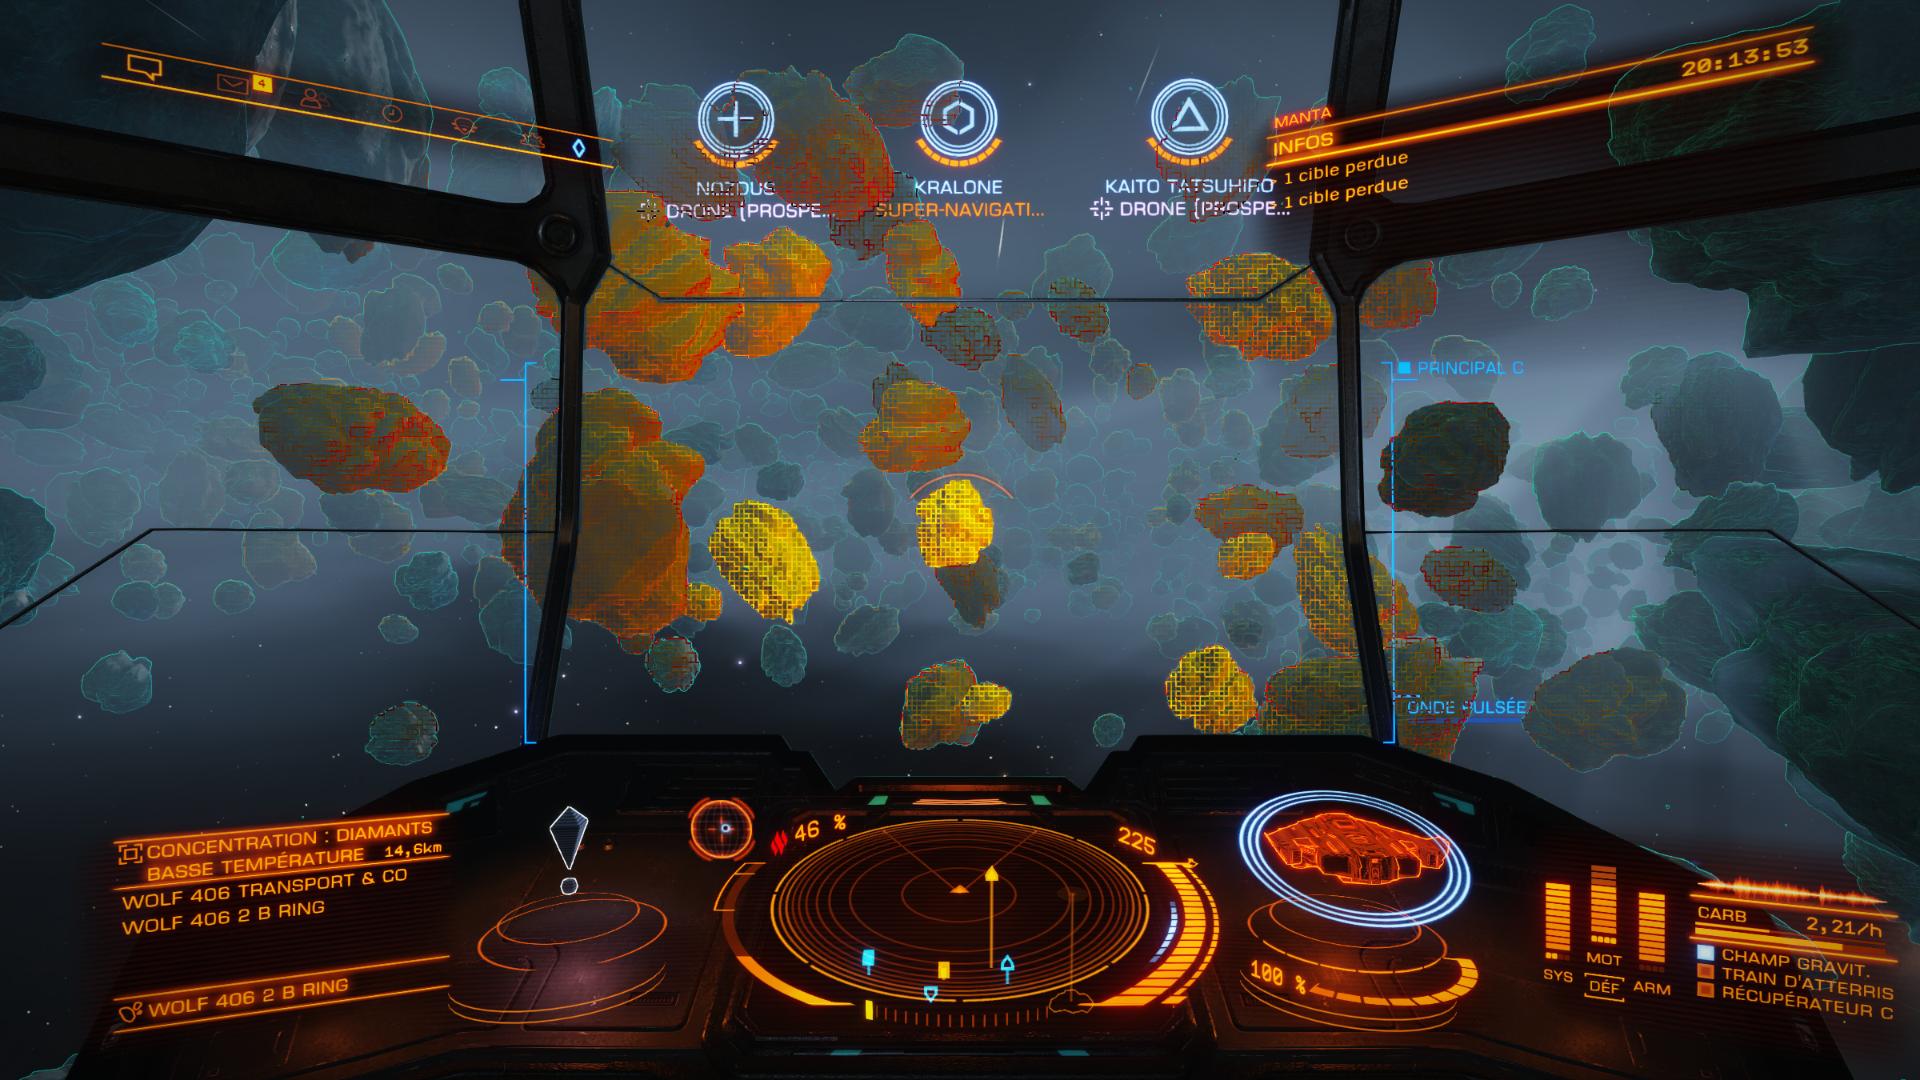
I – Where should I mine?
There are different places where mining is possible, however some are way more interesting than others. Such asteroid fields have already been found by the community, there are always more to find, but let’s learn first how to find interesting areas by yourself, shall we? Minerals and Metals are the two main items your are looking for if you want to ear credits. Chemicals Products aren’t that interesting (mainly in Icy fields)
First, open your galactic map and check out the systems nearby. Note that the more you are in the center of the Human bubble where the traffic is huge, the less great areas you will find as these are heavily exploited.
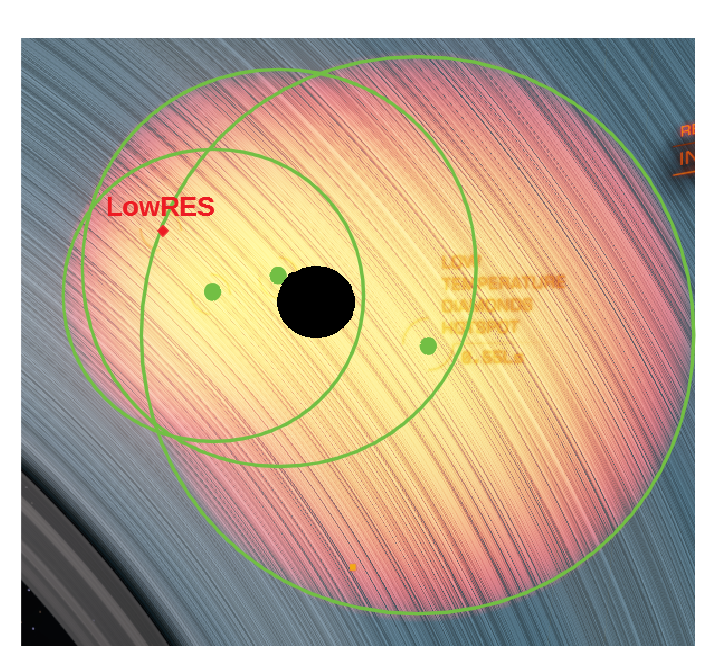
Use your Discovery Scanners to analyze the systems and gather details. This will help you in finding the right spot for your mining session.
Don’t forget to bring a Detailed Surface Scanner to toss probes at the asteroids rings. It will display the best spots in the asteroids rings.
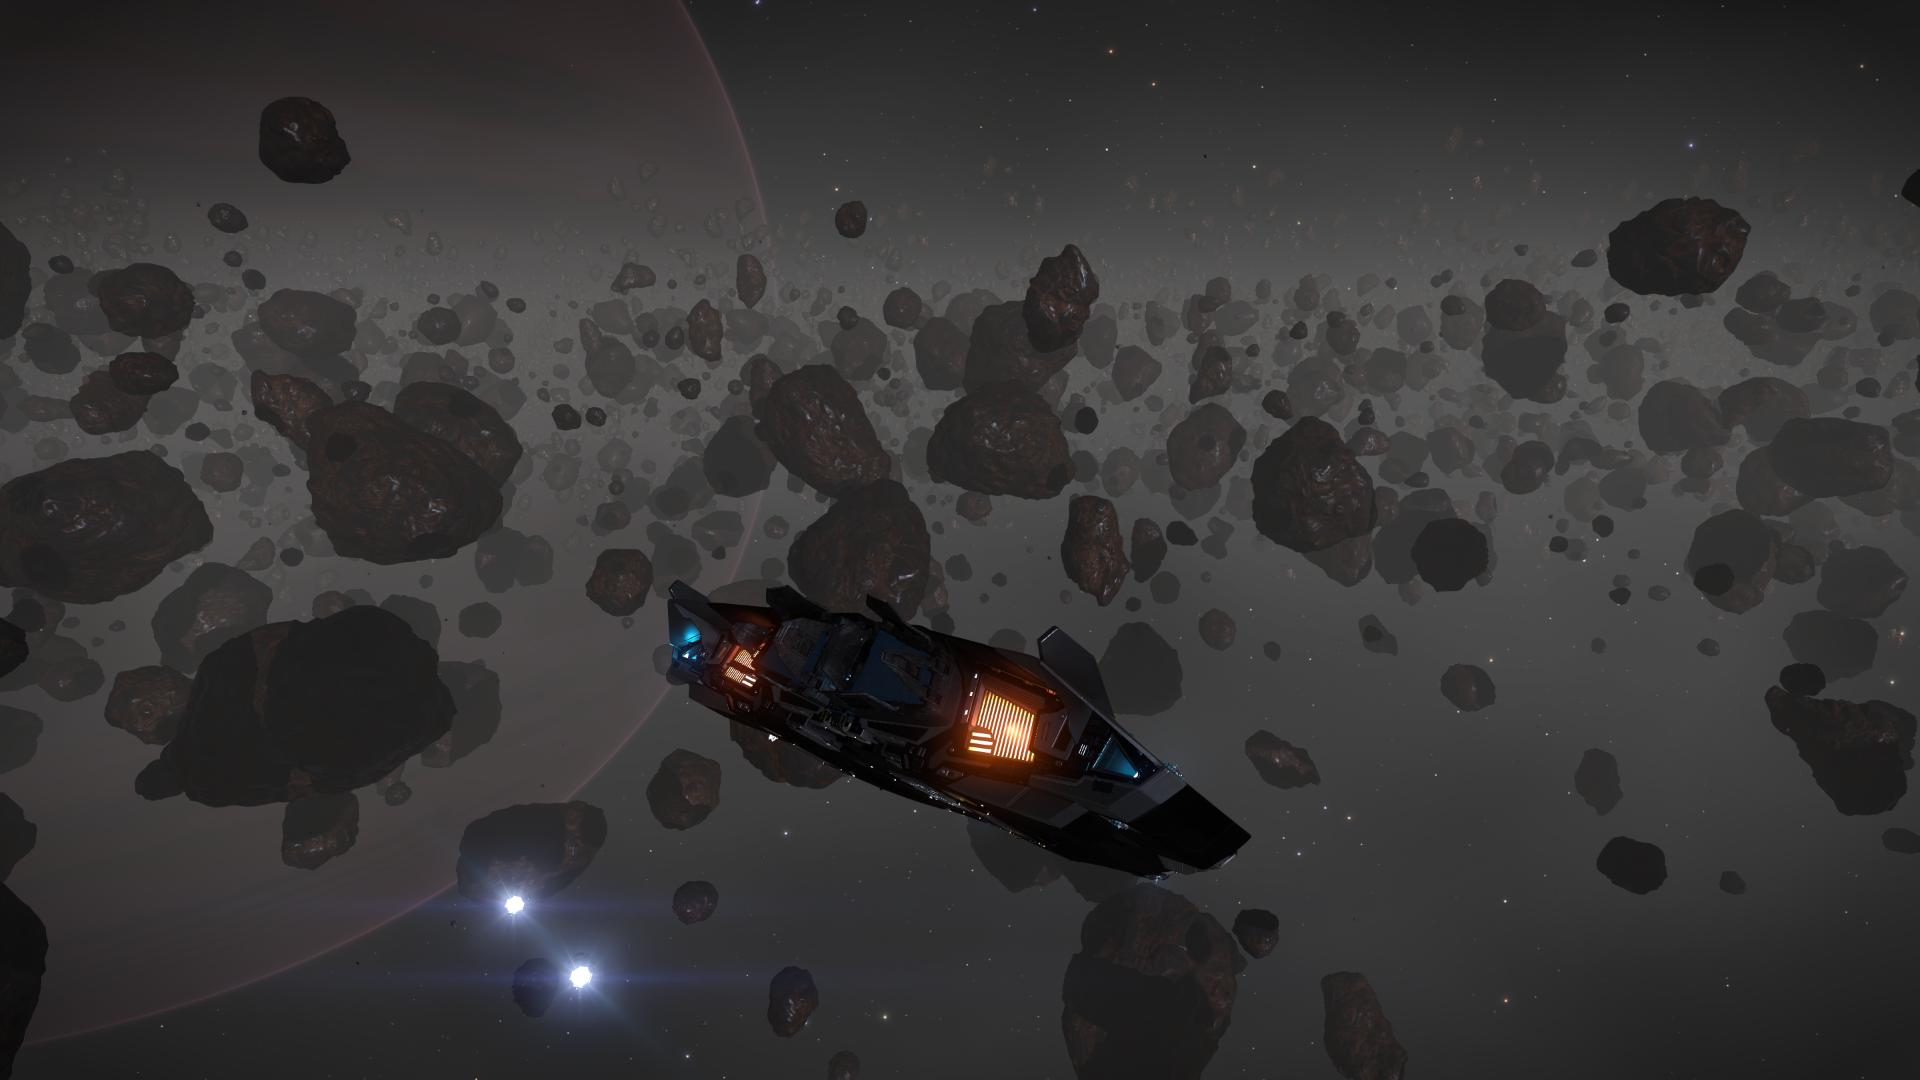
◘ There are two areas full of asteroids:
- [X] Asteroids belts, they can appear between bodies or close to the star – Not interesting, forget about them.
- [✓] Planets’ rings, orbiting around high gravity bodies – You need to aim for these.
◘ In these two mining areas, there are different types of fields:
- [✓] Icy – Different materials and mineral can be found here if you’re skilled and lucky: Low Temperatures Diamonds, Bromellite, …
- [X] Rocky – Mainly low values metals and minerals: Indite, Rutile, Bauxite, …
- [✓] Metal Rich – Interesting values from metals and minerals here: Bertrandite, Silver, Samarium, …
- [✓✓] Metallic – That’s what I’m talking about, METAL: Gold, Platinium, Painite, …
◘ Finally, these areas have quality and sizes:
- [XX] Depleted – Nope!
- [X] Low Reserves – Hmmm, still nope!
- [✓] Common Reserves – Sure can do better.
- [✓] Major Reserves – Ok, let’s bookmark it you can mine there.
- [✓✓] Pristine Reserves – Very rare, if you found an Icy or Metallic one: Congrats, keep it and make profit out of it!
Keep in mind that the more time you pass looking for an interesting field, the less time you will loose wandering in space.
Now here are several interesting systems known for their huge and excellent Icy, Metal Rich and Metallic asteroids fields.
A station within reach is often welcome in order to sell quickly your items, but generally these buy your good at lower prices. It all depends on your play-style.
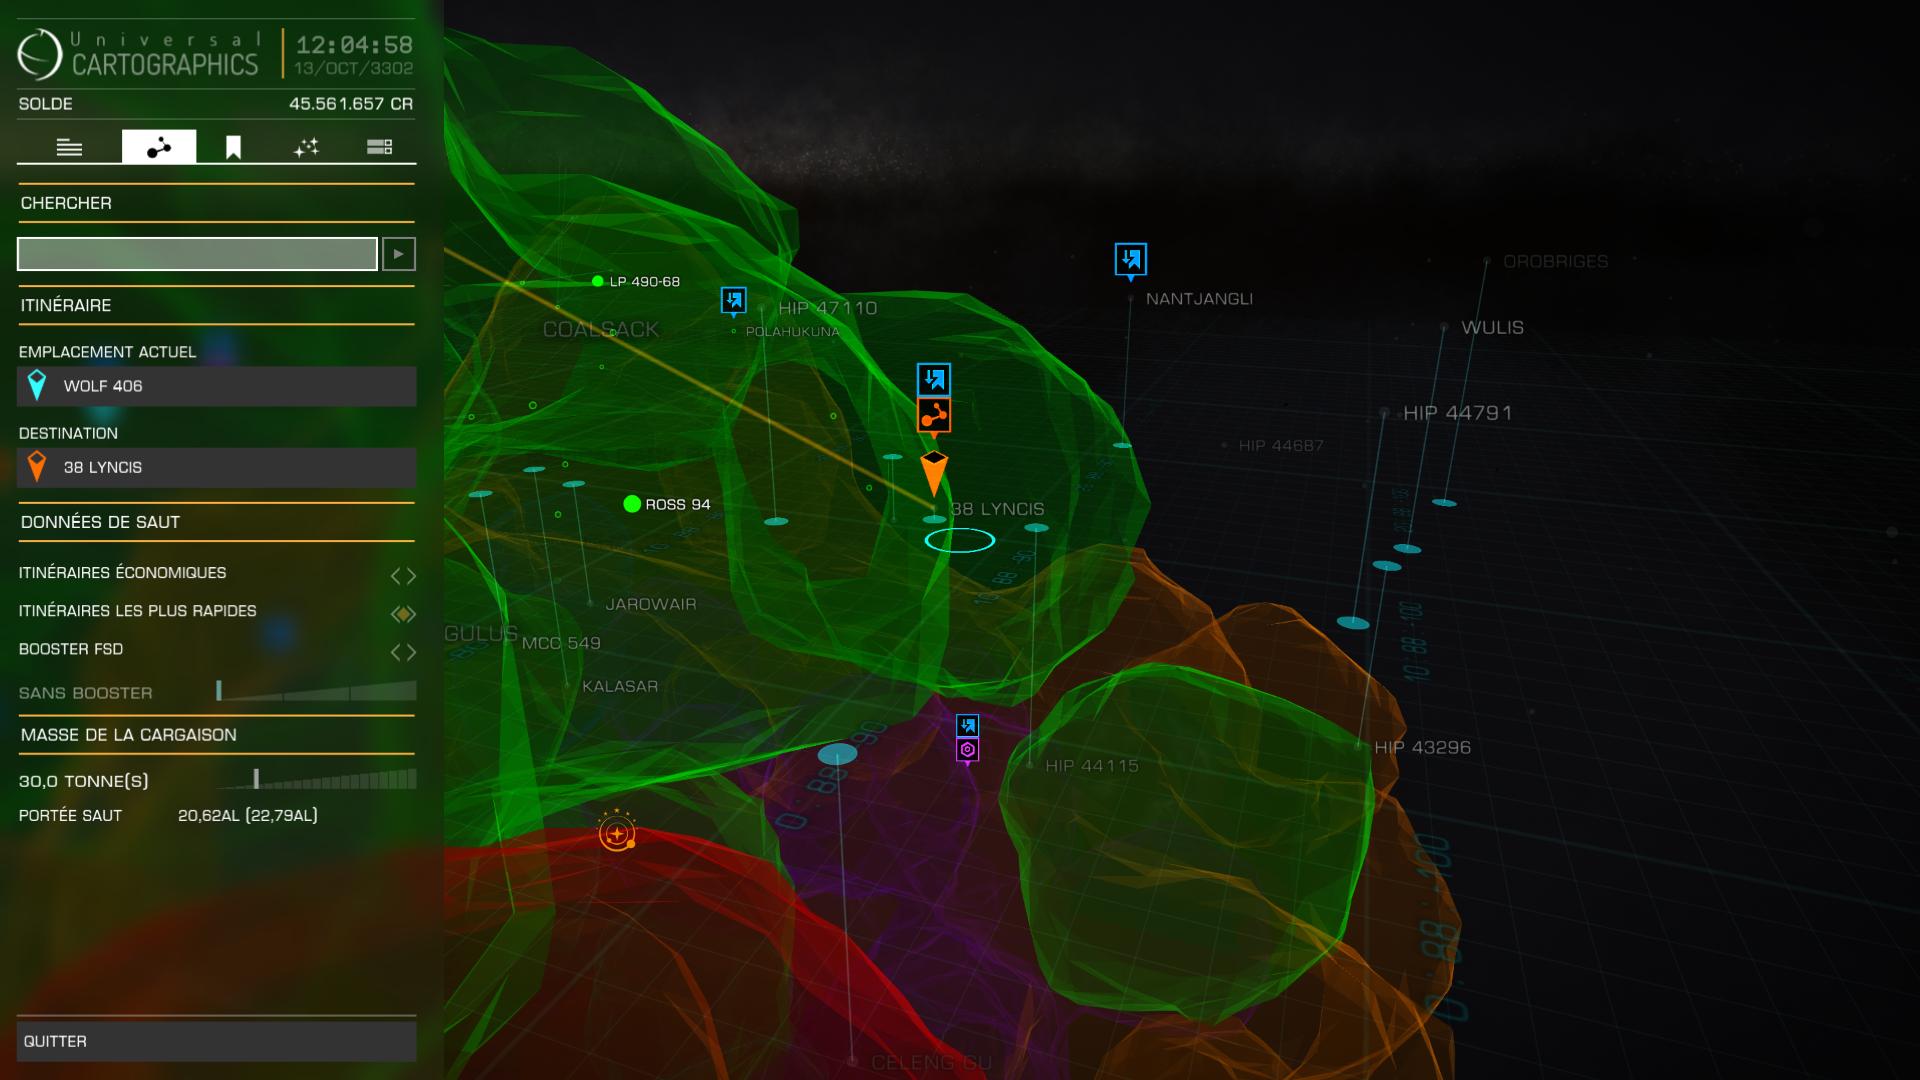
-
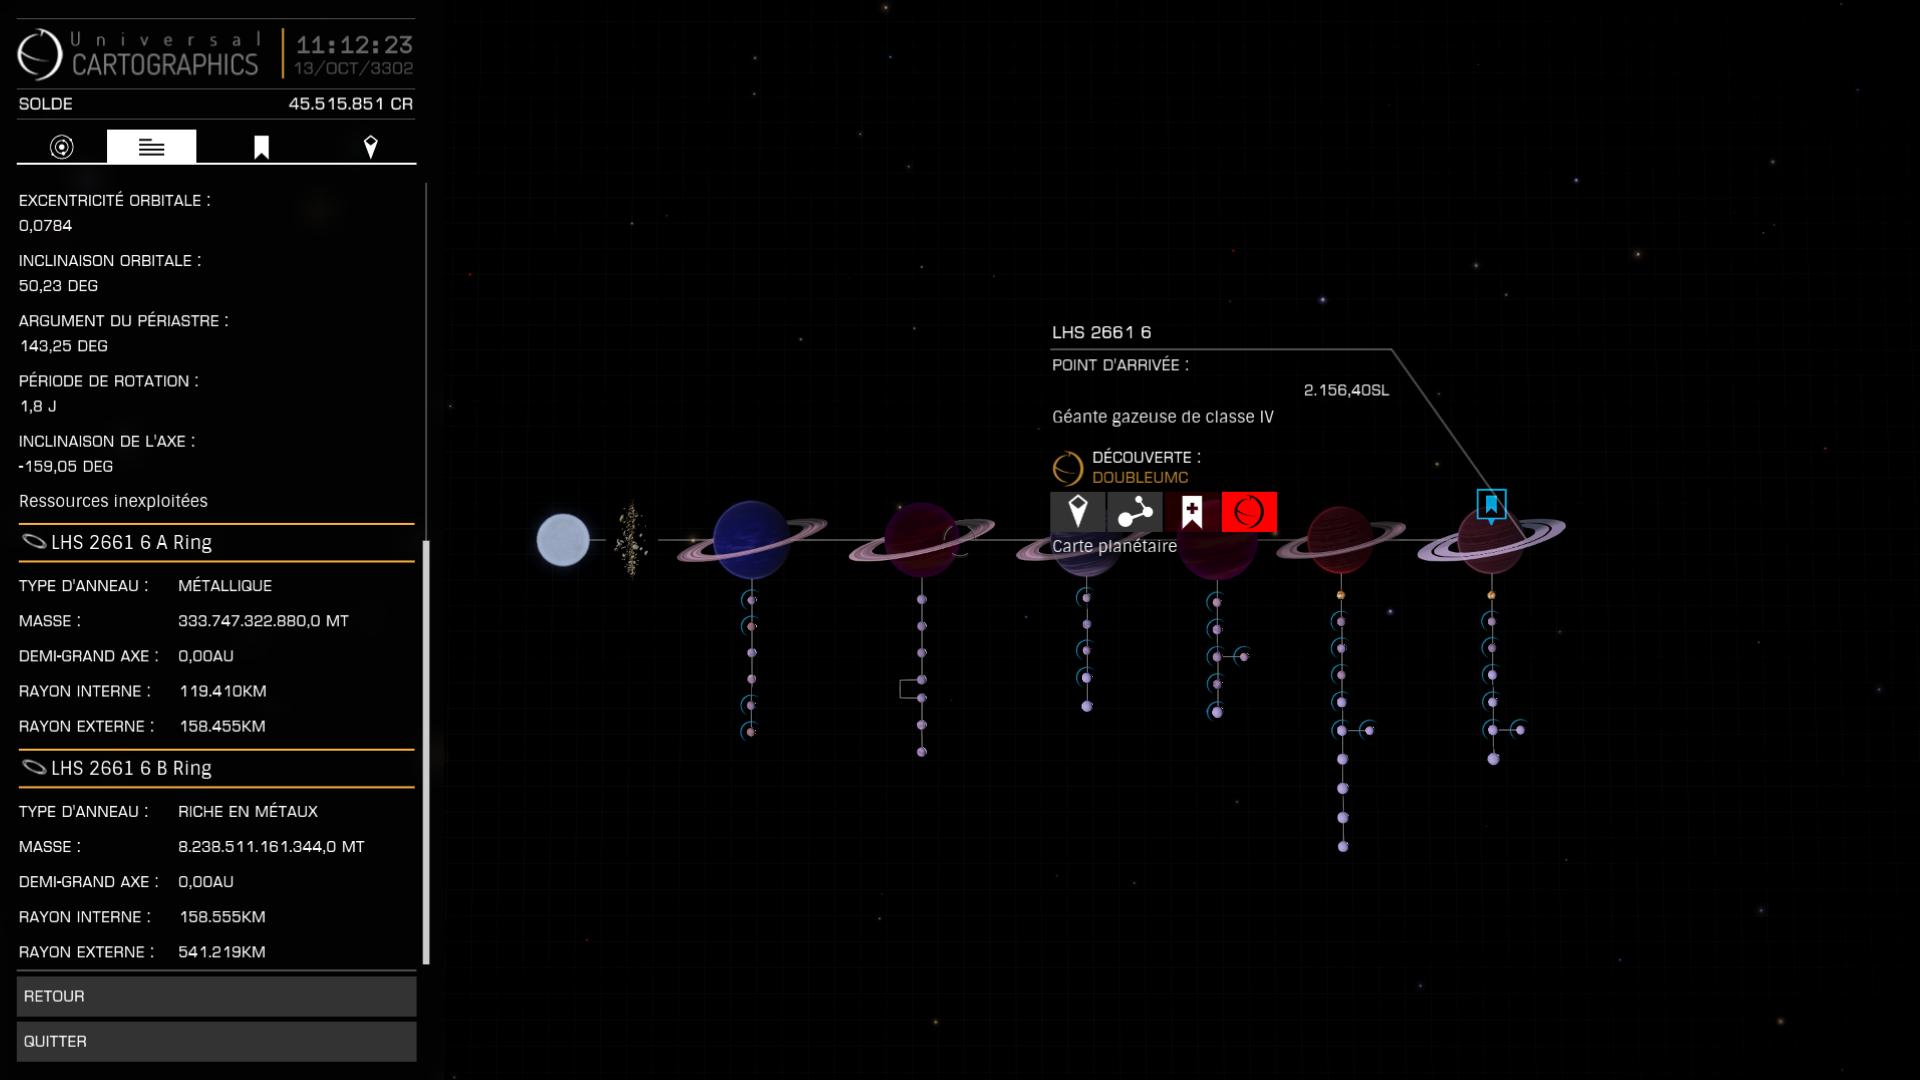
- LHS 2661 – 6
-
- Wolf 406 – 4

-
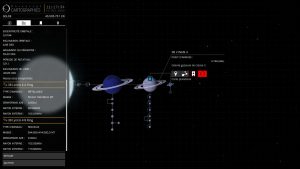
- 38 Lyncis – 4

-
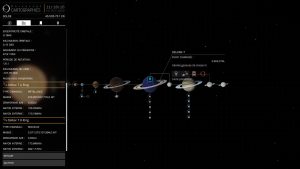
- Delkar – 7
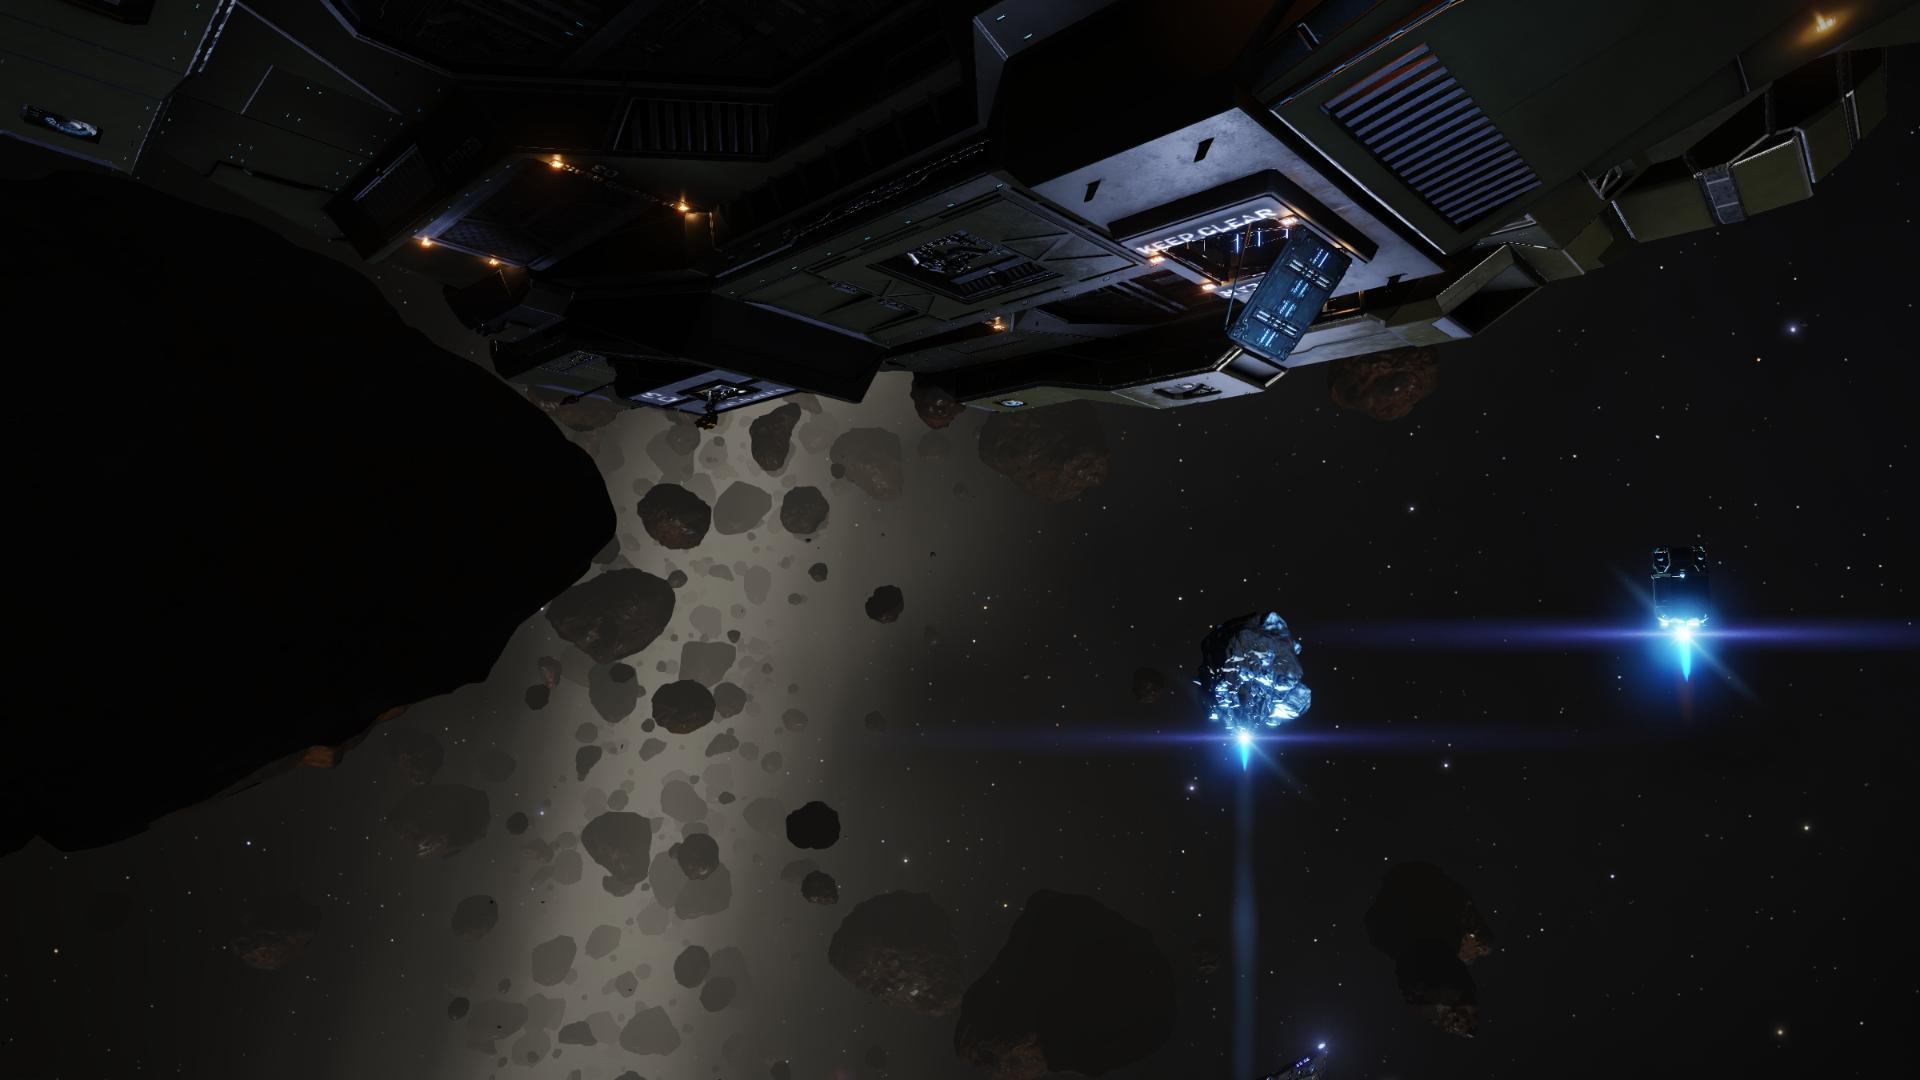
Here is how to approach these rings:
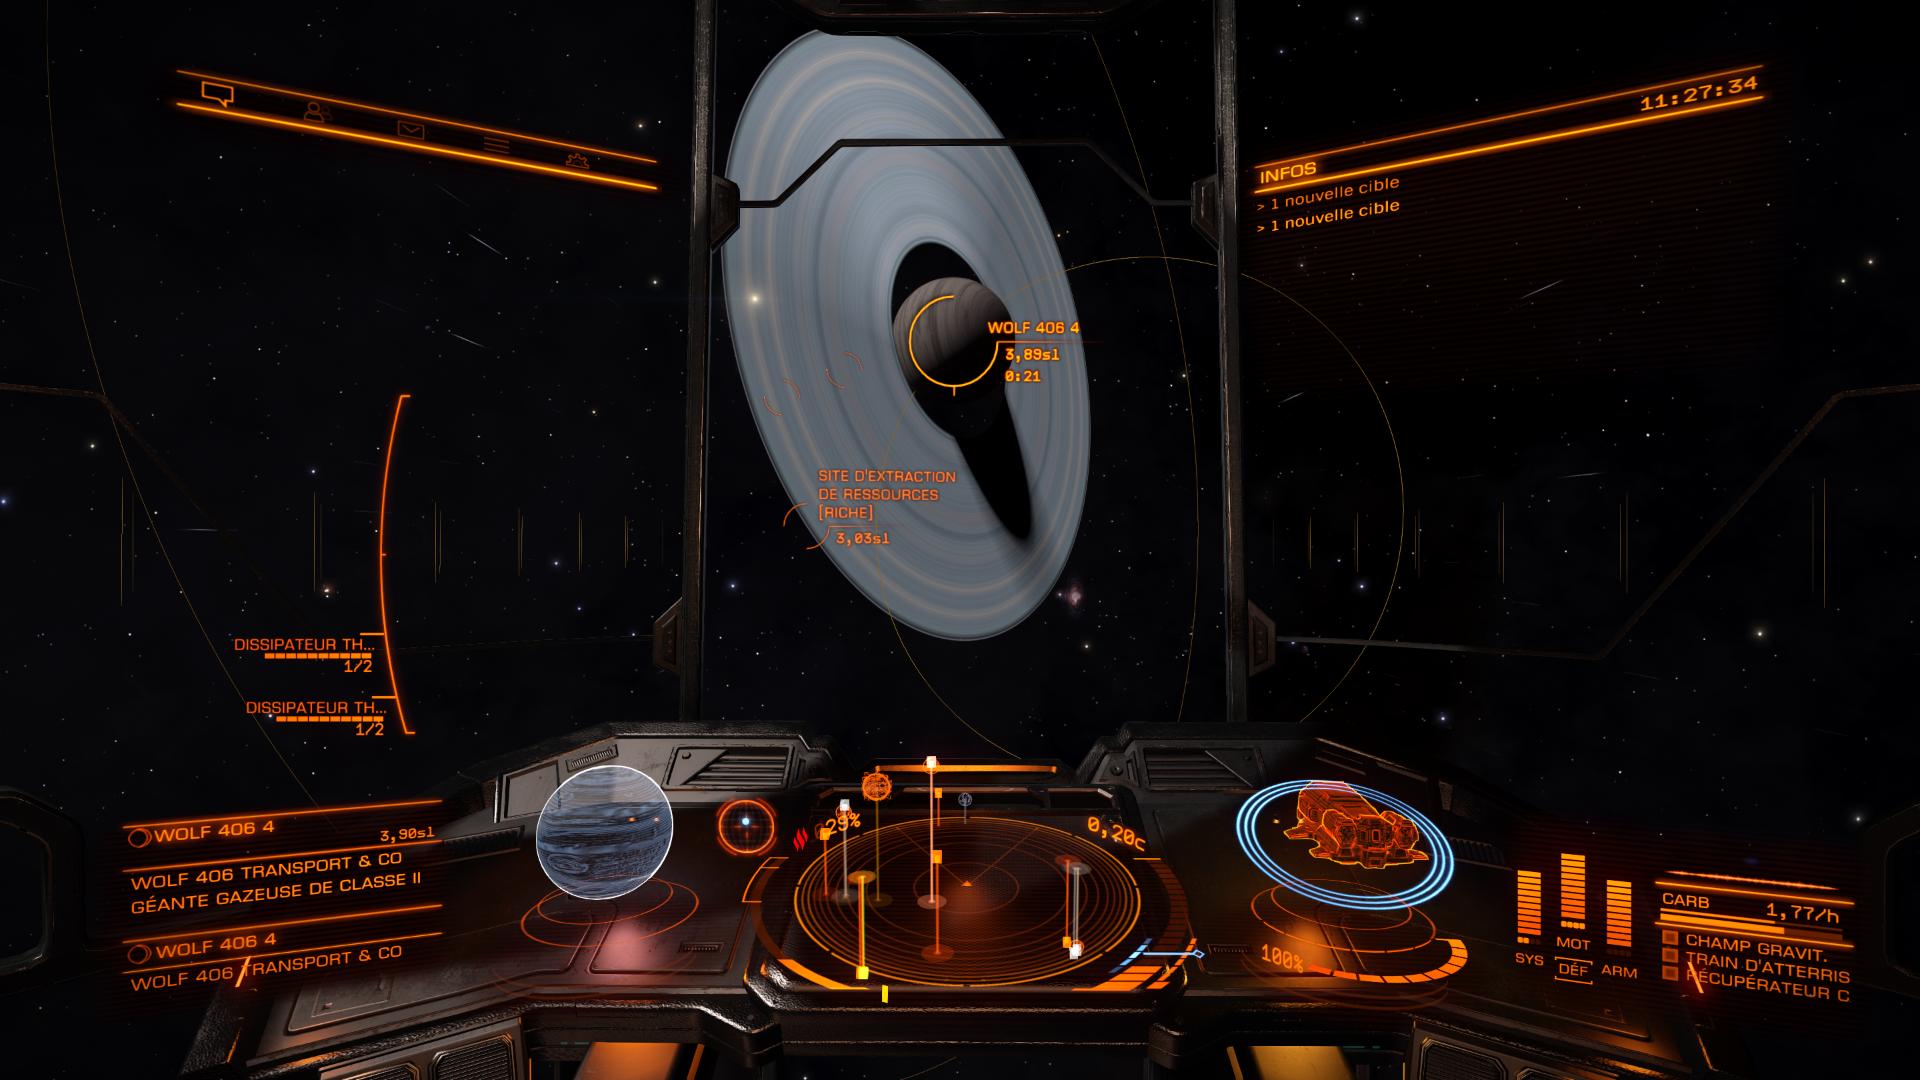
- Avoid the Resource Extraction Site, they have a lot of pirates and are heavily exploited;
- Approach the ring at full speed and then reduce to 75% speed when you are at 6s from objective;
- Keep on approaching the aimed area and lower your speed to 25%;
- Reduce your speed to 10%, then 0% while your are slowly diving into your final approach;
- Raise your sensors, so you can detect things from afar (asteroids and other ships);
- While you approach the first asteroids, lower your sensors to 50% and put your lights on if needed;
- Hey-oh, let’s go!
II – Mining efficiently
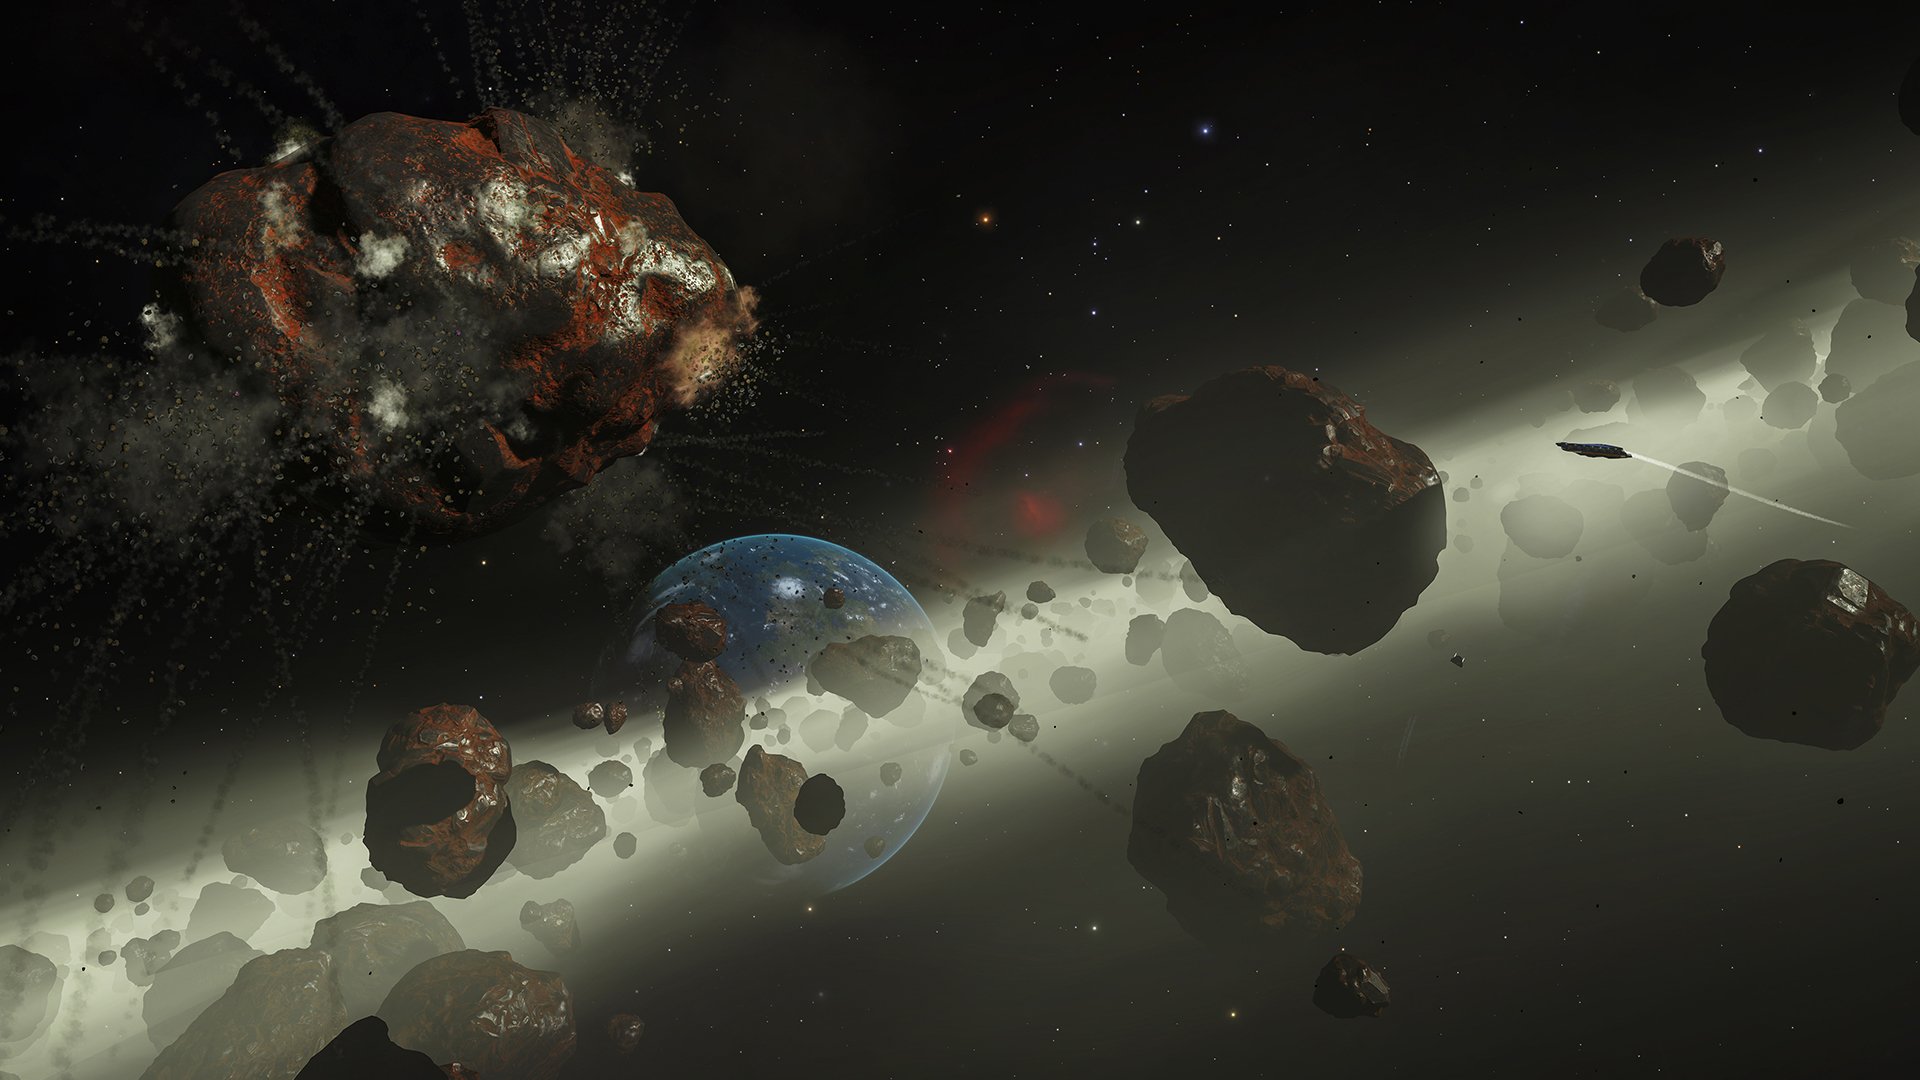
Awww, credits everywhere! Asteroids. I mean, asteroids. Their textures mush be metallic-ish and smooth or white and icy.

Again, don’t forget that Prospector drones will double the quantity of Metal/Minerals that you can mine out of asteroids.
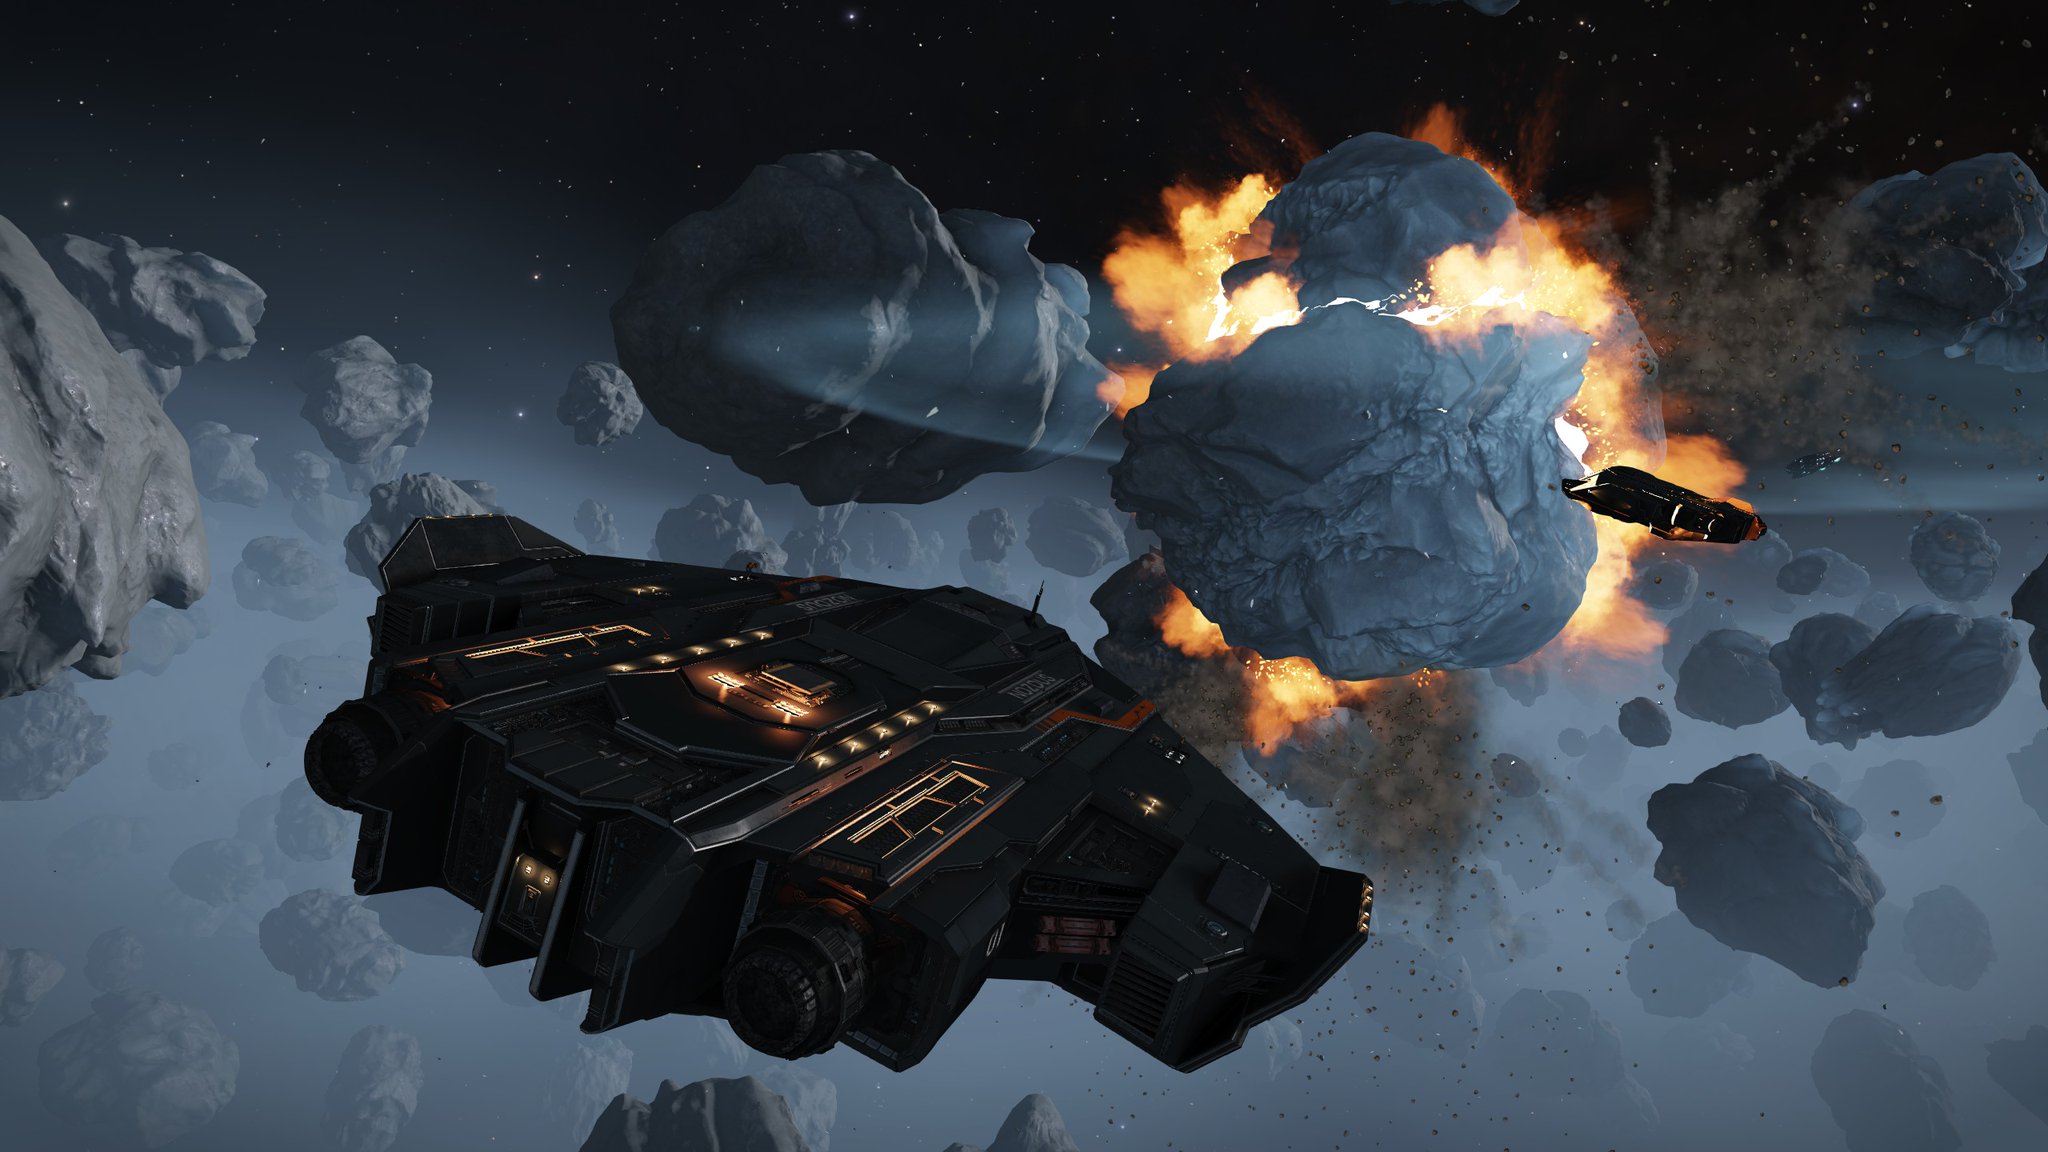
Mining Processes:
- Approach the chosen mining site. Reduce your supercruise speed to 75% to get there smoothly.
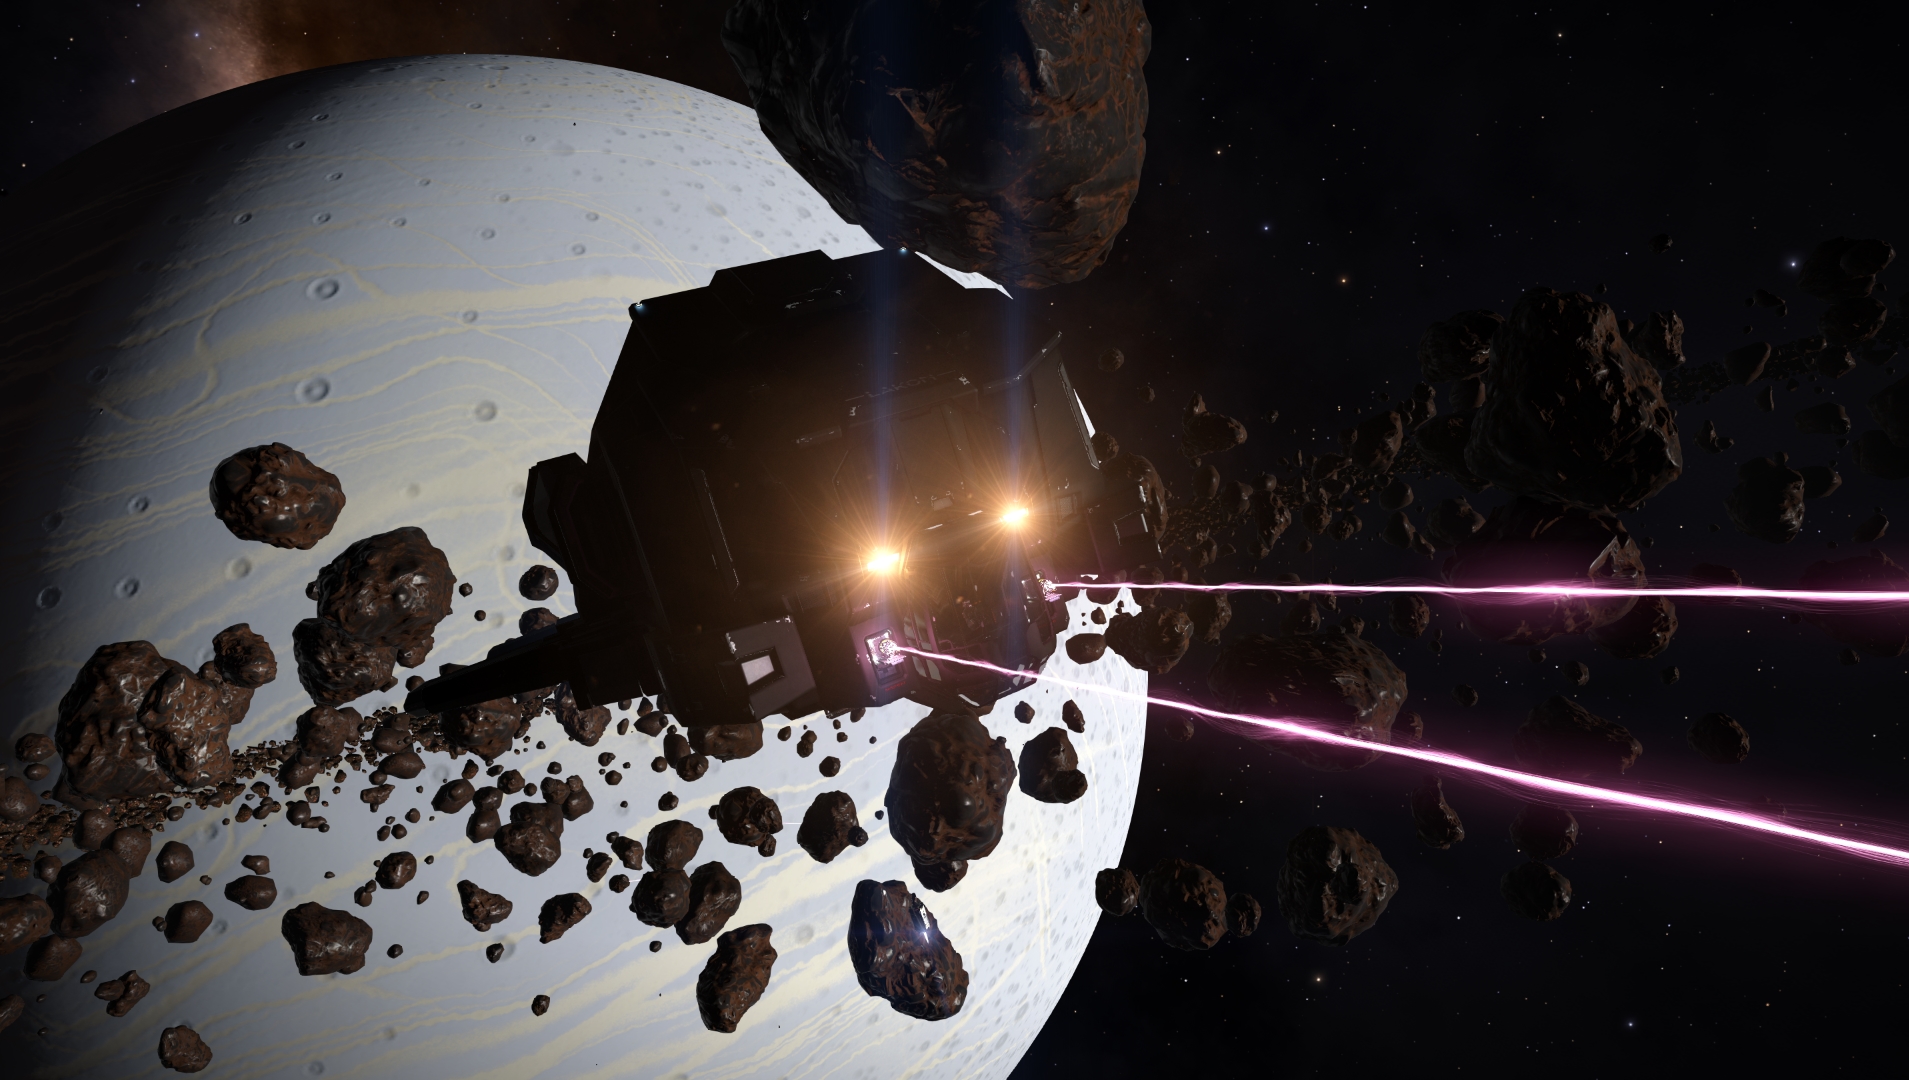
- Start your Pulsed Wave Analyzer to choose your asteroids. The rock must be vivid yellow for the highest value. The more a rock is red-orange, the less interesting it is.
- Approach and launch a prospecting drone. You will get an overview of the items to recover through which tools
- Remember to launch your collector drones if you have them, and open your cargo hatch.
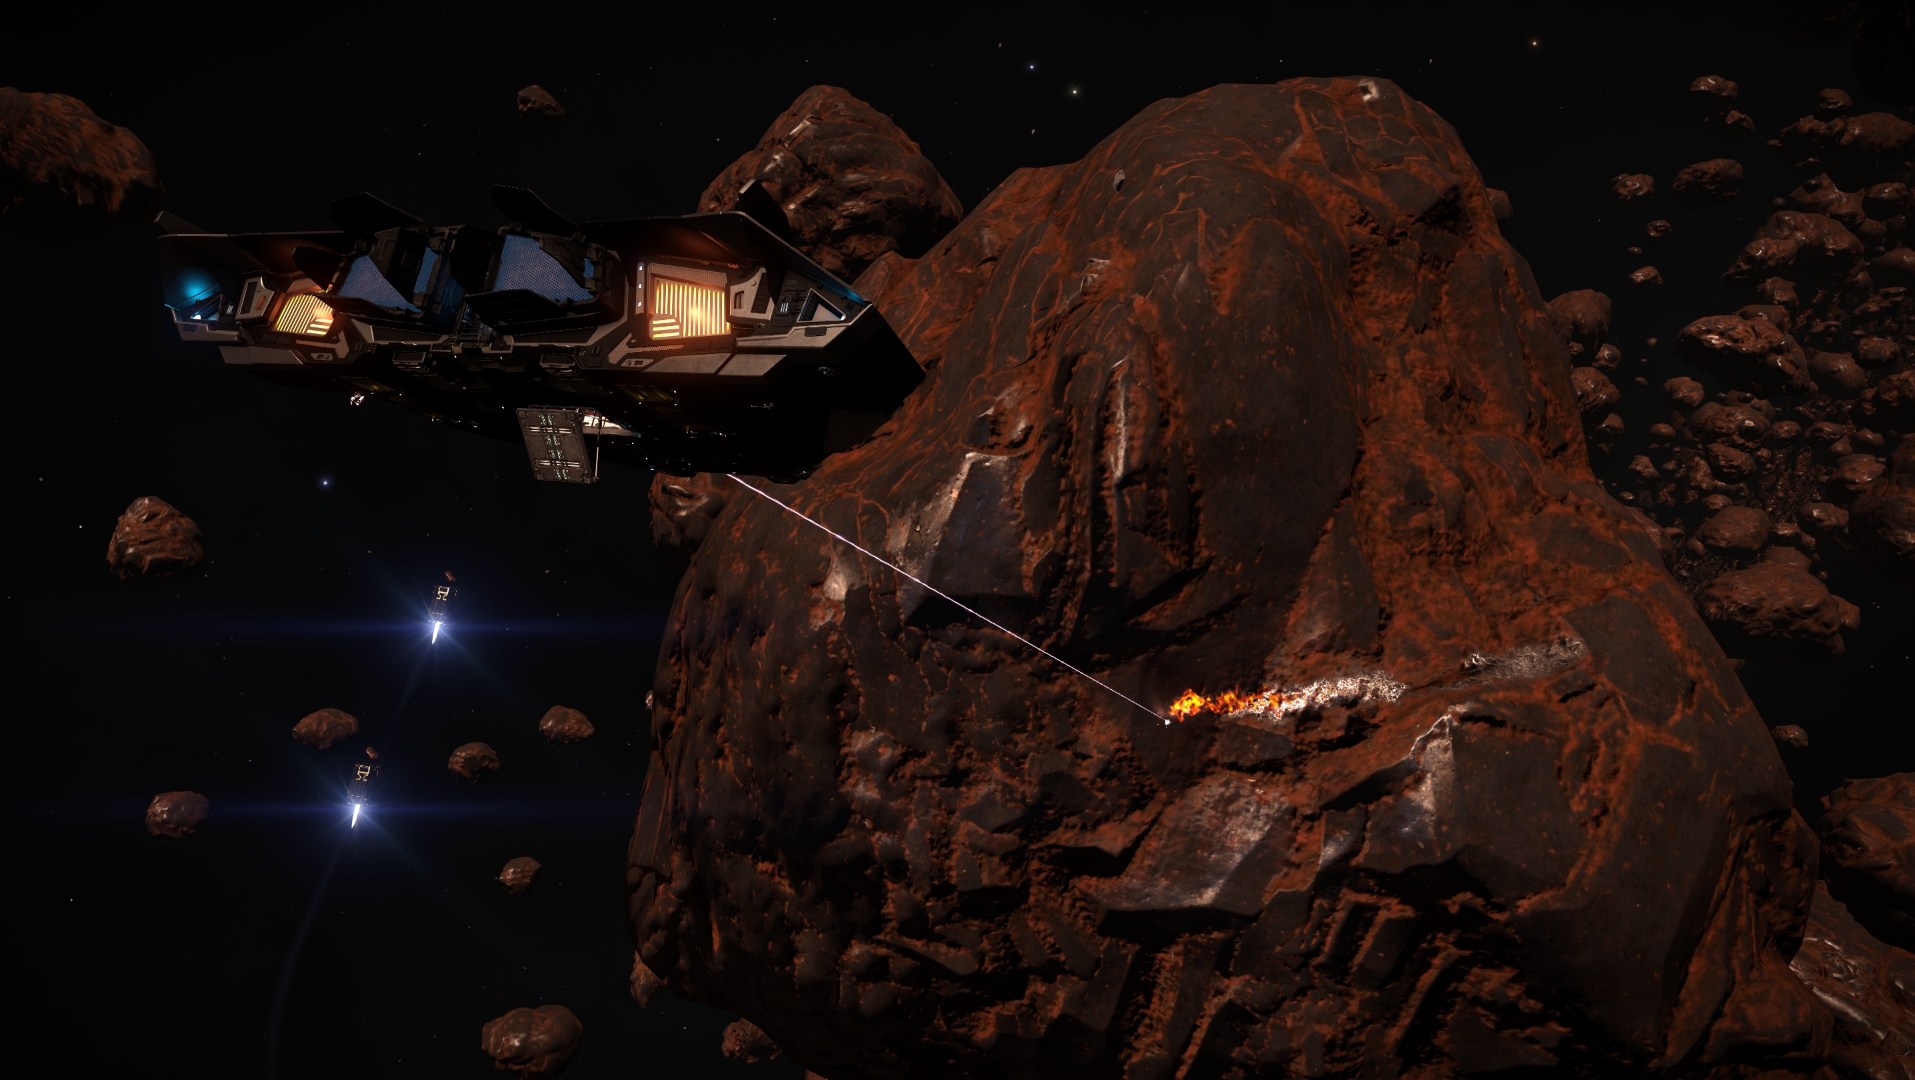
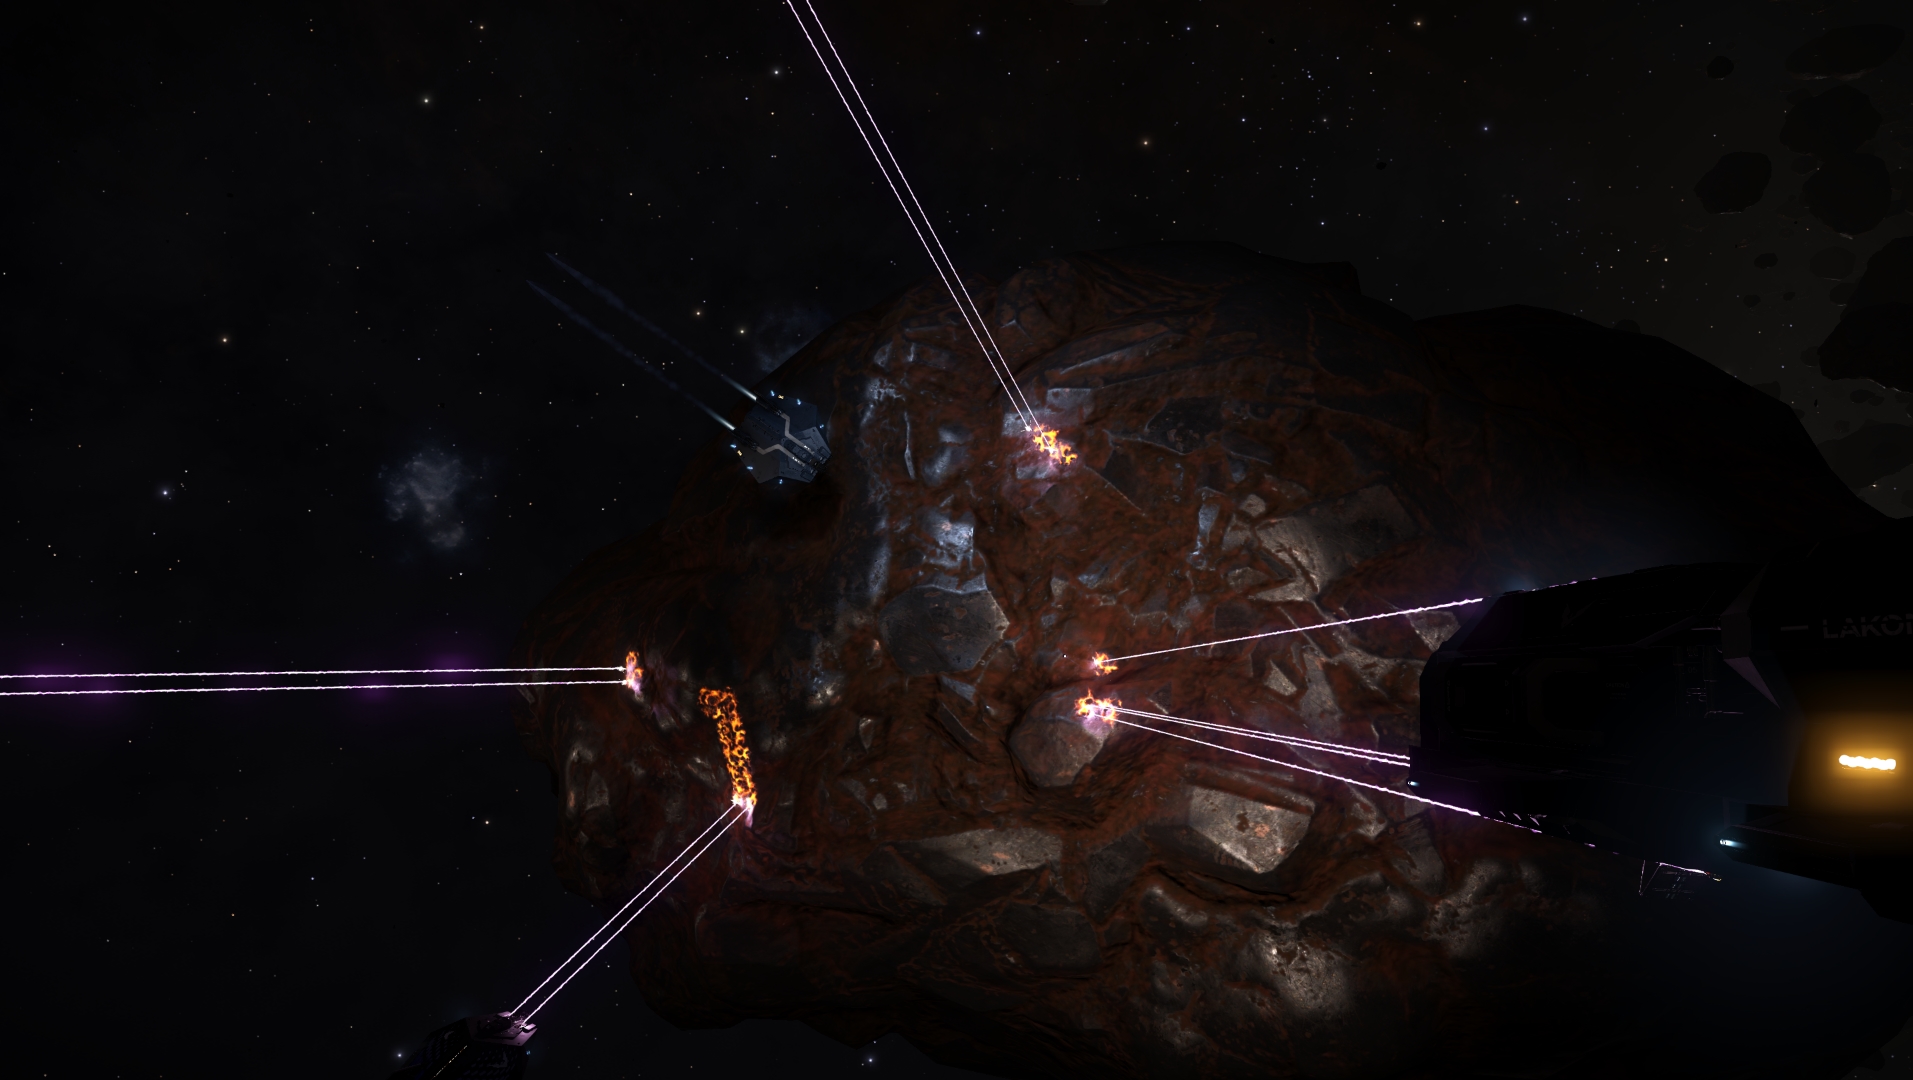
- Approach the asteroid a bit more, and use your Mining Laser to empty the asteroid. At the same time, if you can, use your tools to extract the Metal/Minerals hung on the surface or hidden just below the surface of the asteroid; Respectively thanks to Abrasion Blaster and the Sub-surface Displacement Missile
- If the prospecting drone has indicated Metal/Minerals hidden in the asteroid’s core, it’s time to launch Seismic charges with the right charge level. Note that fissures have different strength.
- The lower this strength, the less the tool will need to be charged.
- The asteroid explodes after your Seismic charges process, and many chunks of items can then be gathered. Other chunks hung inside the cracked asteroid, for you to mine.
- Repeat on another asteroid

When a Collector drone brings a fragment of ore in your ship, it will be added to the bins in your Refinery.
The better Refinery have more bins than the lower classes. A bin must have or exceed 100% to create 1 unit of this ore. The latter will then be added to your cargo.
If you don’t have an interest in an Metal/Minerals in your bins, feel free to vent it. This will free the spot.
Fill your cargo until you cannot hold more, and then head to the station where you will sell your findings.
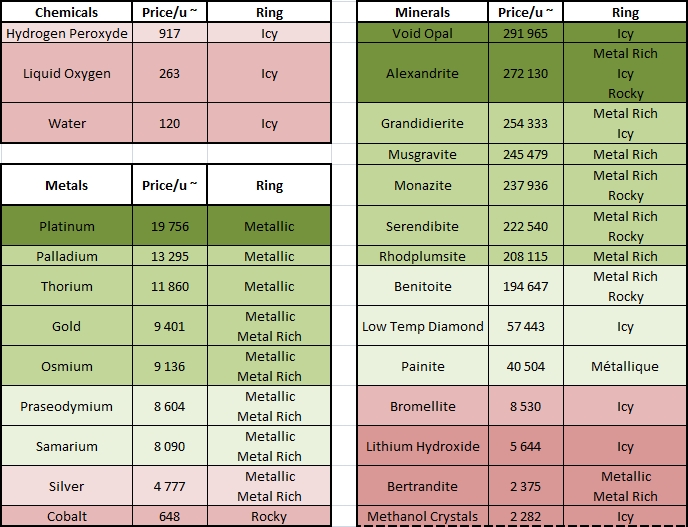
Here is a board, representing values of the Minerals and Metals:
►►► Note that the Minerals are actually META and sell around 1M500k unit!
III – Where should I sell my ores?
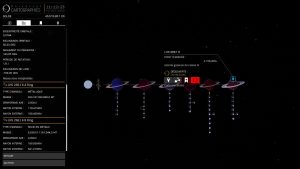
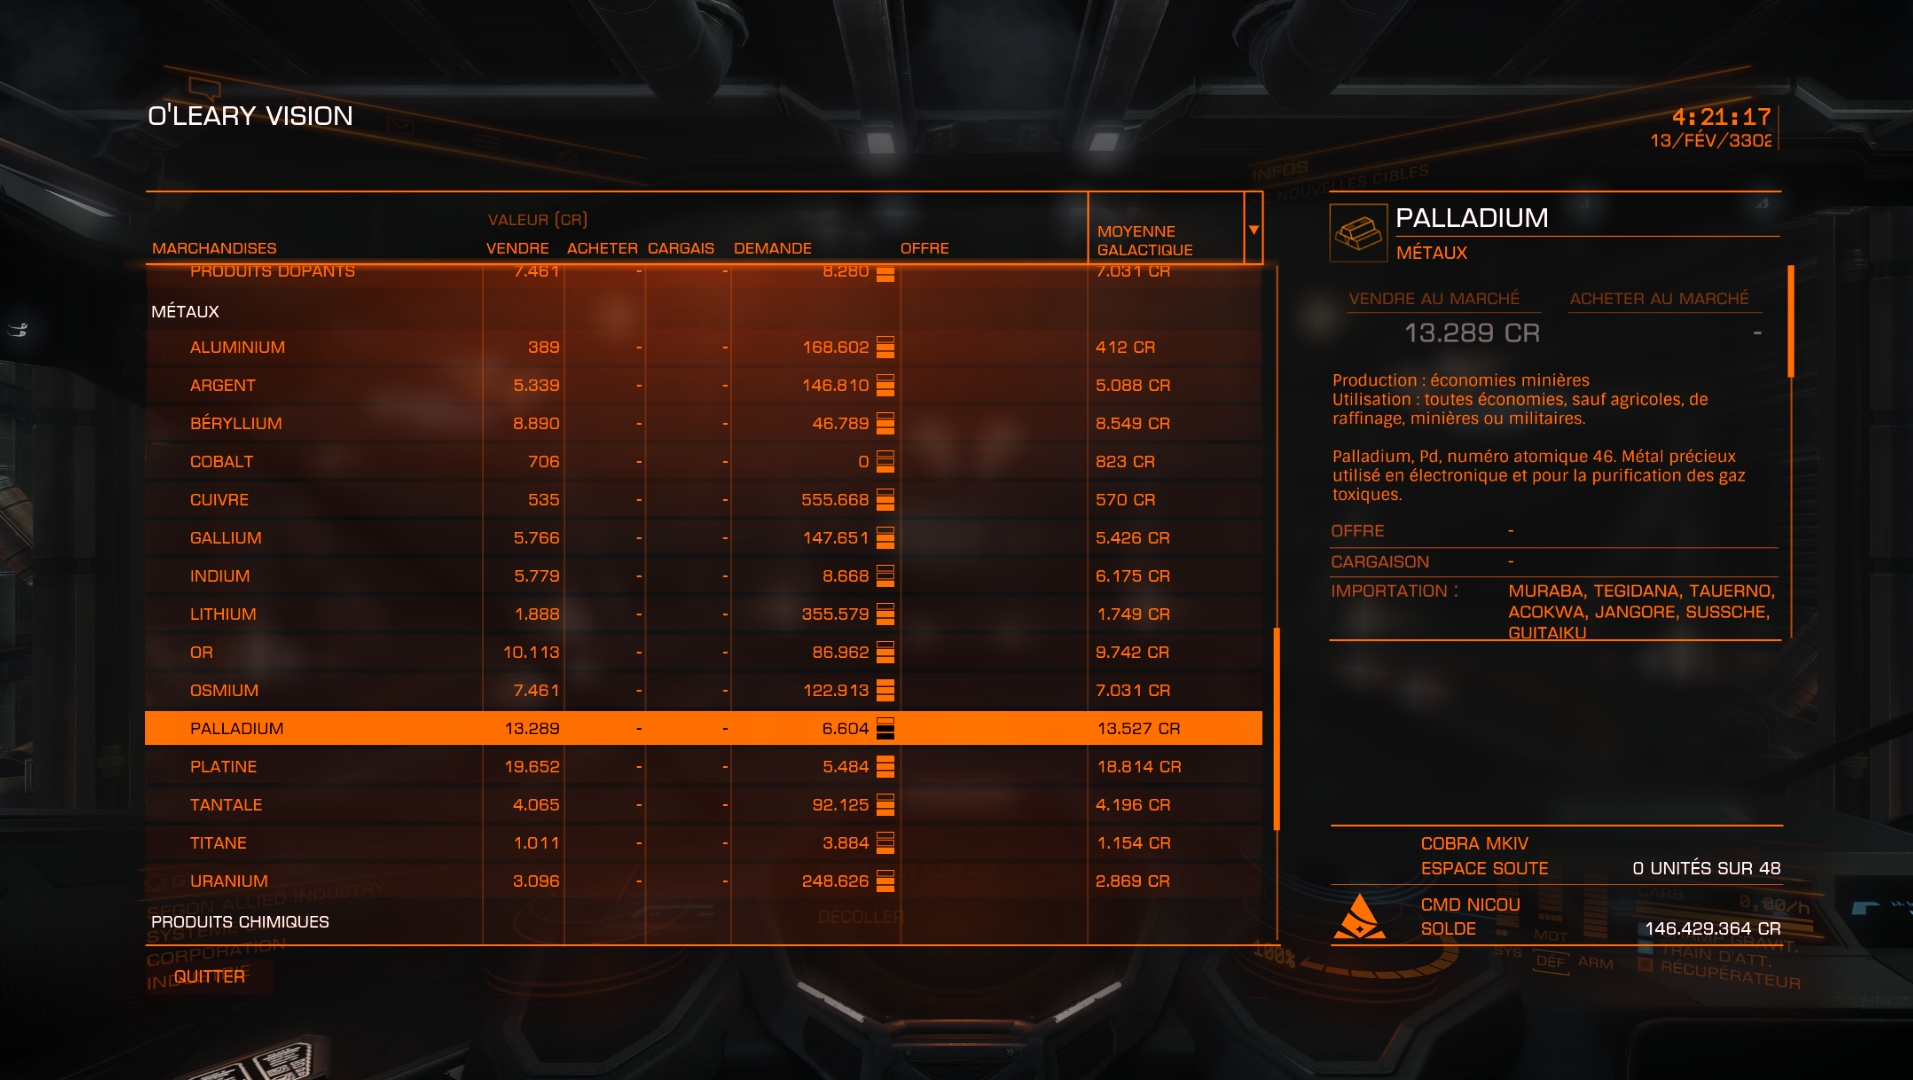
Once you’re ready to sell the fruits of your labor, have a look at your Cargo. Here you should have Metals and/or Minerals: these two Metal/Minerals are best sold in different stations in order to make the most profit. However, in order to gain time, we would like to sell them in the same place. Let’s check for systems’ economies.
Open your map as specified with the image below and highlight “Extraction”, “Industrial”, “Refinery” and “High-Tech”.
Learn more about the Galaxy Map and the Trading feature within in, thanks to our Trading Guide.
► You can also use EDDB to quickly know where are the best demands and where you can make the most profit.
► EDDTools/Miner is also interesting

Then sell everything in the stations depending on their economies. Check the Trader’s Bible from CMDR Prometheus Darko. Osmium and Painite are well sold in the Industrial stations.
Tadam, here are your credits! Maybe not the best profit you can do in Elite: Dangerous but it’s pretty fun and you still can earn a lot.

Tips and tricks
1) Before going on an adventure, check the Missions Board! You could find some interesting missions, bring even more credits into your account.
2) Even if your Cargo is full, let’s fill the Refinery as well! Once your Cargo is all sold in a station, refine these items and sell the freshly made units of ores.
3) An asteroid spins on itself, be careful about your moves and its moves! It is very important to put your lights on, or to mine in a sunny area. Avoid the dark areas “behind” the planetsI.
4) The limpets/drones are sold in the Advanced Maintenance panel of stations, if they provide this type of service. They actually take space in your cargo. Let’s fill 90% of your cargo if you are a Focused Miner, or 50% if you are a Mass Miner.
5) Don’t go too far from your drones, they have a range max between you and them. Beyond this max range, they will no longer find you and cry, alone, in space… why have you forgotten them?! :'(
6) Some great Mining spots:
- Wolf 406 4 (Icy)
- 38 Lyncis 4 (Metallic)
- LHS 2661 6 (Metallic)
- Delkar 7 (Metallic)
- Polahukuna (Metallic)
- You can also dock your exploration ship at Gurabru, Kratman station, then bring in your mining ship + large hauler with a better jump range. Then take your mining ship and jump to Hyades Sector DB-X d1-112 2 ring A. Once full, return to Gurabru and take your hauling ship to sell it haul.
- And the well known Borann A2 (Icy) and its three superposed Diamond hotspots
Any comments or error found? Feel free to share your thoughts with us!
Nykrae – Learned mining with this guide